Managing Users

The Users tab in settings lets you invite teammates to your Sofy account and control what each one can do. Only Admins can add users or change their roles.
Role | Intended For |
Admin | Managing users, integrations, projects and the subscription, as well as running tests |
Automation User | Creating and running prompts, schedules and skills |
Report Viewer | Viewing run results and reports only |
Add a user
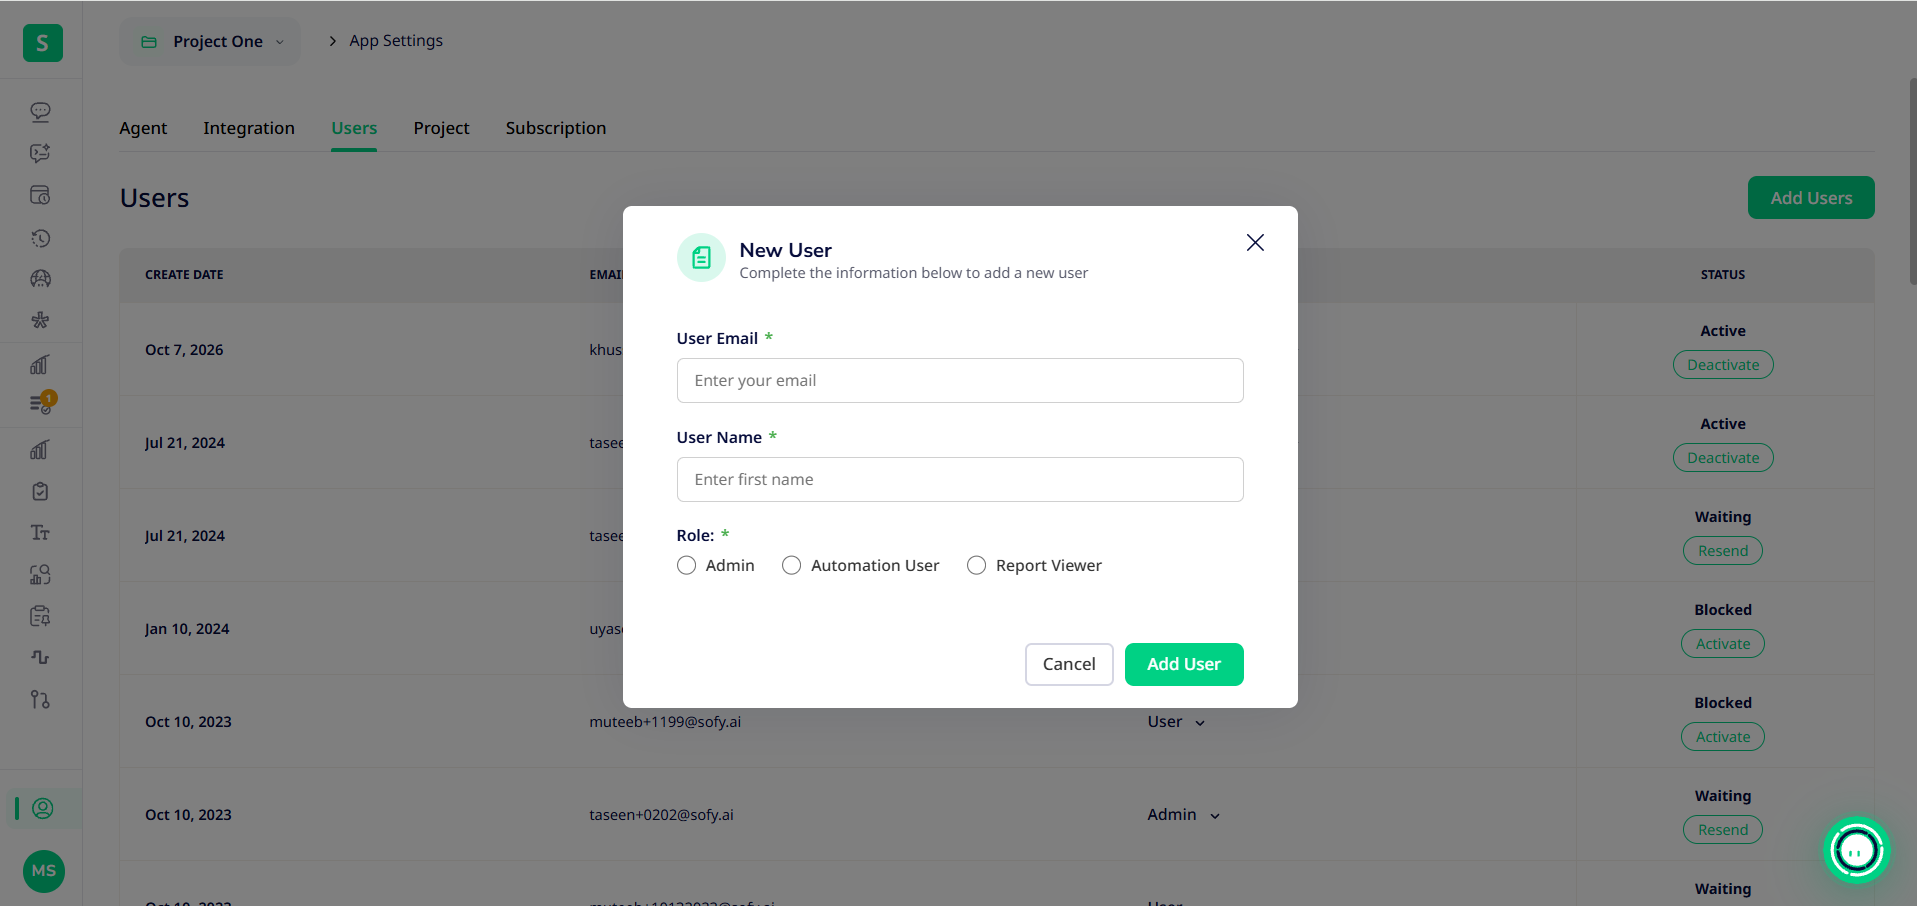
- Click Settings in the left menu, then select the Users tab.
- Click Add Users. The New User dialog opens.
- Enter the User Email and User Name, and choose a Role: Admin, Automation User or Report Viewer.
- Click Add User. The person gets an email invitation and appears in the list as Waiting until they accept.
Manage existing users
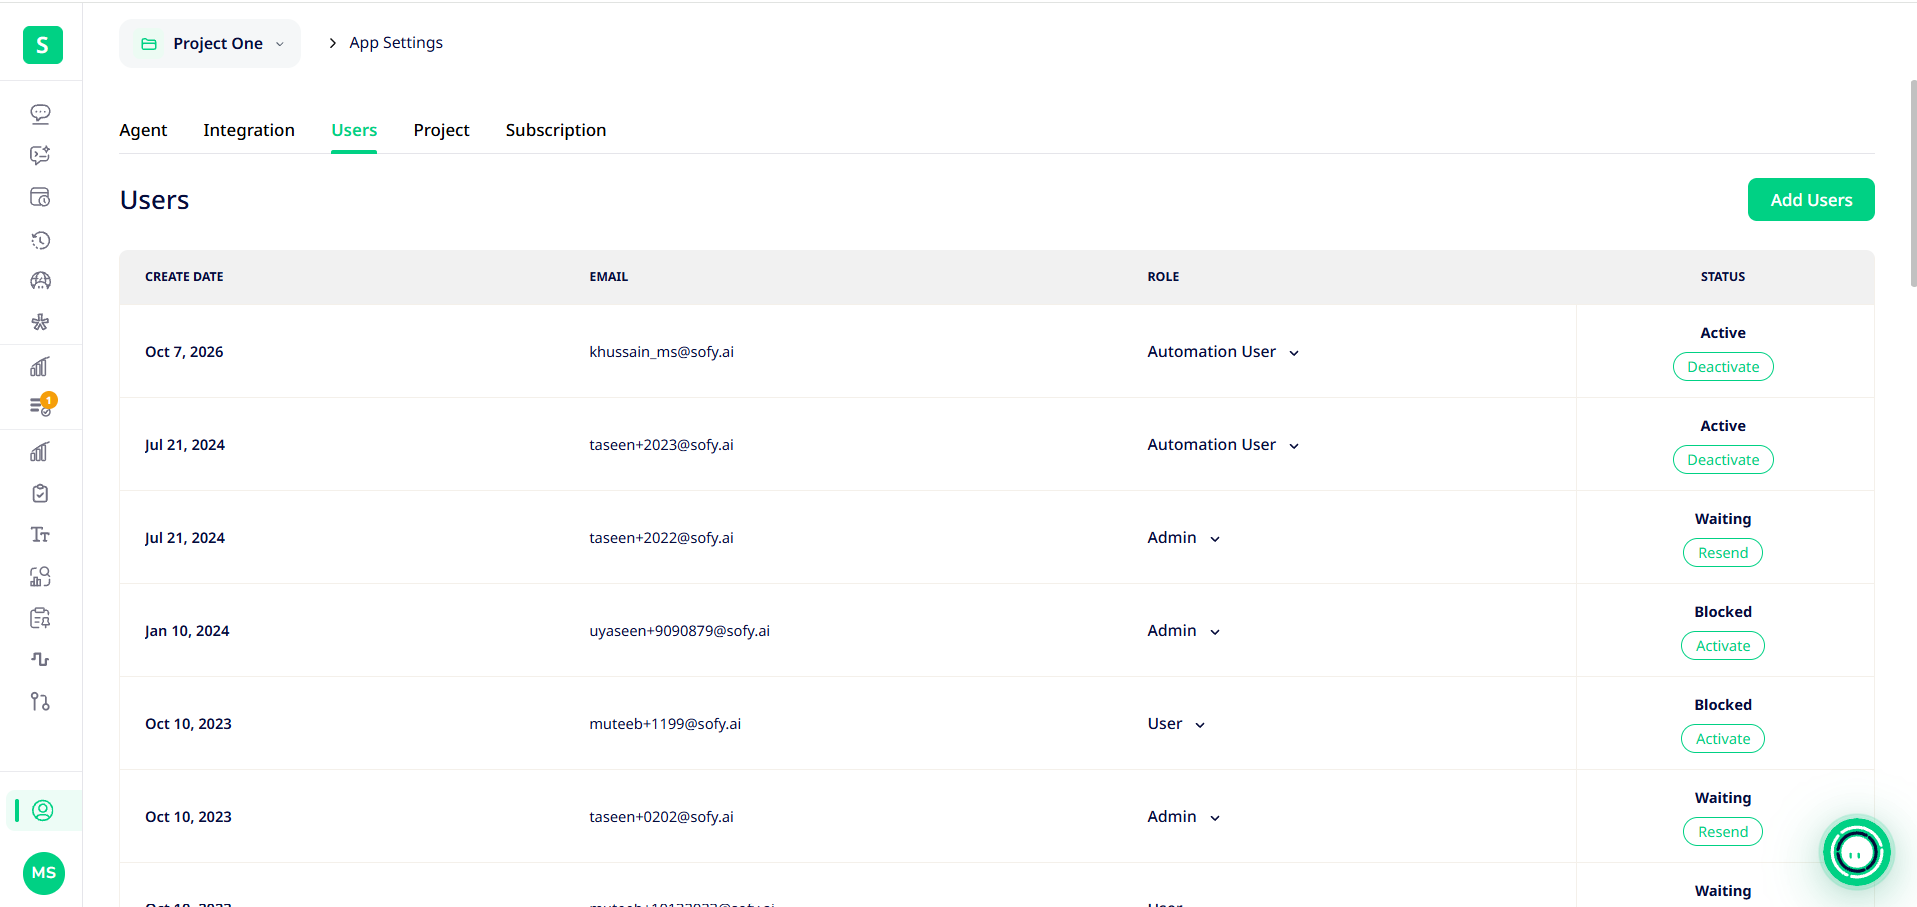
Each user's row has these actions:
Status | Meaning | Action Shown |
Active | The user has accepted and can sign in | Deactivate removes access but keeps their runs and prompts |
Waiting | Invited, hasn't accepted yet | Resend sends the invitation again |
Blocked | Deactivated by an Admin | Activate restores access |
To change someone's role, pick a new one from the Role dropdown in their row.
Self-hosted (Azure Managed Application) deployments
If Sofy runs in your own Azure subscription, user management works differently:
- The first person to sign up becomes an Admin. Everyone who signs up after that joins as a Member.
- All users share one workspace. Everyone sees the same "Default" project, prompts and results.
- Admins can add users, change roles between Admin and Member, deactivate and reactivate users, and reset passwords.
- There must always be at least one Admin. You can't demote or deactivate the last one.
- If your administrator has set up Microsoft Entra ID single sign-on, use Sign in with Microsoft. Members of the allowed group get an account automatically the first time they sign in.
- Change your own password from your profile.
