When you create an automated test, you can choose to insert those recorded steps into an existing test case instead of having to re-record the test or create a template. You can also include additional actions, modify the test flow, or incorporate validation steps.
This is helpful so you can add individual steps at any location within a test case, create more efficient test maintenance, and quickly adapt to changing app requirements.
Log in to your Sofy account.
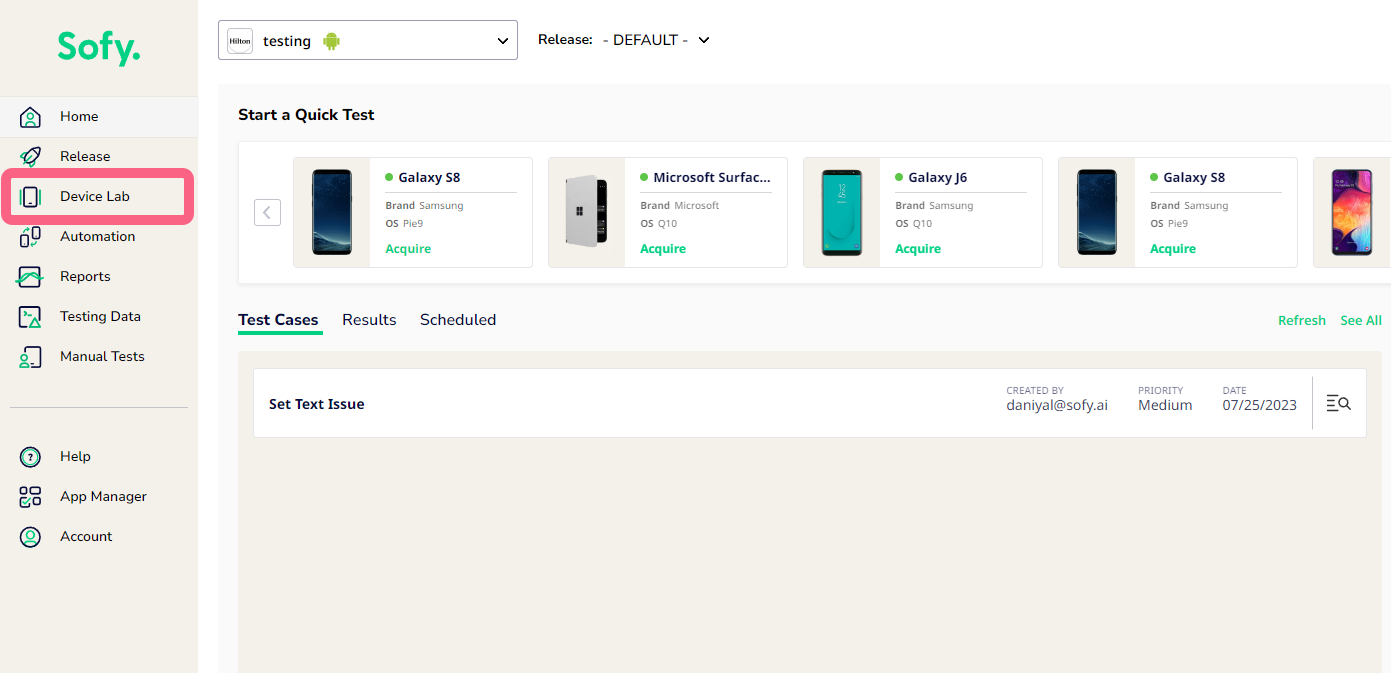
Select Device Lab from the left navigation bar.
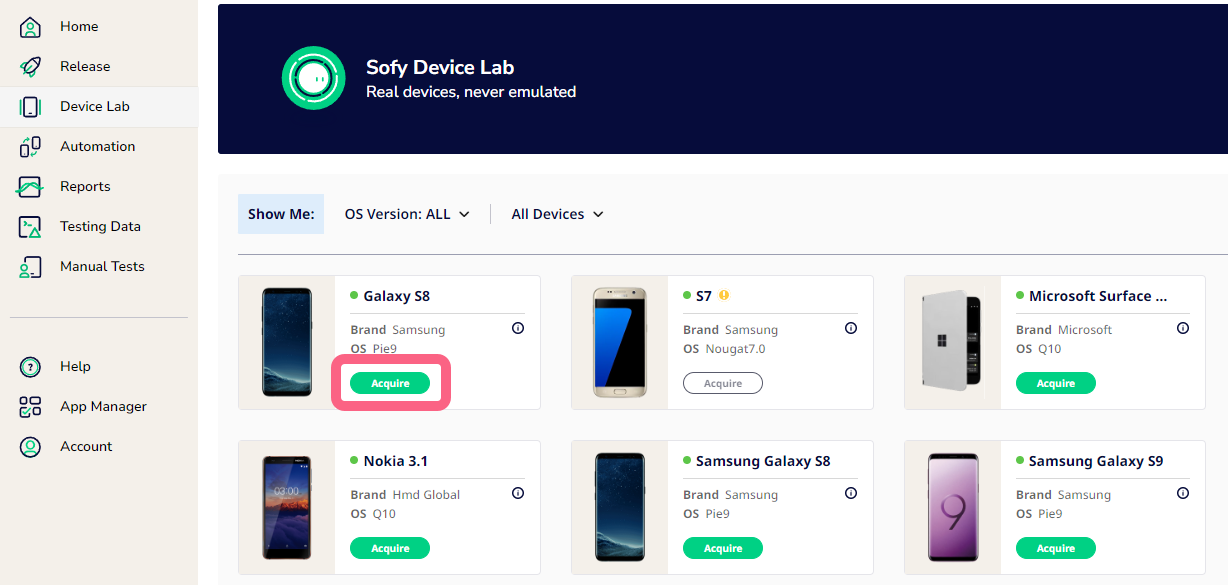
Locate the device you want to test, then select Acquire.Note: If a device is not available, the Acquire button will be grayed out.
Click Launch to open the device in a new window.
Wait for the app to install, then navigate to the section in your app from where you want to start recording steps. For example: If you want to capture making a purchase in your app, start at the section in your app where you want to start the transaction.
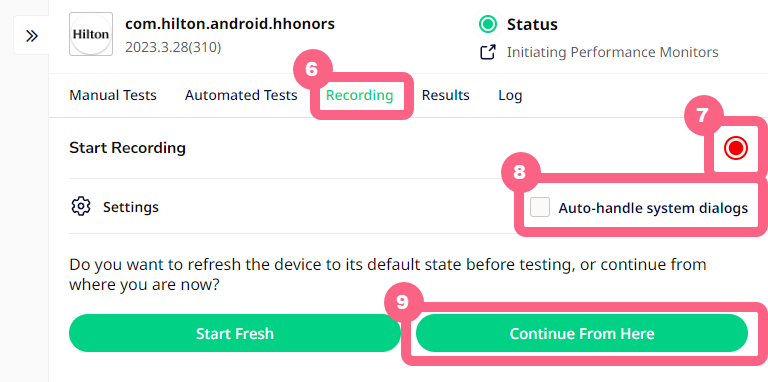
Click the Recording tab from the right panel.
Select the Start Recording red button at far right.
Check the Auto-handle system dialogs box to allow Sofy to automatically handle any system dialogs that pop up. If you wish to handle the system dialogs as part of your test case, leave this option unchecked. Note: Check this box only if you’re inserting the recorded steps into a test case that also auto-handles system dialogs.
Click Continue From Here to record the test from the current state of the app.
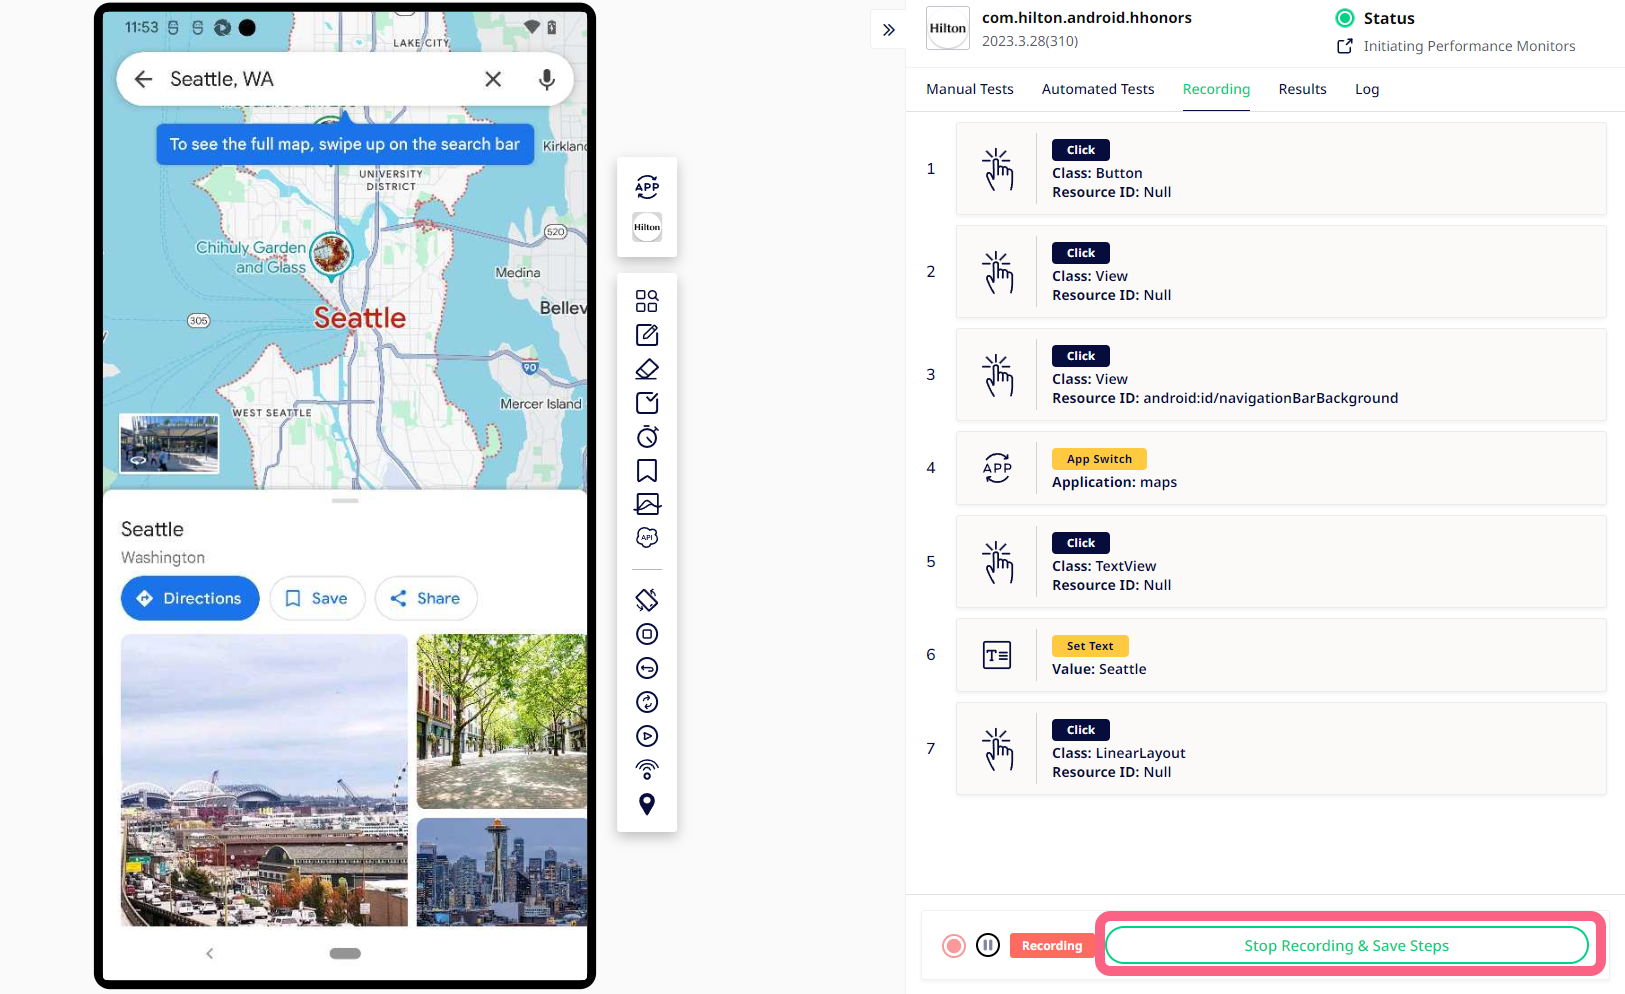
Interact with the device on the left and perform the desired steps you want to test in your app. Each step will be recorded and listed on the right.
Once you’re done recording your steps, click Stop Recording & Save Steps at the bottom of the page.
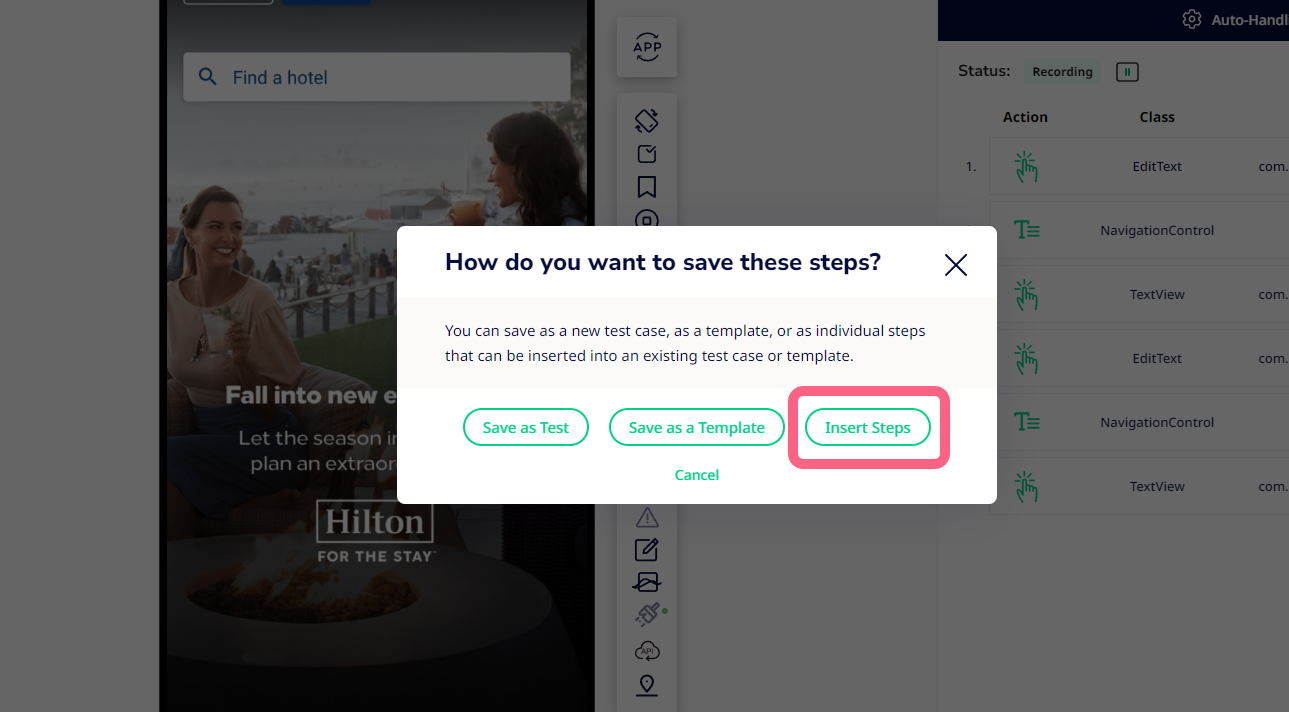
Click Insert Steps to insert the recorded steps into an existing test case or template.
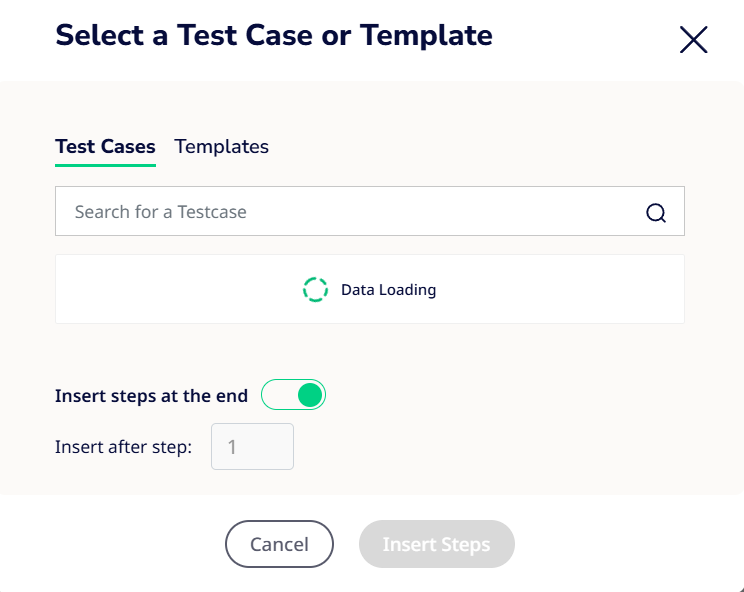
Select the Test Cases or Templates tab, then search for and select the case or template in which you want to insert the recorded steps.
You may choose to insert steps either at the end of a test case or after a specific step per your use case. Click Insert Steps once you finalize your selection.
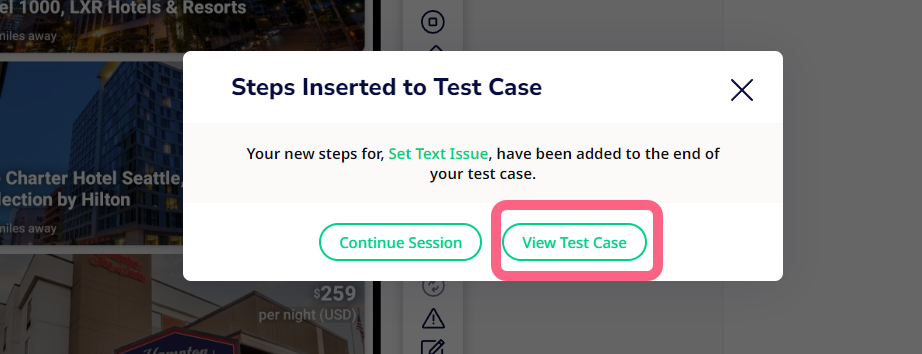
To view and edit the recorded steps, click View Test Case.
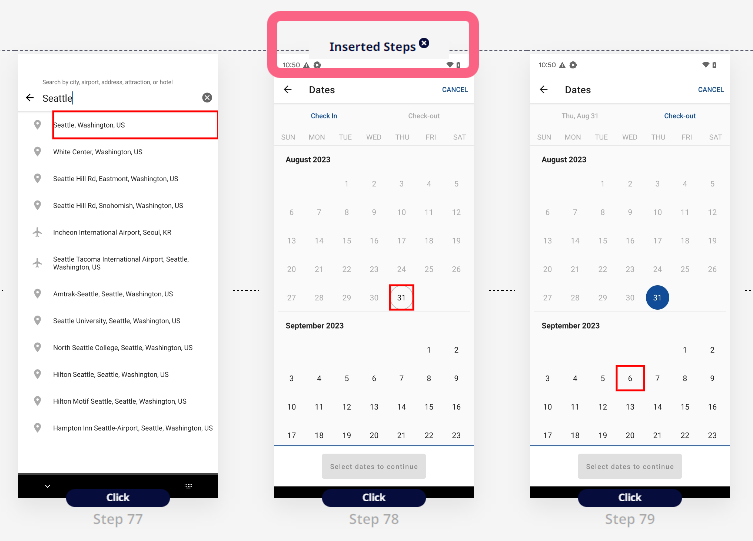
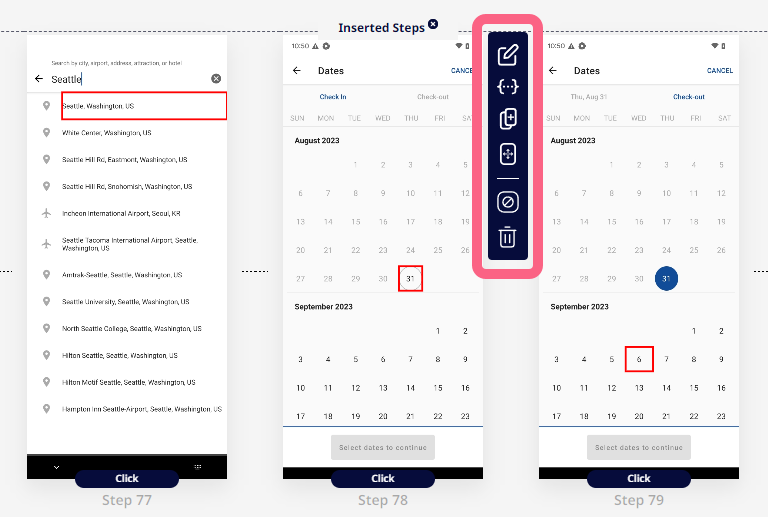
Your new steps will be added to the end of the test case or template and labeled with Inserted Steps.
If you want to make changes to any recorded step, click on the step and choose from the following options in the popup menu:
Edit: Review the step’s details, add asserts, or configure a manual override.
Condition set on step: Add a condition on the selected step.
Duplicate step: Duplicate the selected step.
Reorder step: Move any step somewhere else in the test case or template. Click, hold, and drag any step to its desired location, then select I’m done.
Disable step: Disable the selected step. When a test is run, this step will be skipped.
Delete step: Remove the step entirely from the test case or template.
Click Save Test once you’ve finished configuring the test case or template.