October 2022
October 5, 2022, 4:00 PM PST
It's October and our update harvest has begun!
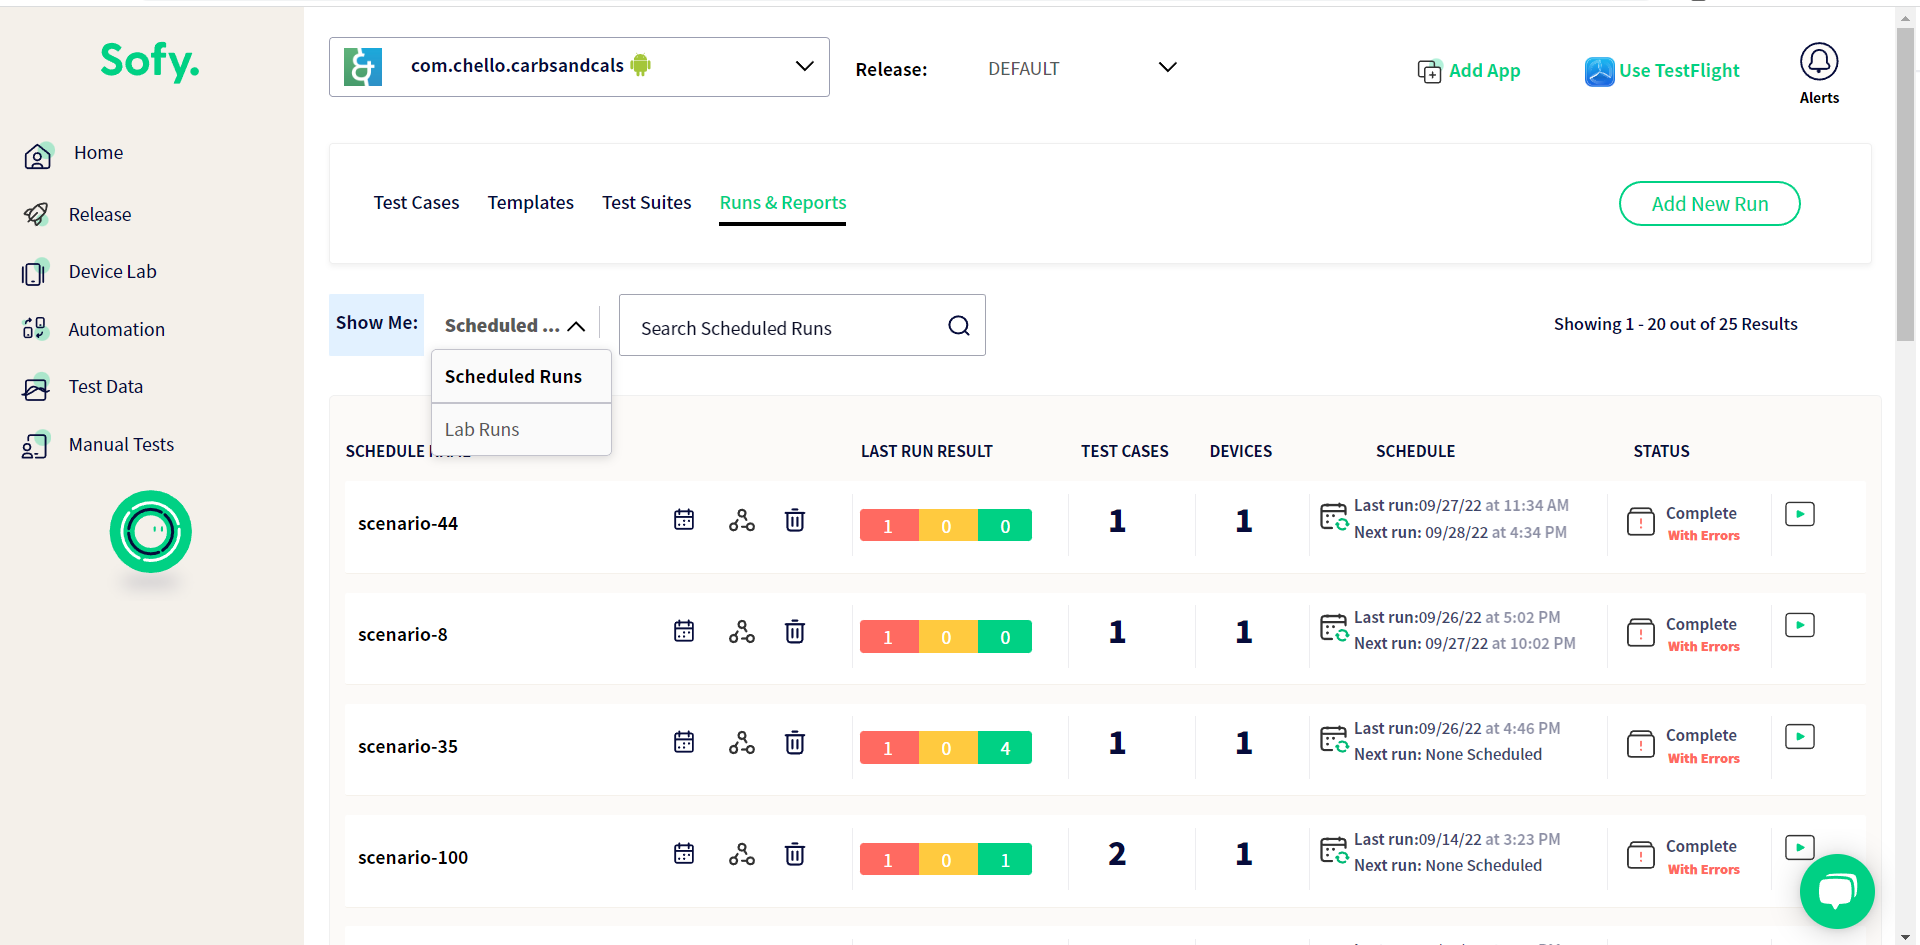
- Scheduled Runs and Lab Runs design improvements
We've removed the Automated Test cases tab. This data can now be found under the “Runs & Reports” column along with scheduled runs. You can navigate between scheduled runs and lab runs using a dropdown. We've also much improved the Scheduled Runs UI, providing you with a better understanding of your executed runs.
In lab runs, we've implemented new multi-select filters. Lab runs can now be filtered on the basis of different results (Passed, Passed with Errors, Incomplete, and Failed).
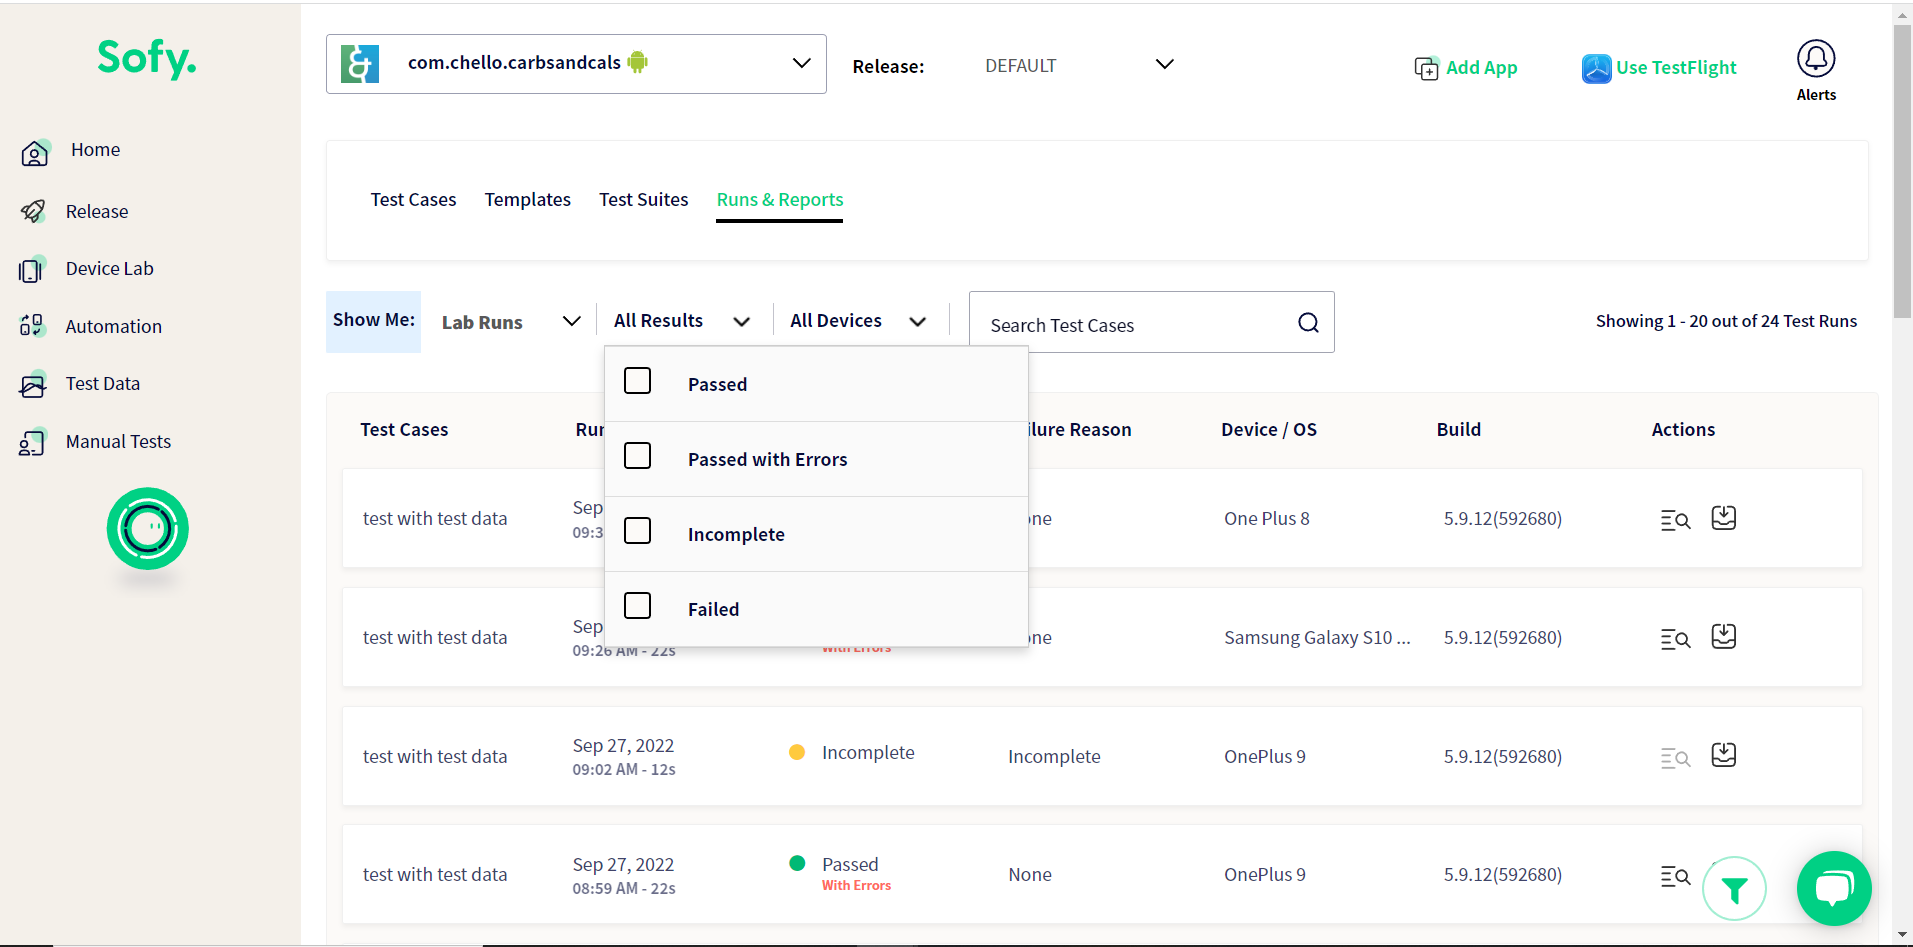
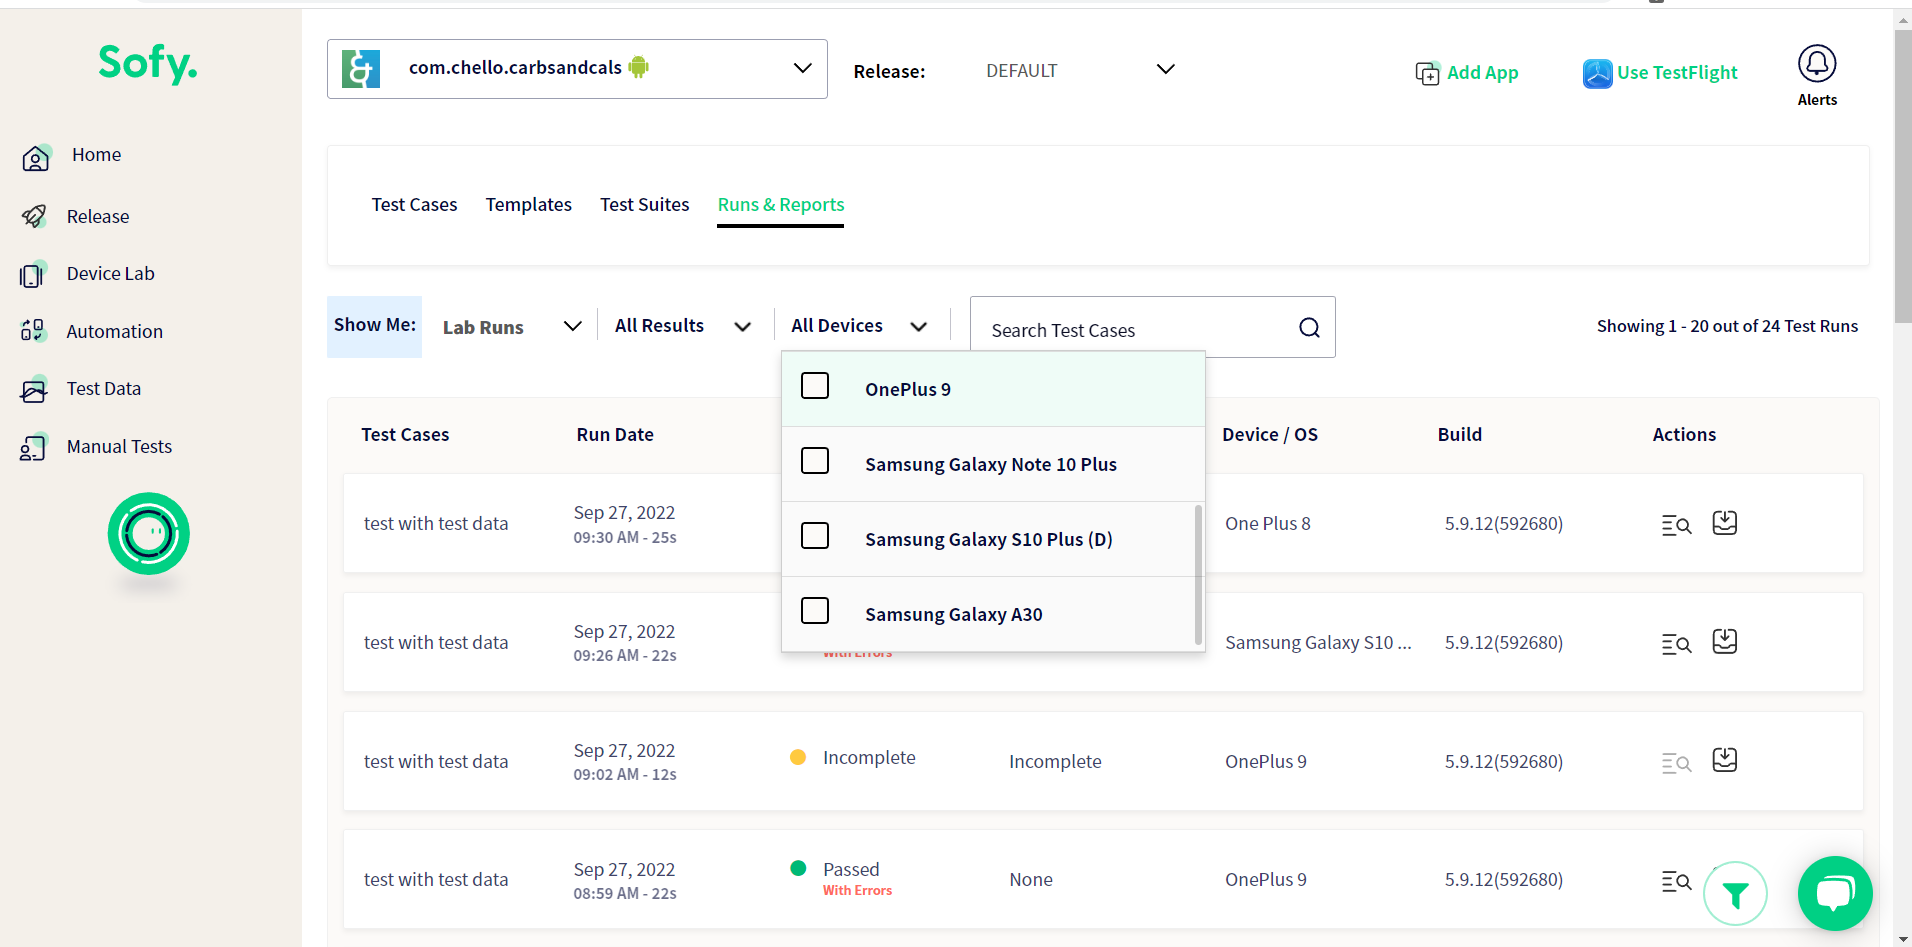
You can also filter your runs through devices you've used to run automated test cases.
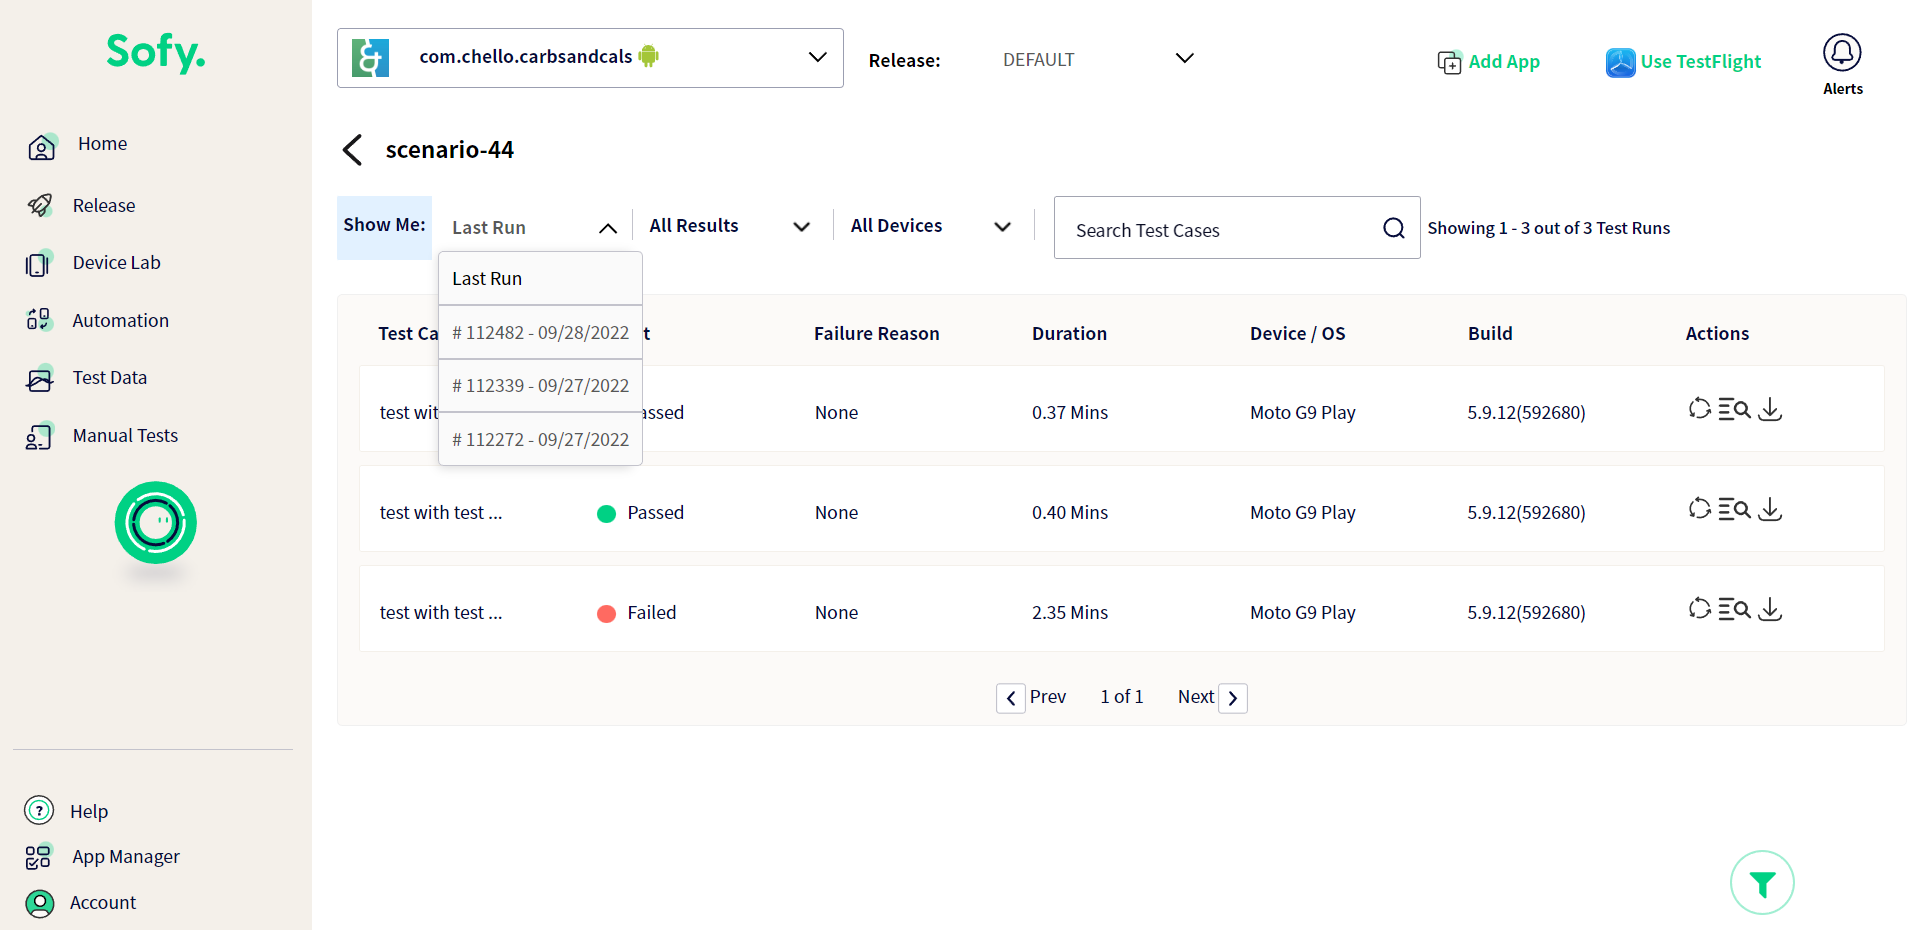
In the schedule test run details, we've added new filters that let you select runs by groups. You can also filter data via results and devices.
- APP Billing page design improvements
We've implement a progress meter on the APP billing app page to determine the total time left and how much time you've used, allowing you to get a bettert idea of your status.
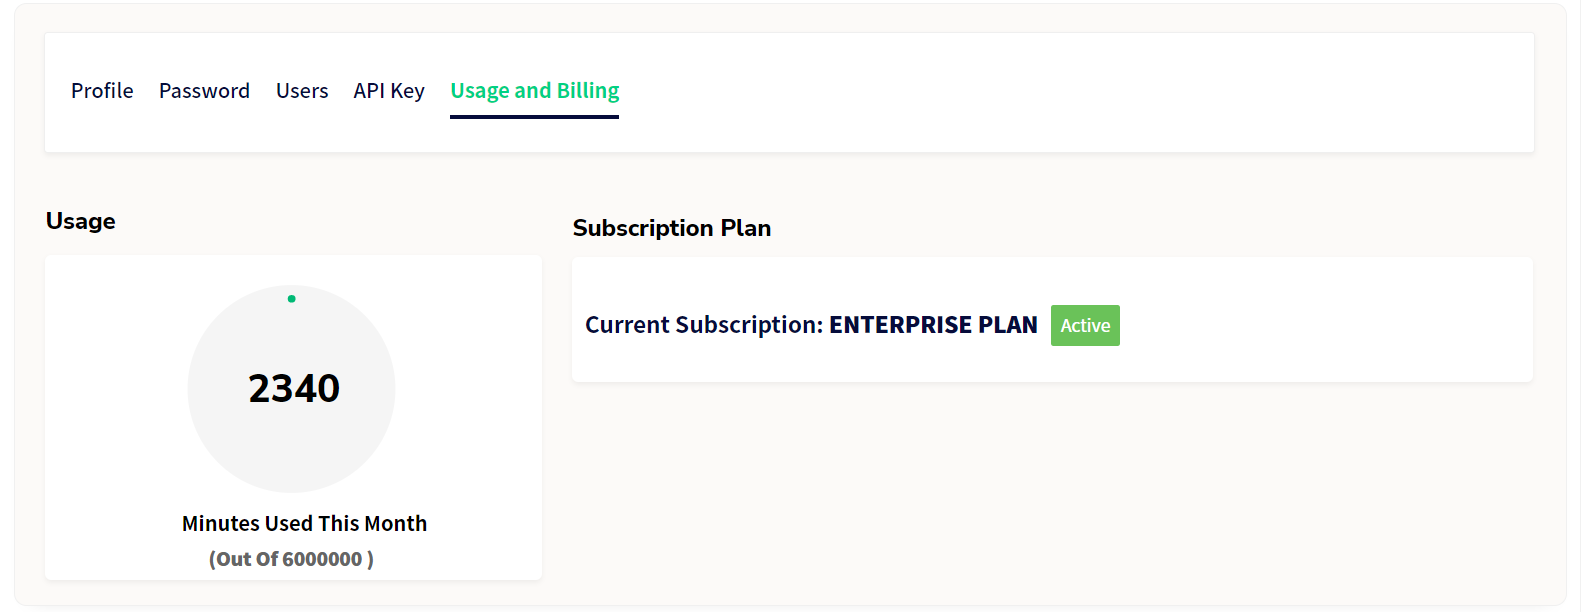
We've also a added a grid that displays more detailed usage data.
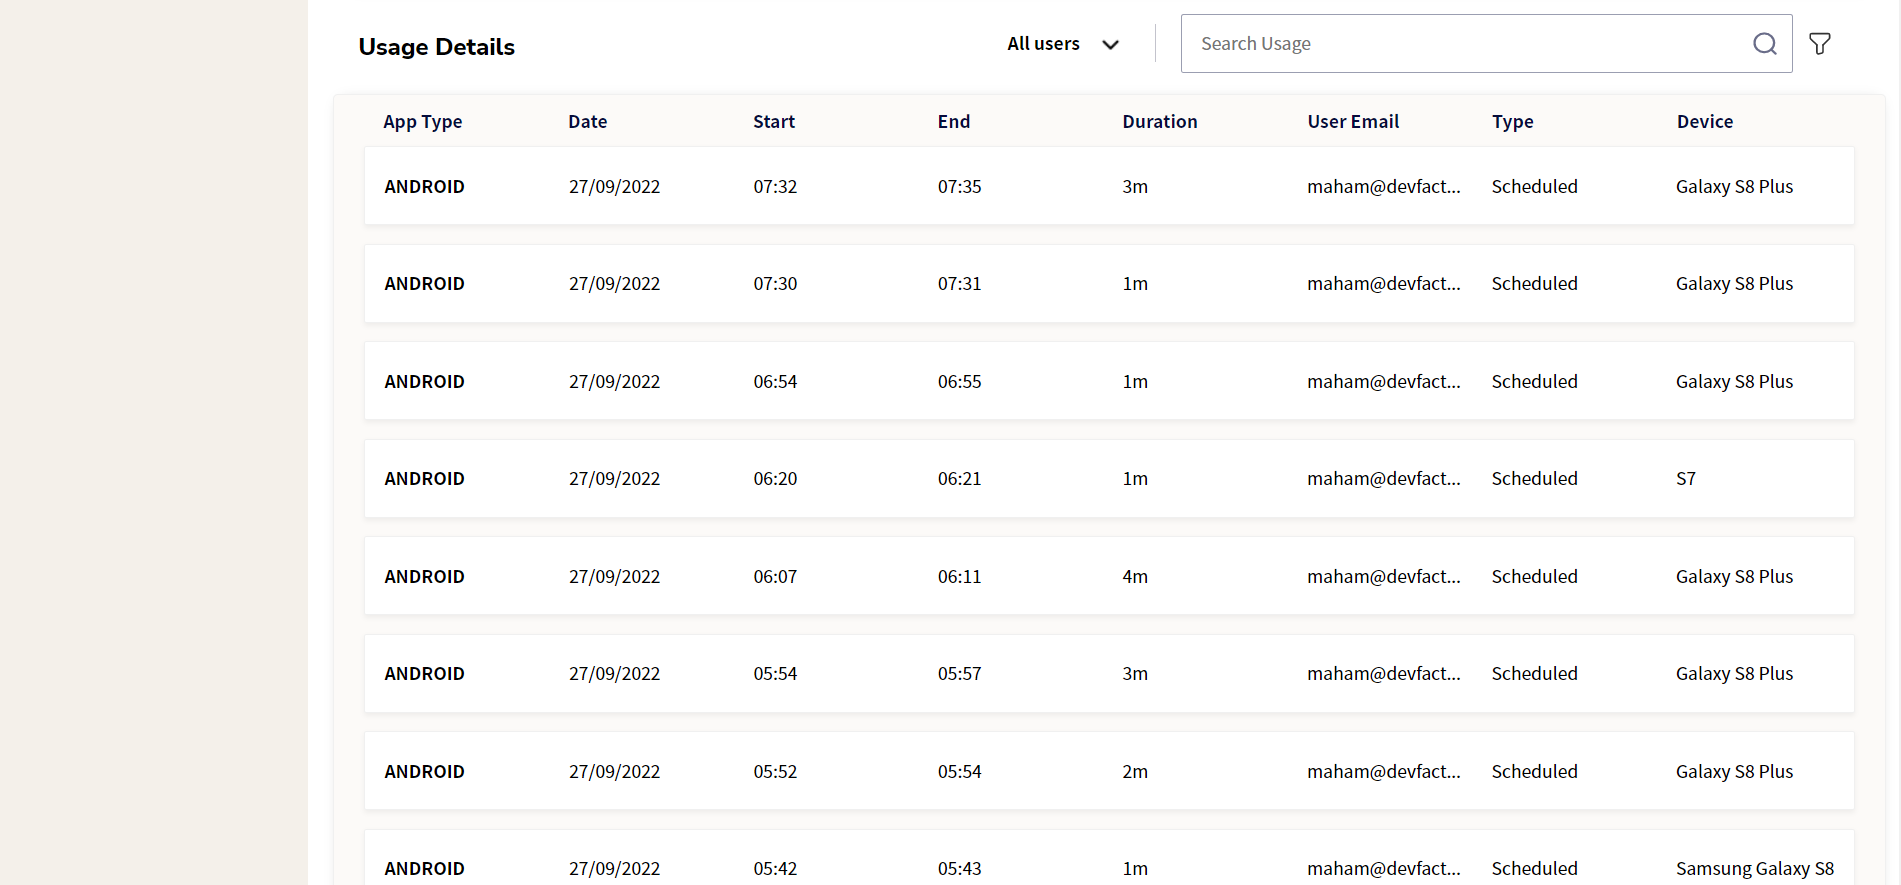
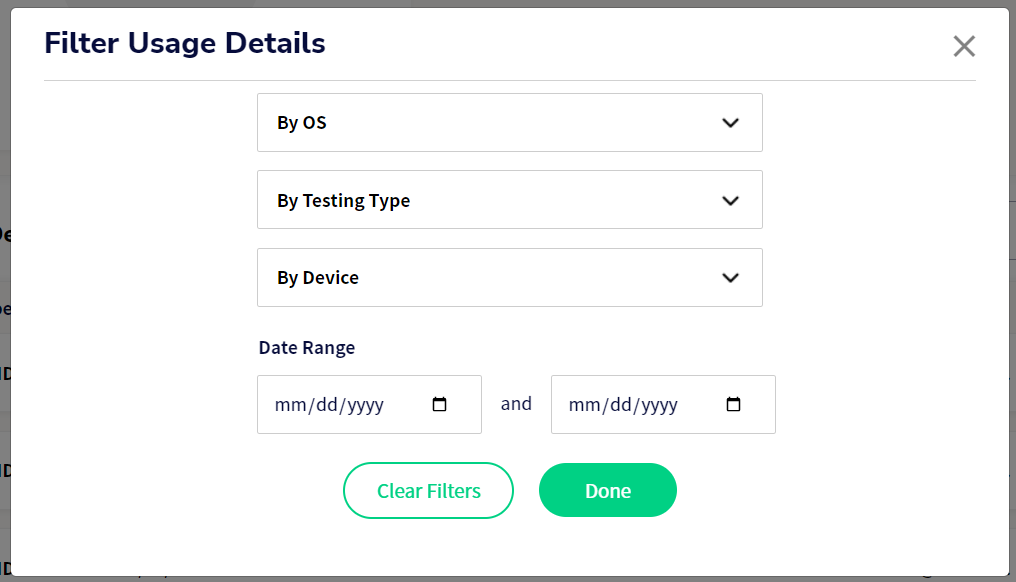
Finally, we've added the ability to further filter using options By OS (Operating System), By Testing Type (Schedule, TestFlight, or LabSession), By Device, and Created Date Range .
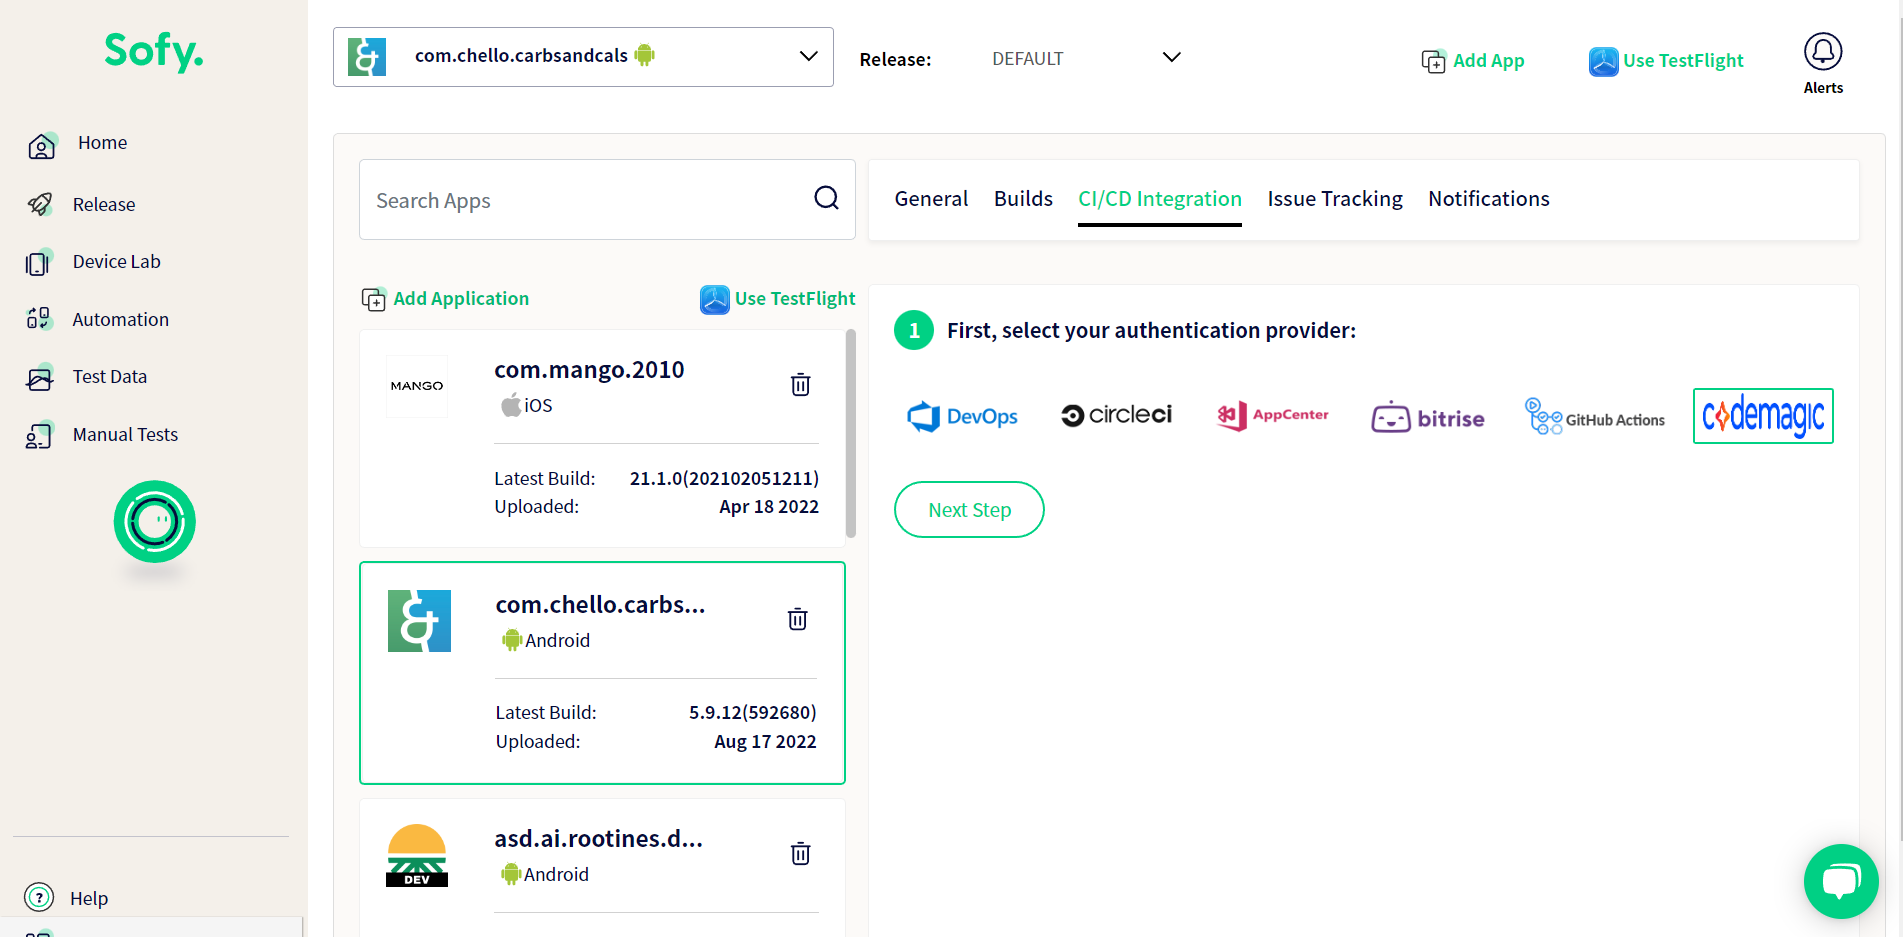
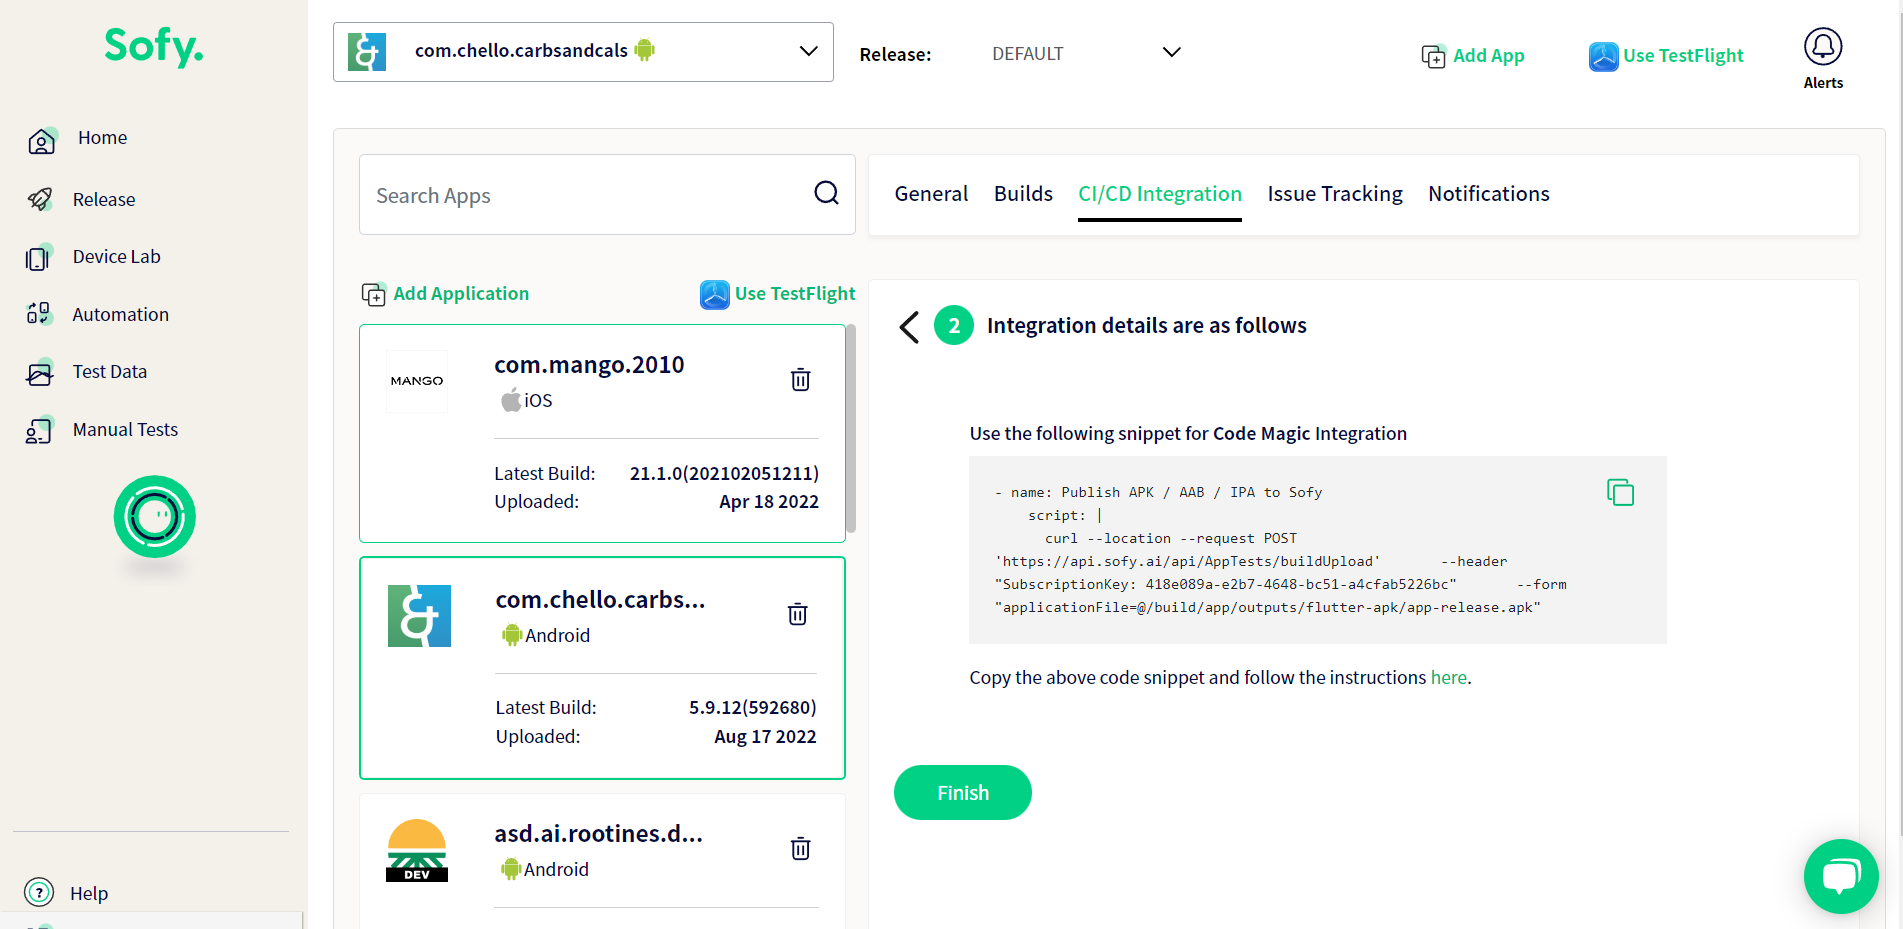
- Codemagic Integration
You can now use native integration with Codemagic with Sofy, woohoo! For instructions on integrating Codemagic with Sofy, see Codemagic's documentation here.
- Edit Screen changes
We've added the following fields to "Edit Scenario Component":
- Short Description
- Notes
Short descriptions can be maximum of 30 characters. You can add notes for detailed information on the step.
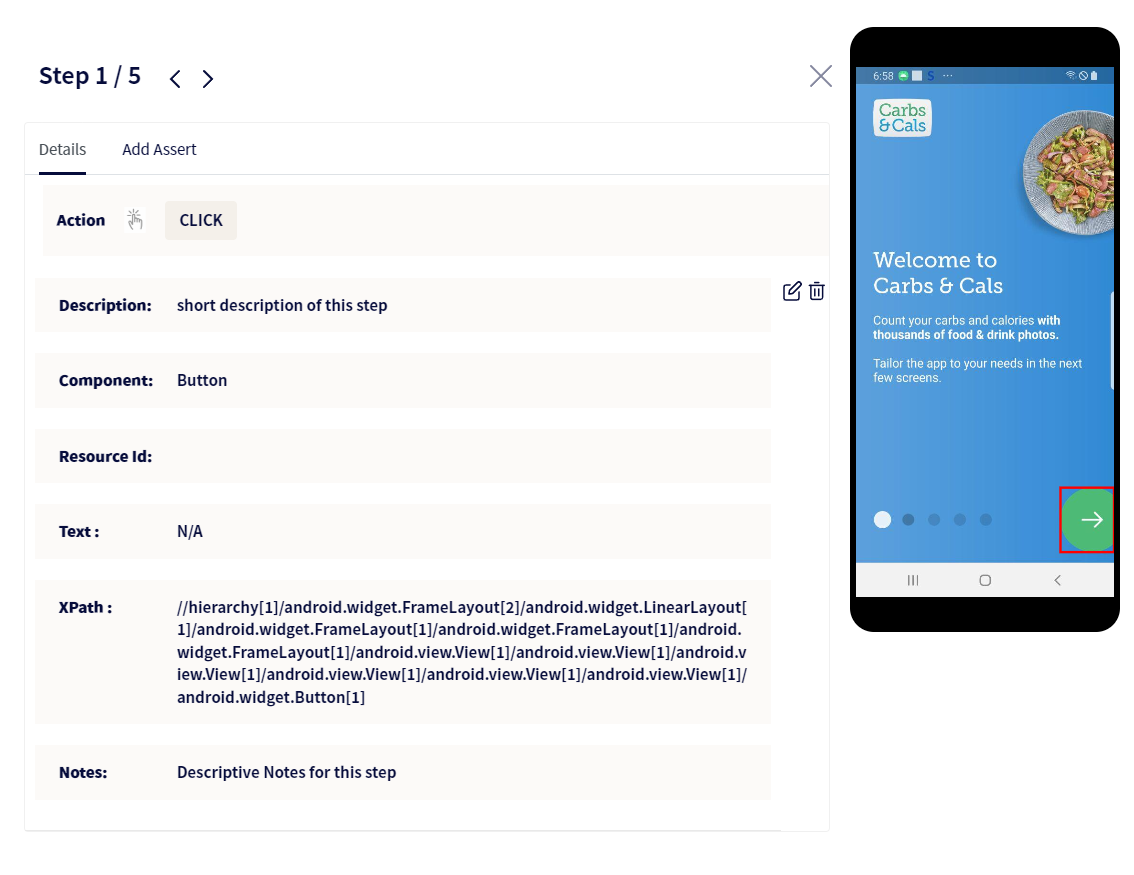
"Click" view screen.
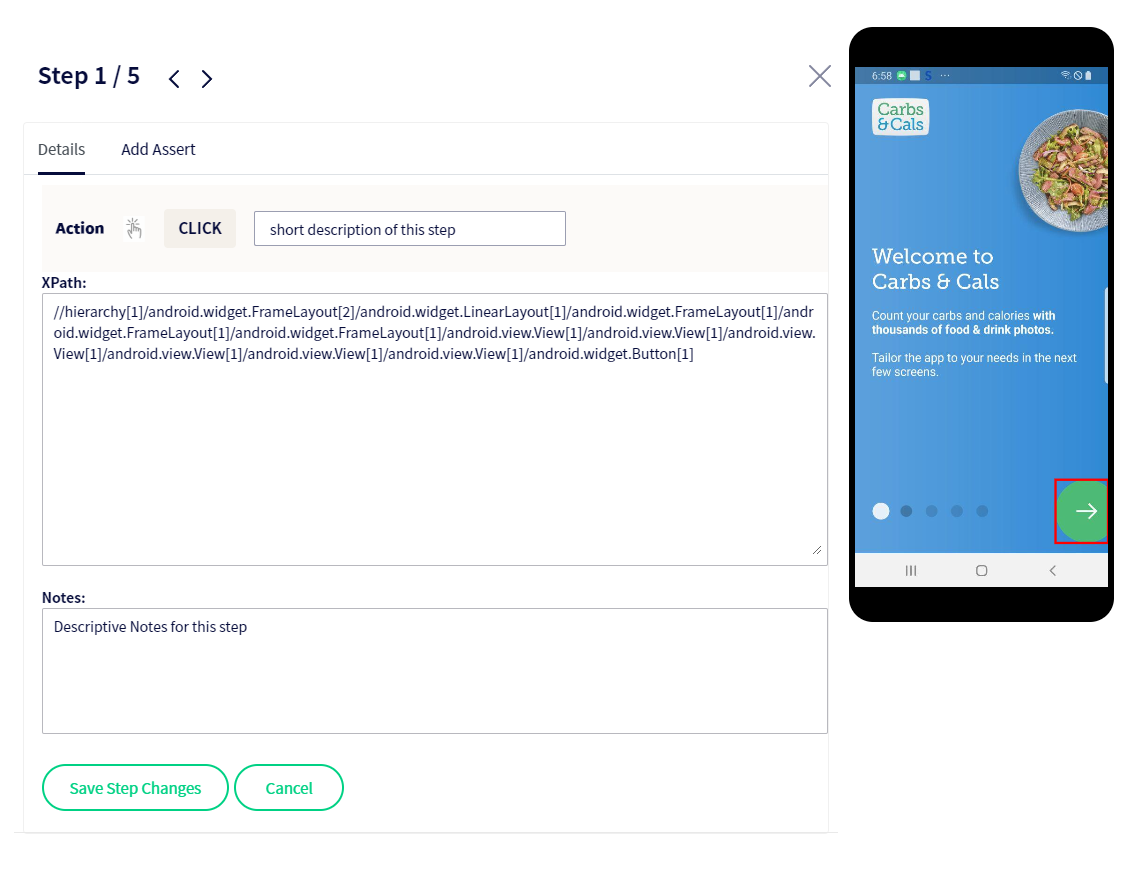
"Click" edit screen.
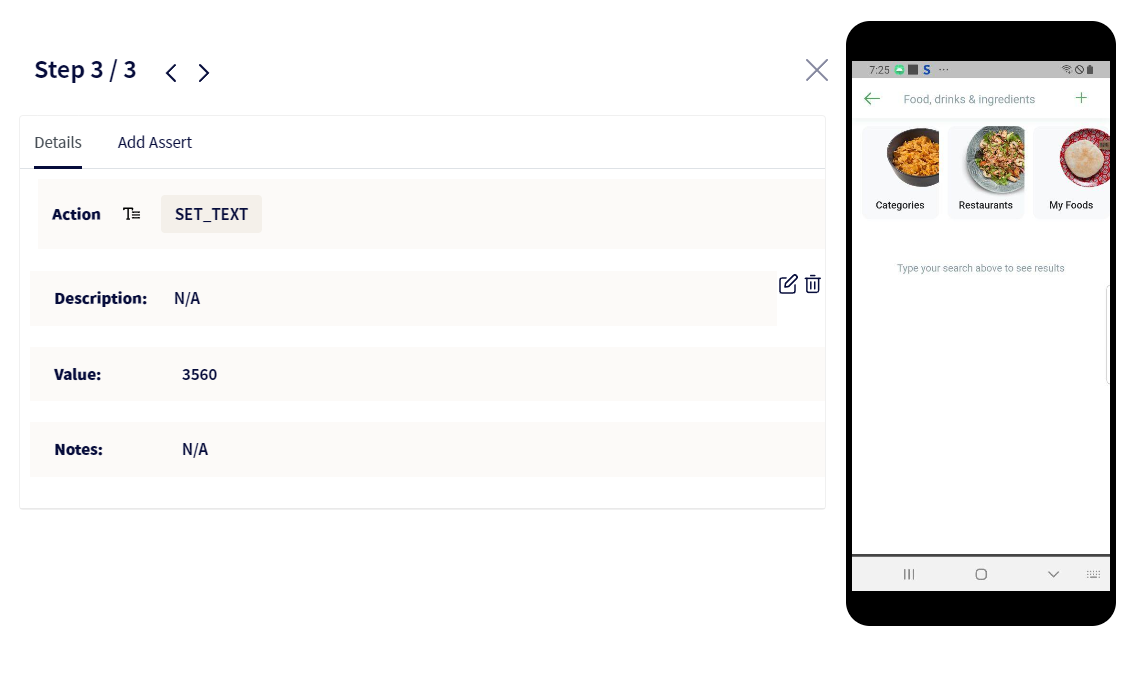
"Set Text" view screen.
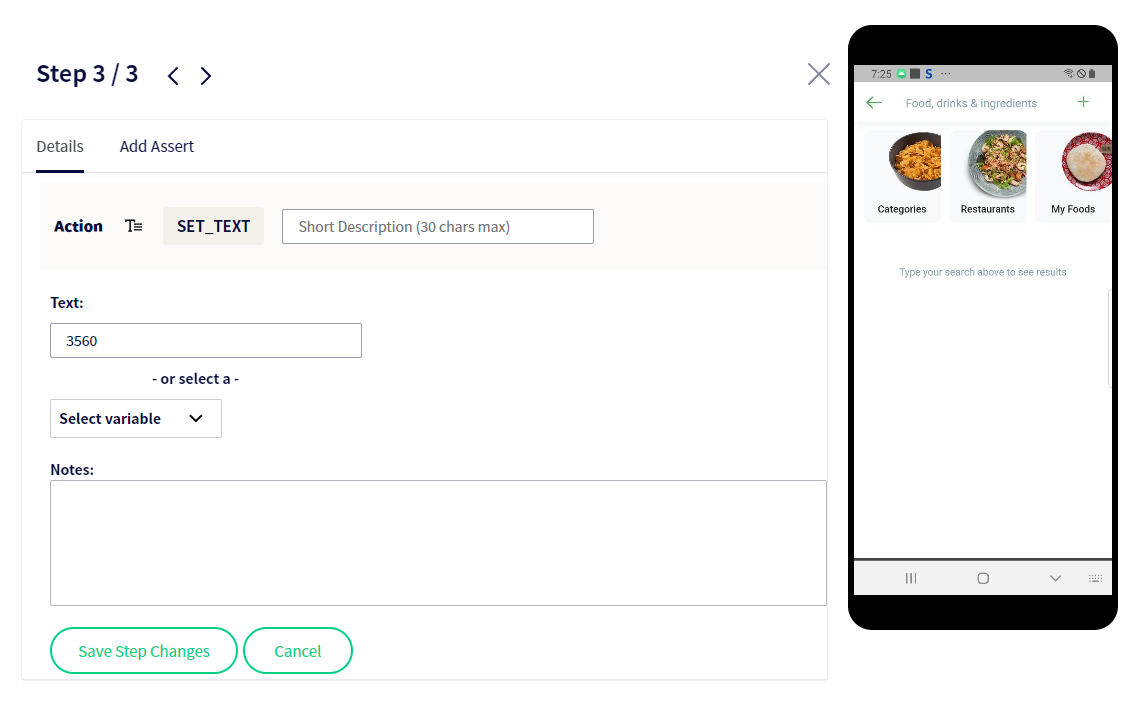
"Set Text" edit screen.
For certain steps you cannot edit the description and notes fields as they self explanatory, e.g: APP_LAUNCH, ROTATE_DEVICE, SWIPE, and so forth.
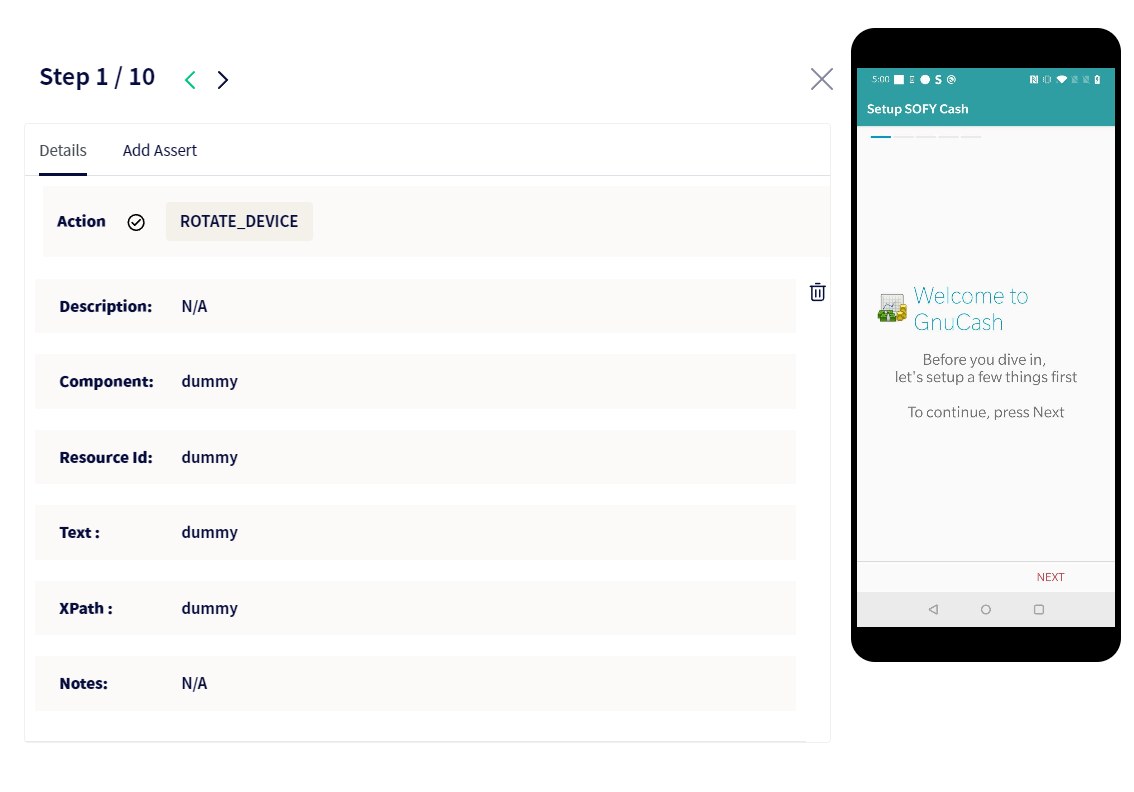
Rotate Device View Screen.
- Deactivating a User:
In the "Accounts" setting in the "User" tab now allows admins to deactivate a user. To do so, complete the following steps:
a. In the "Users" tab, click on the user you want to deactivate.
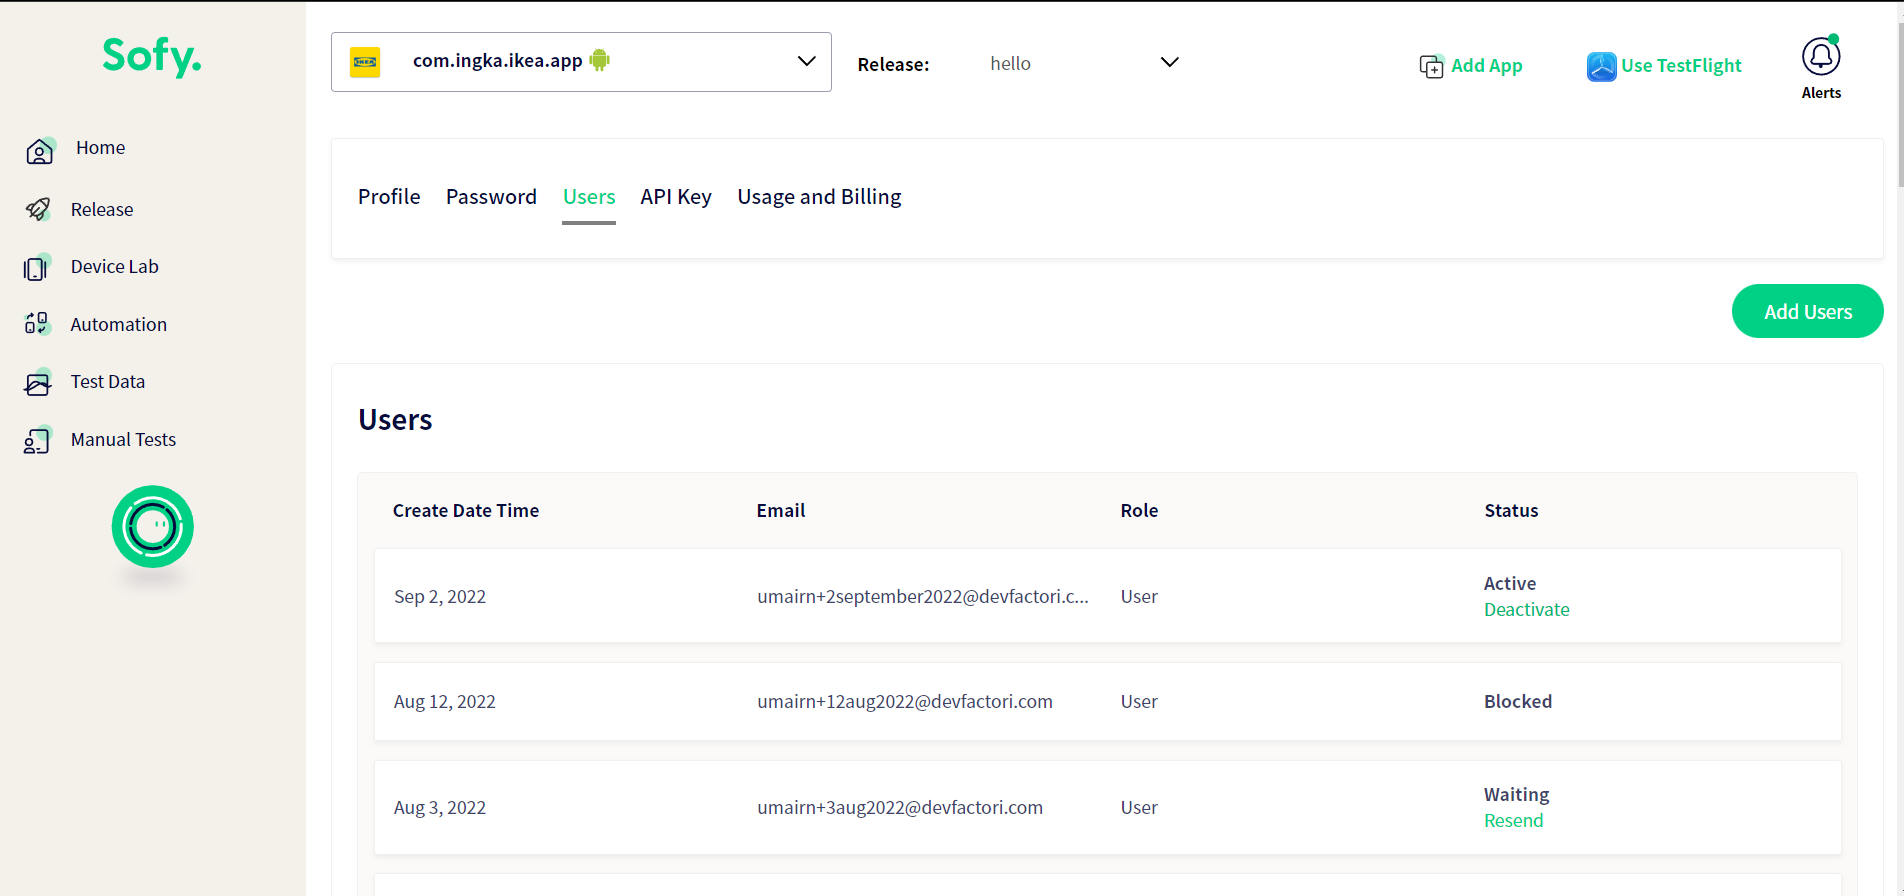
Users List
2. A confirmation dialog box will open. Click "yes" to deactivate it.
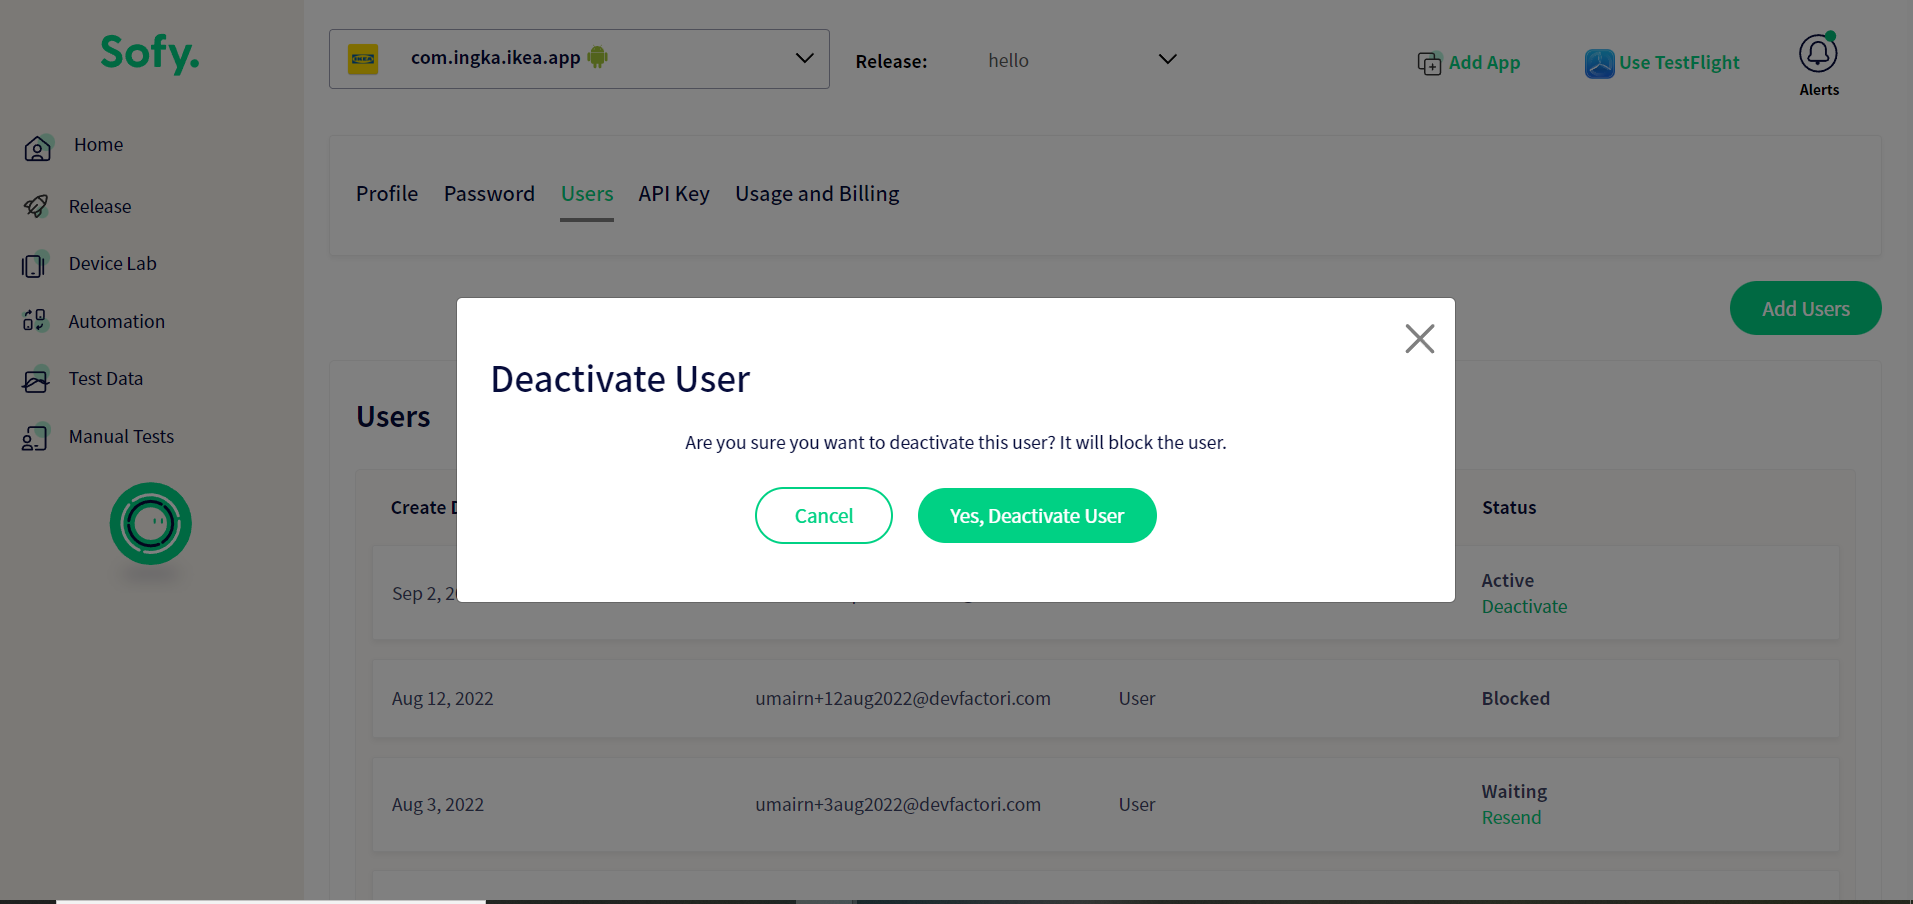
Deactivate Dialog Box
3. The user status will be changed to "blocked".
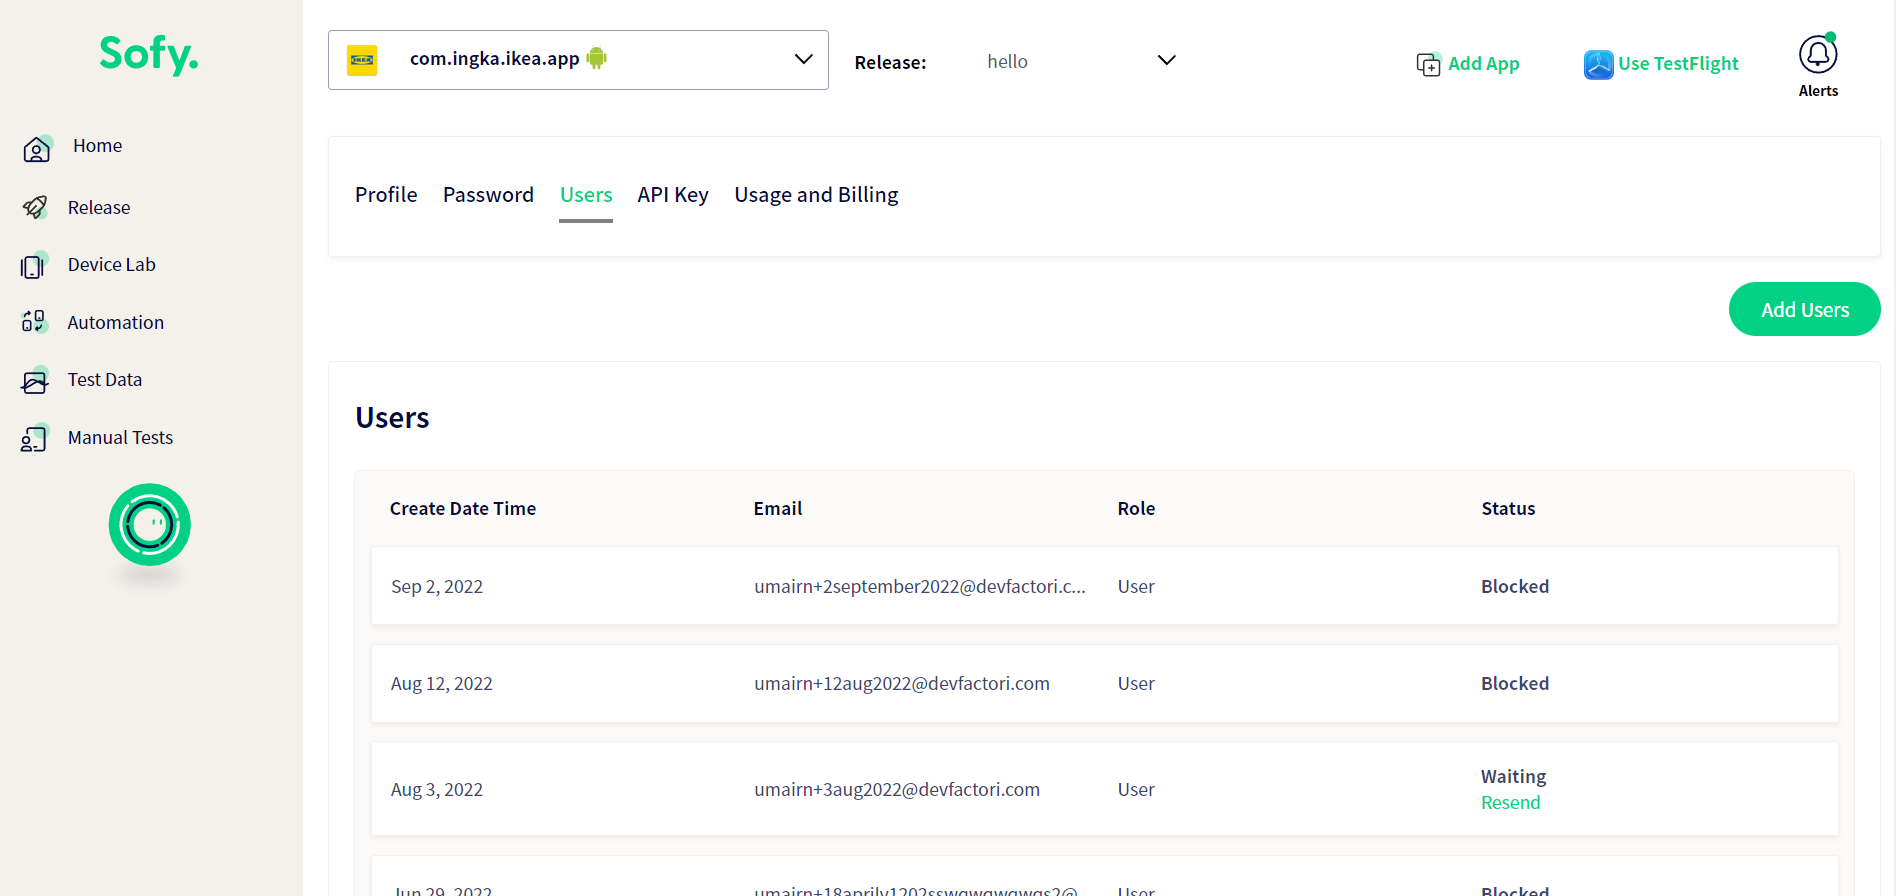
Now your user is blocked.
- Bug fixes: This update also includes a variety of bug fixes.