Adding Delays in Automated Test Cases
Sometimes during an automated test, loading times from screen to screen can vary between high-end and low-end devices or based on how "heavy or light" an XML may be. To account for differences in loading times, and to prevent the automation from performing an action prematurely, we allow our users to introduce static and dynamic delays between screens where some load time is required.
Related Definitions
- Time Delays (also known as static delays): Explicit wait times you can add in your tests to account for any predicted, foreseen delays in between test steps
- Dynamic Delays (also known as dynamic wait): User-specified duration for Sofy to wait for a component to load or become visible before fetching the layout XML in a given step
- Number of Retries: Sofy will retry failed test steps on its own, which is useful for cases where tests may fail due to environment or other one-time issues.
- XML Fetch Time: The time required for Sofy to retrieve the XML layout
- Total Playback Time: This includes the cumulative time for all processes such as dynamic wait, XML fetch time, XML load time, and other internal processes like initialization, XML processing, screenshot capturing, and UI generation.
Adding Static Delays (also known as "time delays")
To add static delays during an automated test, complete the following three easy steps:
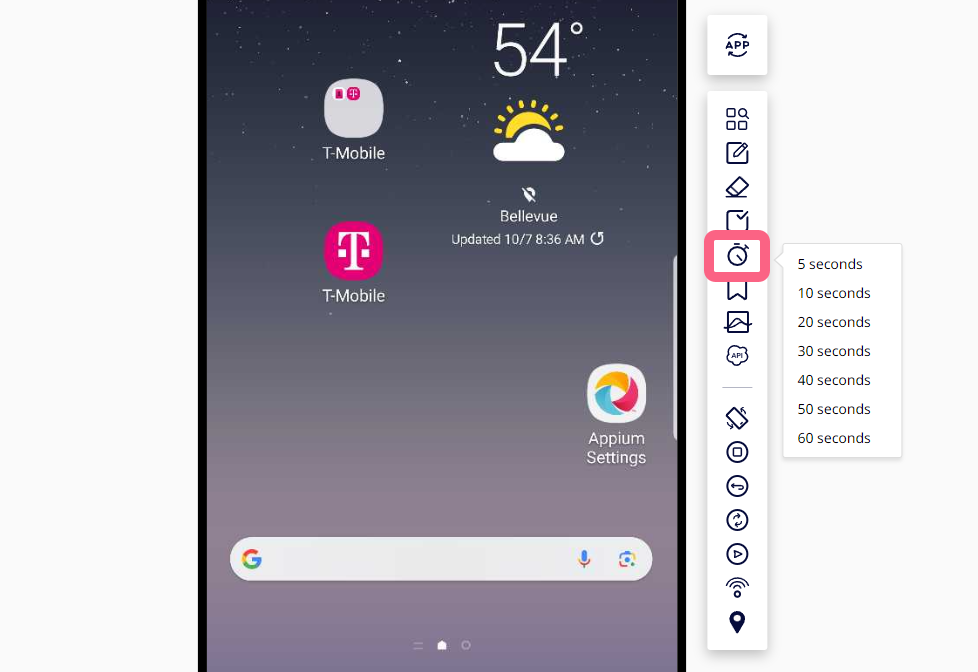
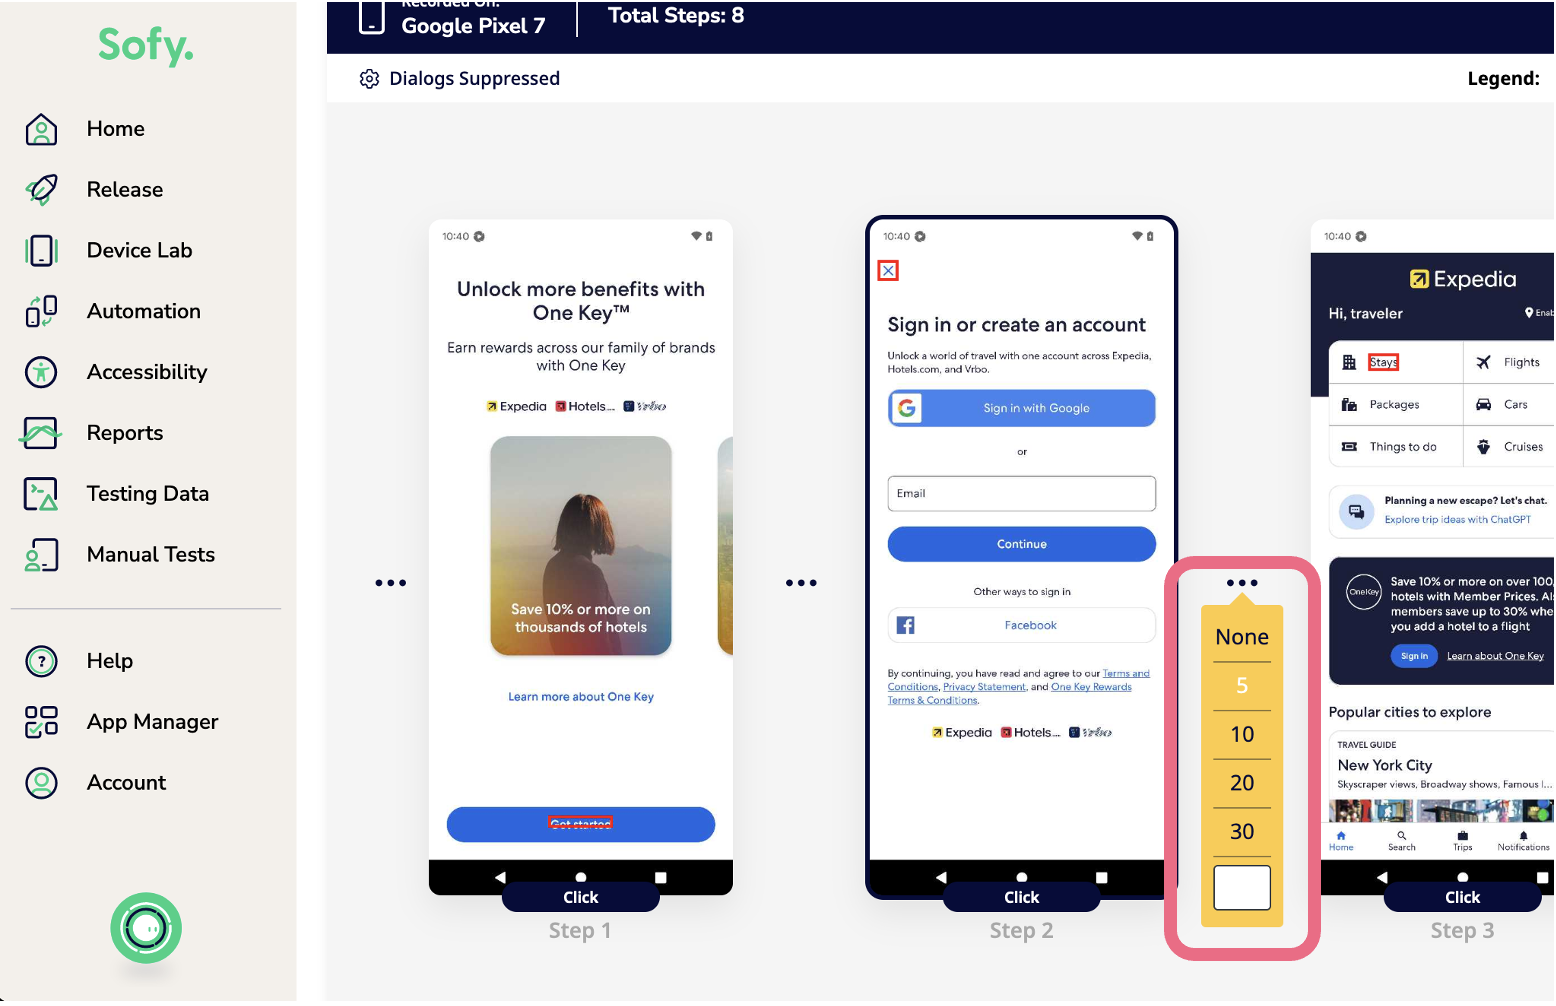
- First, simply click on the clock icon, and select the amount of time you'd like to delay by.
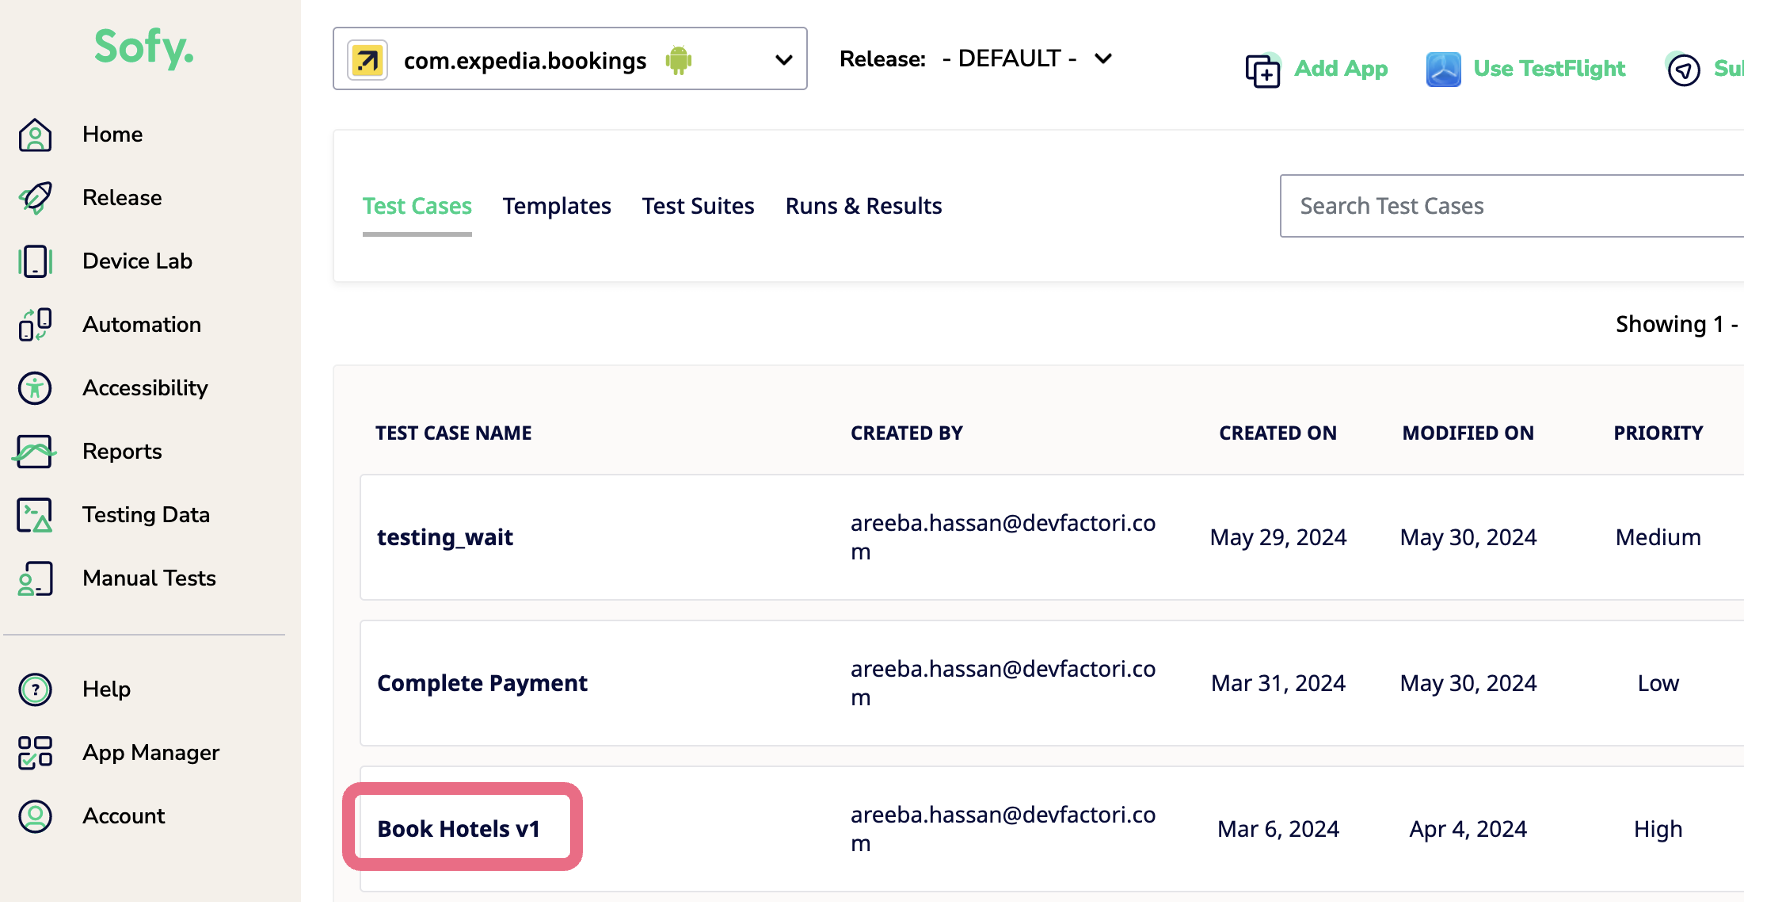
- To add a delay in an existing test case, open up a test case you wish to add a time delay to:
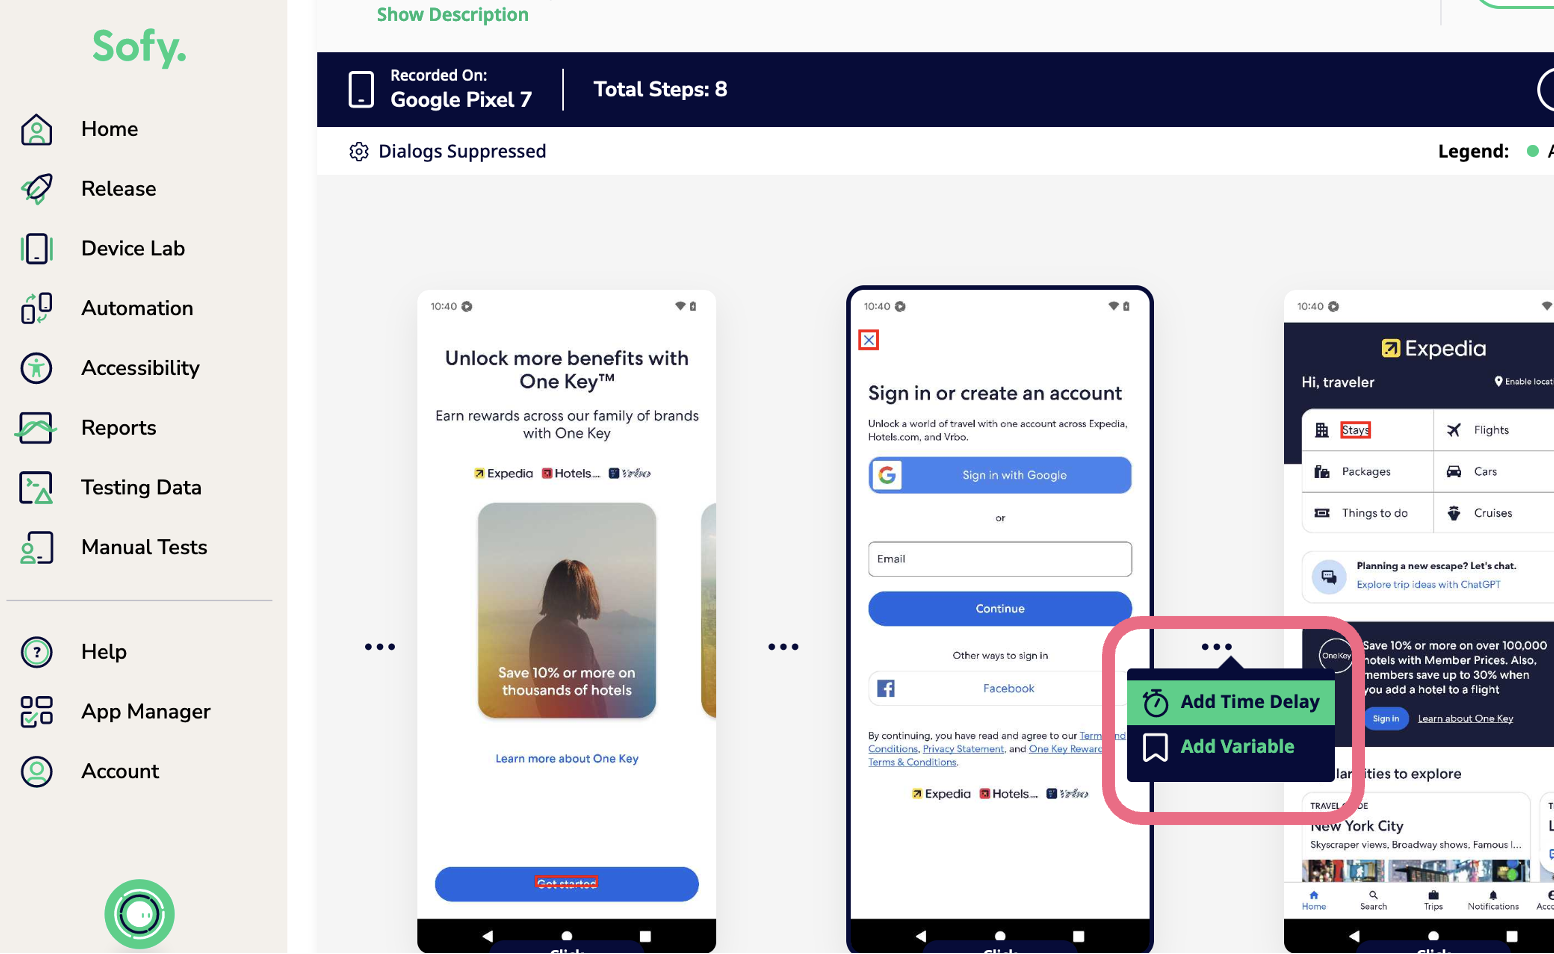
- Hover your mouse between the two screens you wish to add a delay to, click on the clock icon, and select/specify the desired duration for the delay:
Adding Dynamic Delays (also known as "dynamic waits")
Dynamic waits allows you to specify the duration for which Sofy should wait for XML elements to load before proceeding with further actions. It gives you more control over the waiting mechanism, especially useful for screens with heavy XML content.
To add a dynamic wait to a step in your testcase:
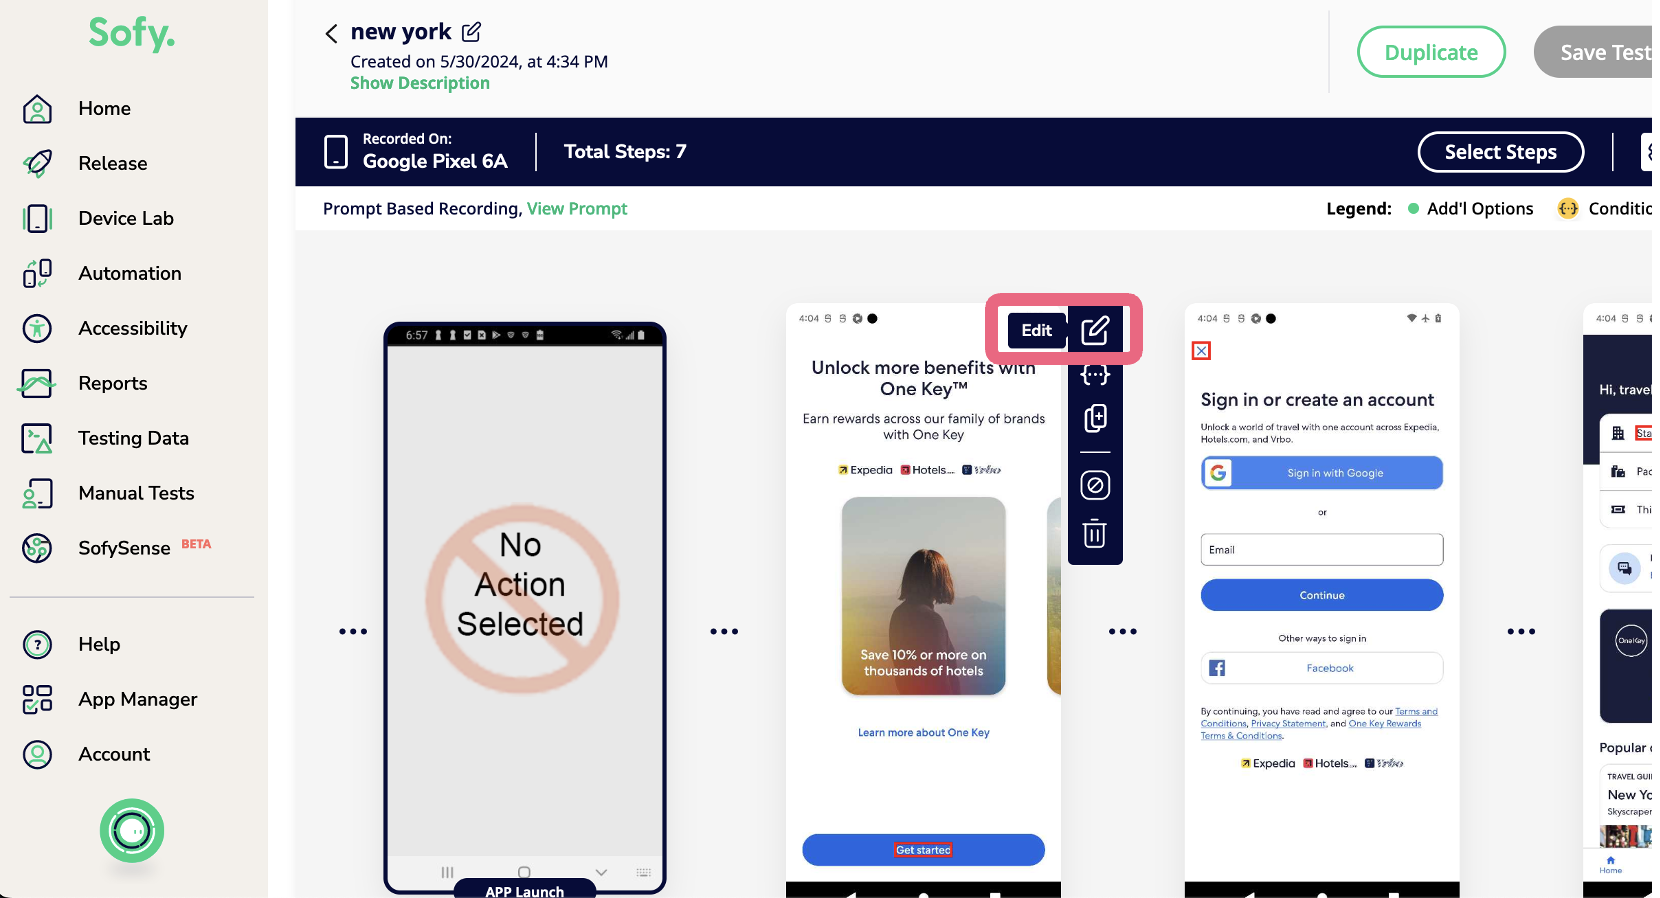
- Open up your testcase by navigating to the Automation section and then selecting the test:
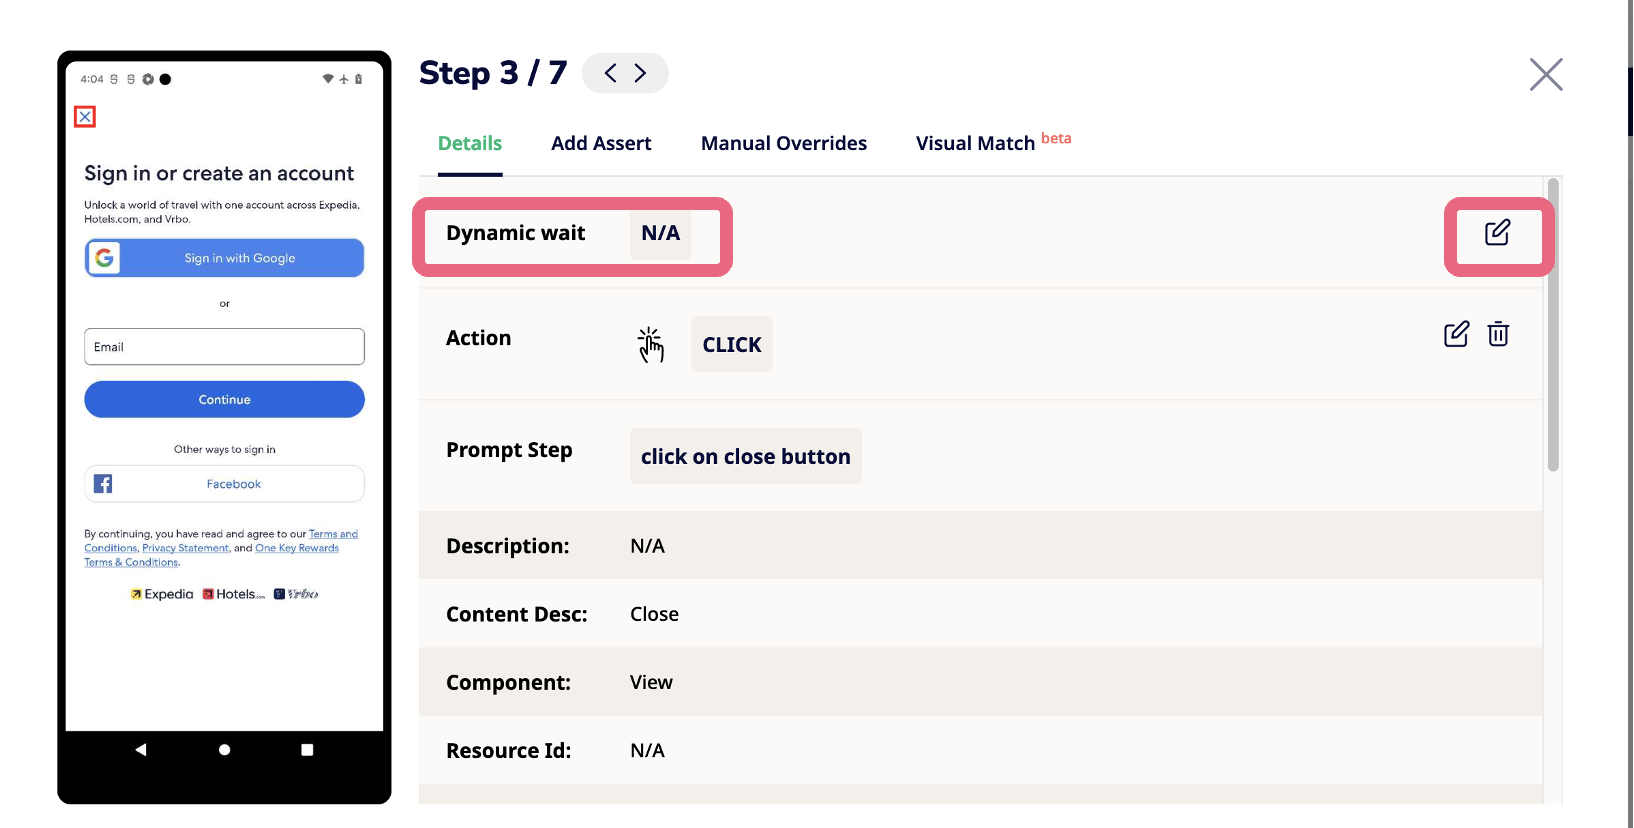
- Open any step in Edit mode to which you want to add a dynamic delay:
- In the Edit modal, you will see an option of Dynamic Wait. Click on the pen icon next to it to provide a value for your dynamic wait.
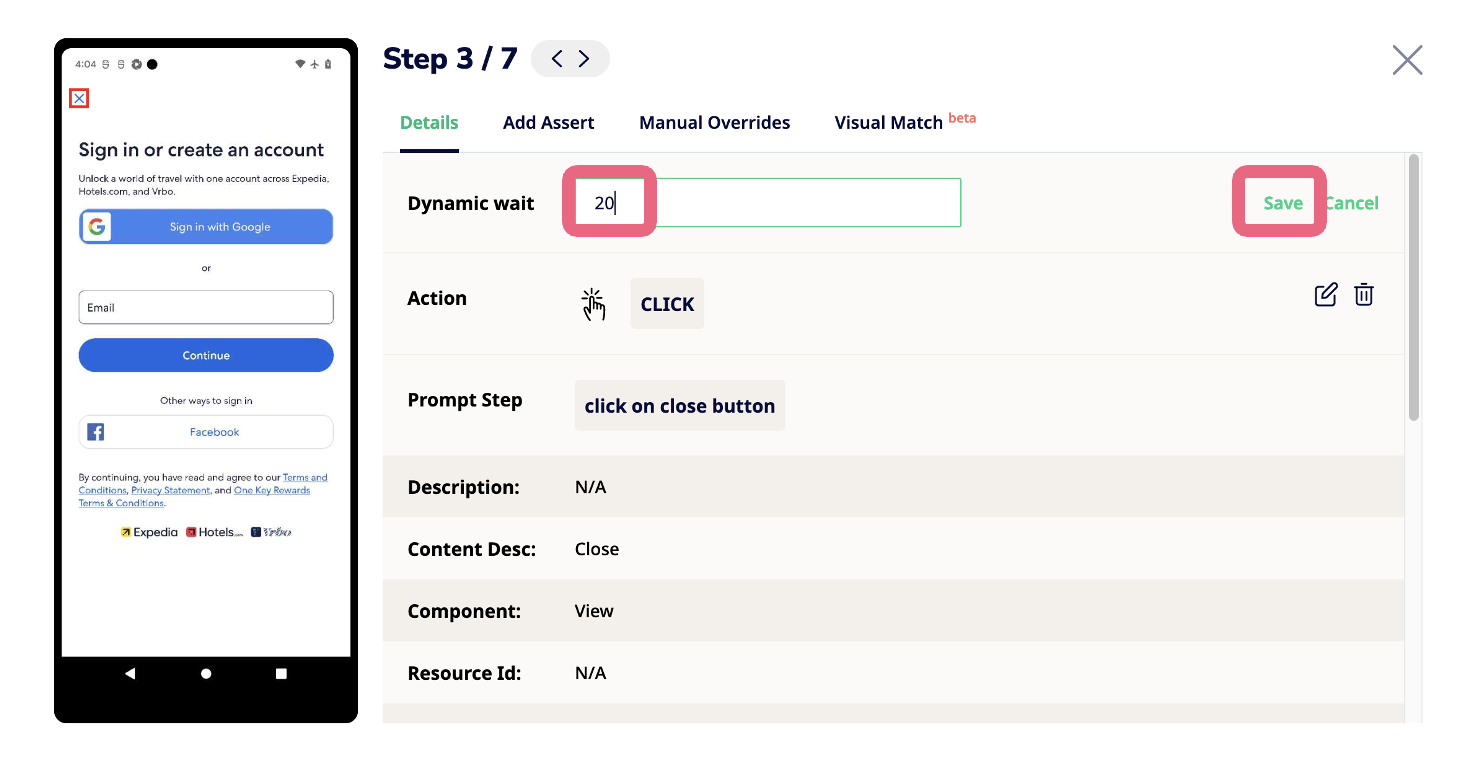
- Once you provide the value, click on Save and also save the testcase:
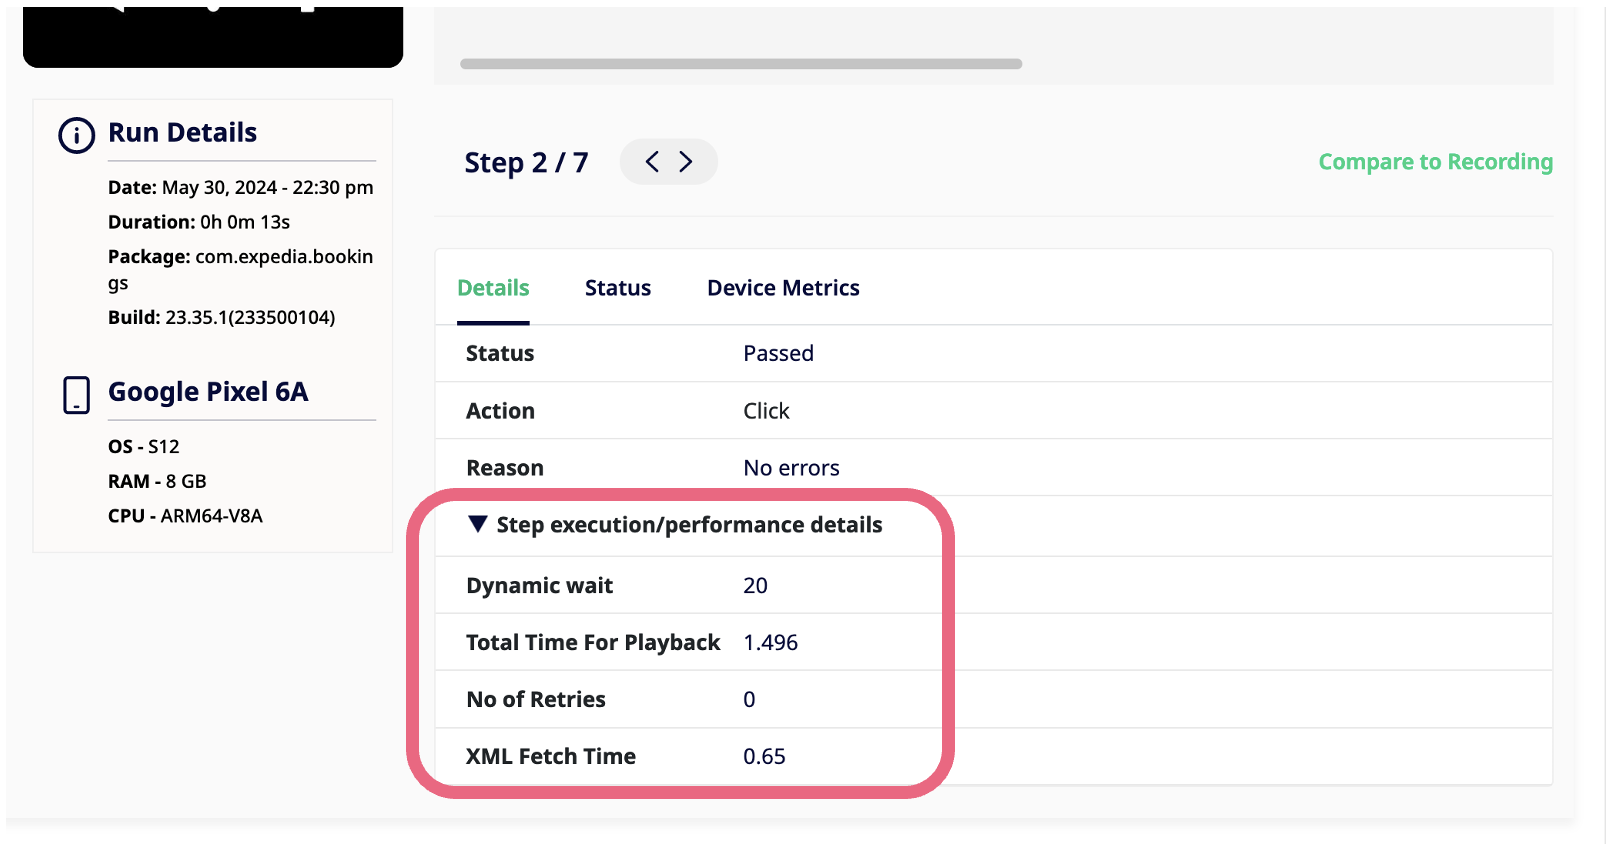
- Now when you execute the test, Sofy will wait for the XML to load for the duration you specified in the dynamic wait. You can see the dynamic waiting time, total time for execution of the step and other step execution details in the Step execution / Performance details section of a step inside a test run:
Alternatively, you can also add Dynamic Wait in Sofy Lab during validation.
- While your test is awaiting changes during the validation in-lab, you can click on edit step.

- Once the edit modal has opened up, you can access Step Options and enable Dynamic Wait as needed

You now have greater flexibility to use Dynamic Wait in Offline as well as in Lab.