An automated test is a list of recorded steps that you can save and run automatically multiple times, on multiple different devices. Automated tests allow you to easily create and save a sequence of test steps, creating more efficiency with repetitive and automated testing across various devices.
To create an automated test case:
Log in to your Sofy account.
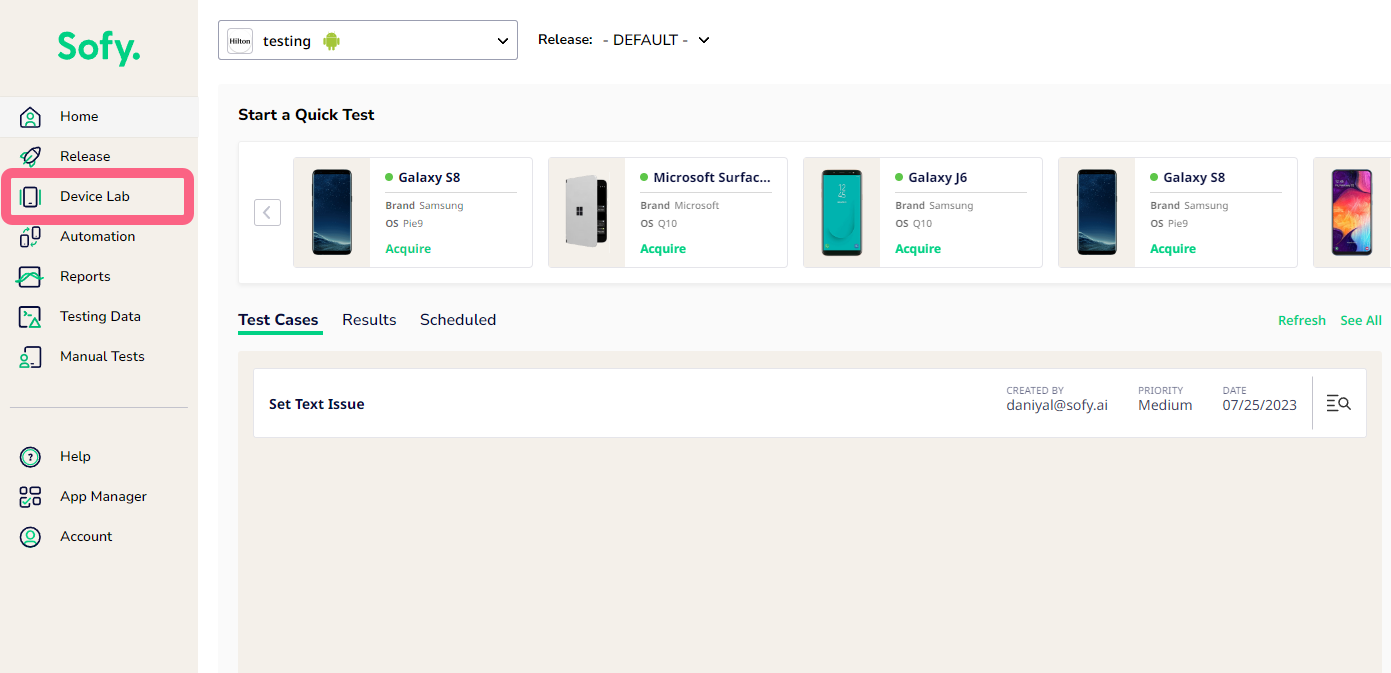
Select Device Lab from the left navigation bar.
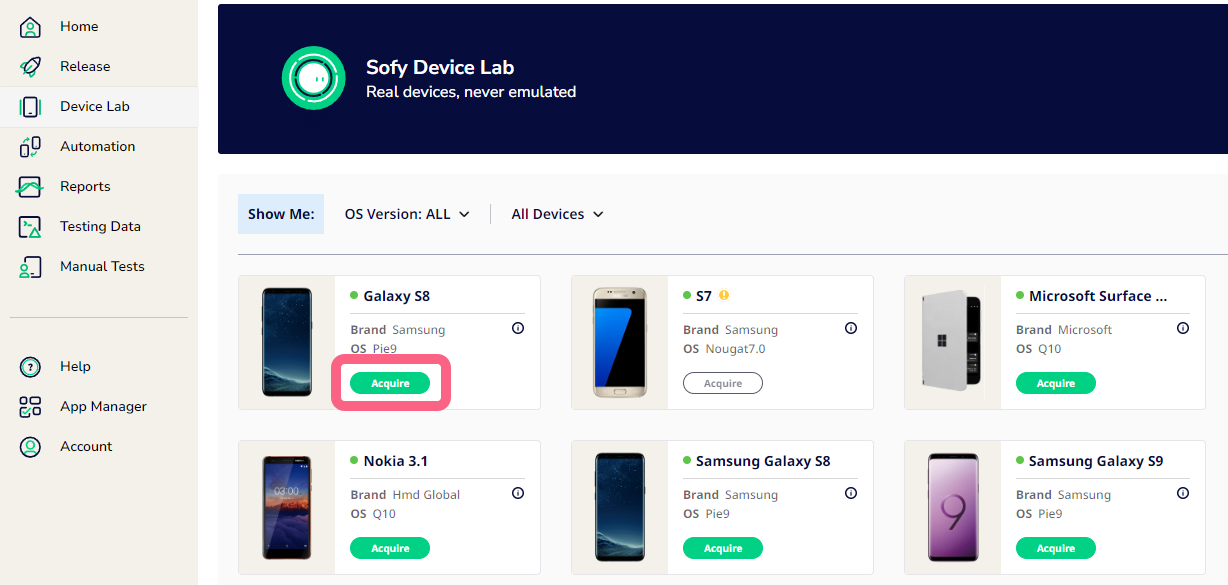
Locate the device you want to test, then select Acquire.Note: If a device is not available, the Acquire button will be grayed out.
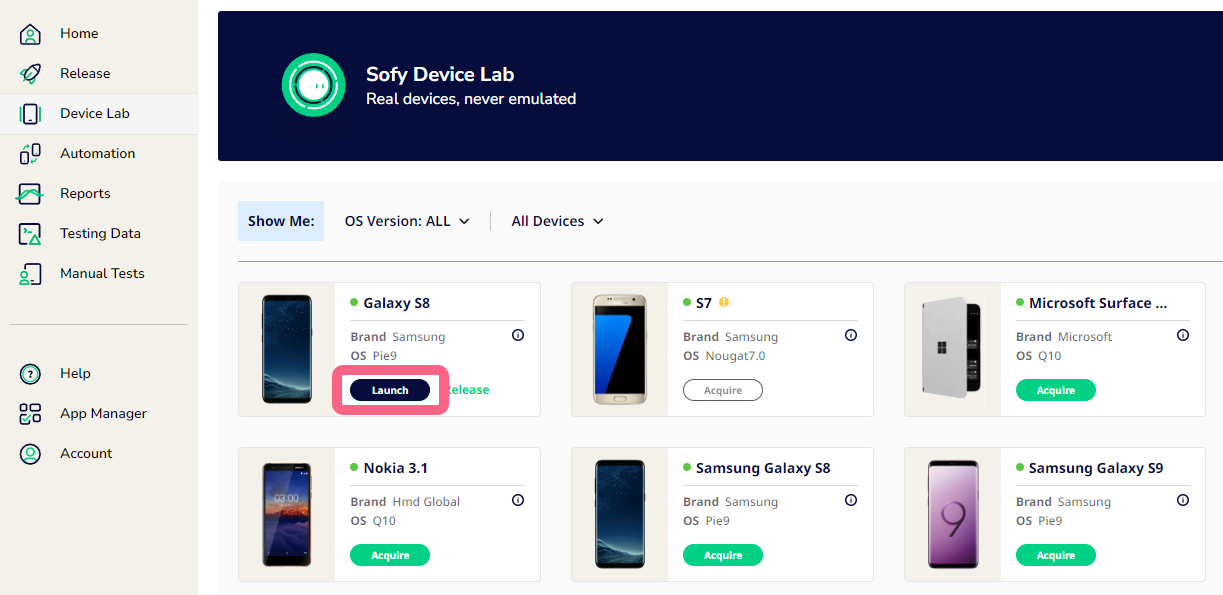
Click Launch to open the device in a new window.
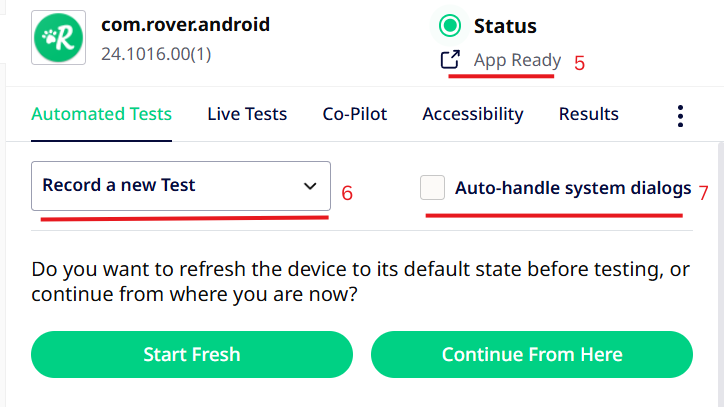
Wait for the app to install. You will see a modal with a status icon indicating that the app is ready.
The modal also contains a dropdown that allows you to choose between "Record a new test" and "Execute an automated test". By default, the former will be chosen.
Check the Auto-handle system dialogs box to allow Sofy to automatically handle any system dialogs that pop up. If you wish to handle the system dialogs as part of your test case, leave this option unchecked.
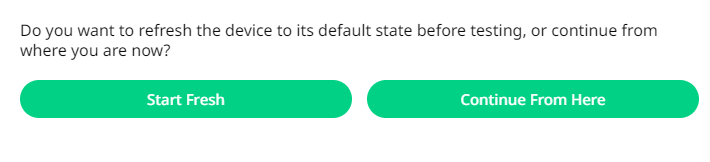
Select how you want to start the test:
Start Fresh: Refresh the device to its default state before testing.
Continue From Here: Record the test from the current state of the app.
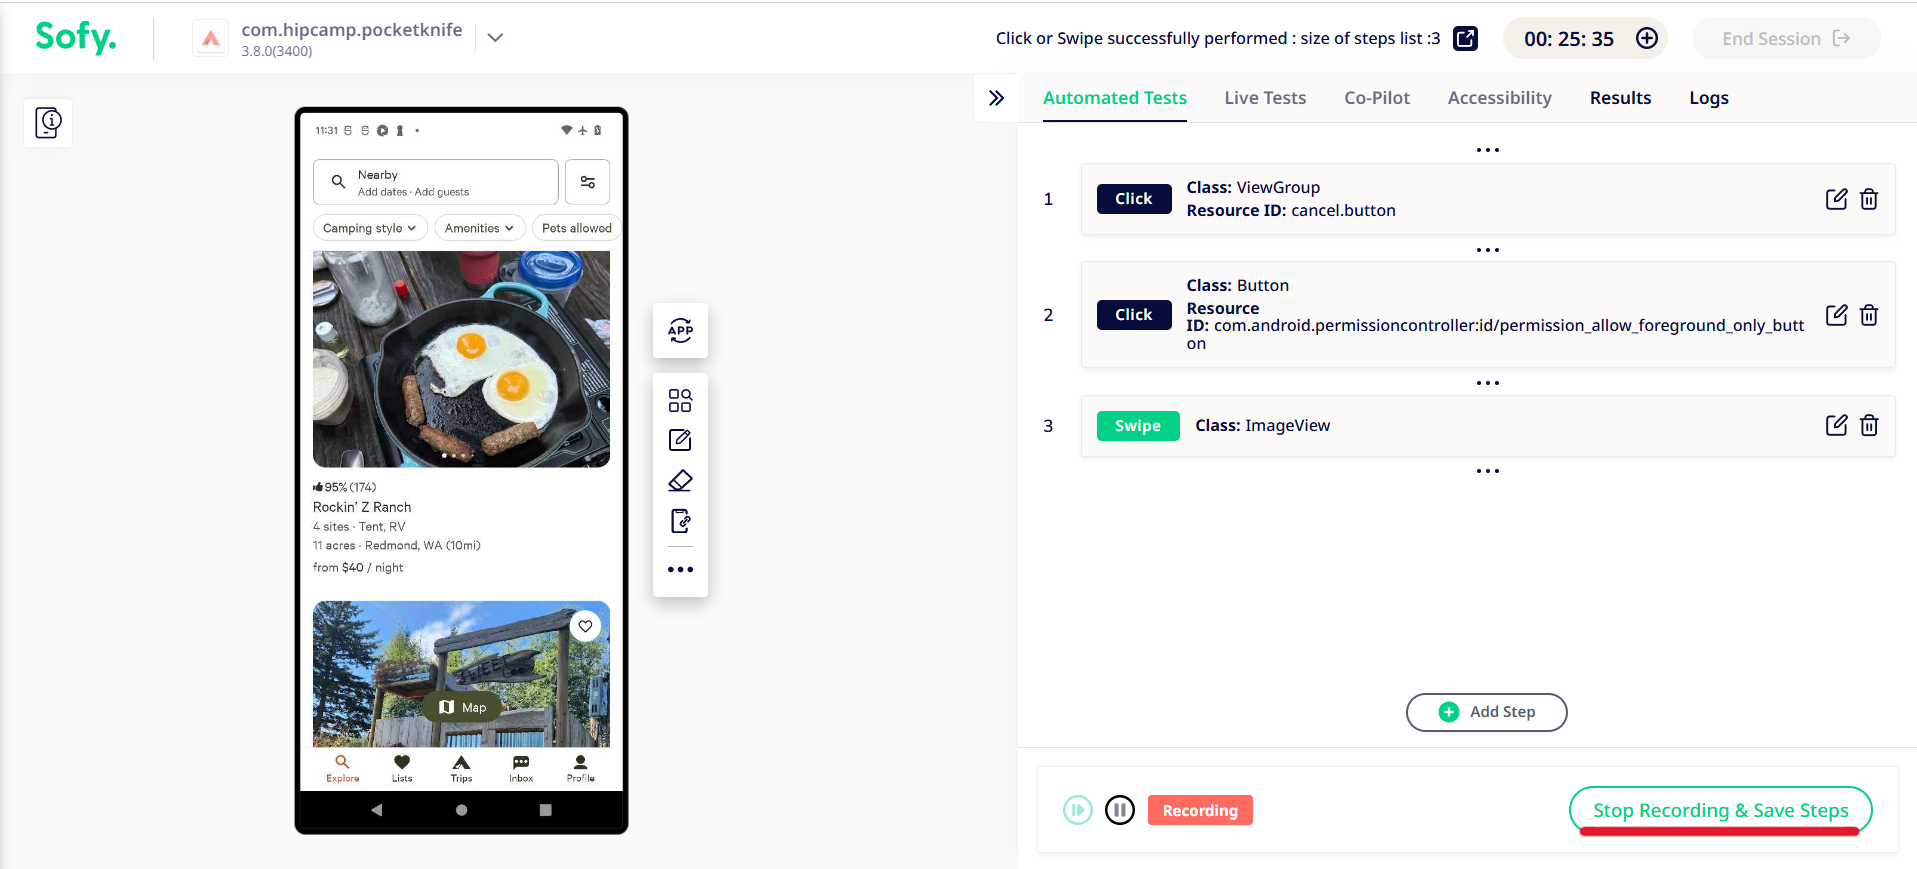
Interact with the device on the left and perform the desired actions in your app. Each step will be recorded and listed on the right.
For any recorded step, you may edit or delete it.
Once you’re done recording your steps, click Stop Recording & Save Steps at the bottom of the page.
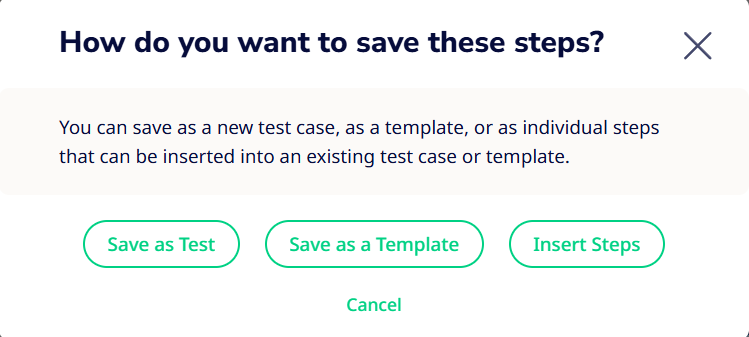
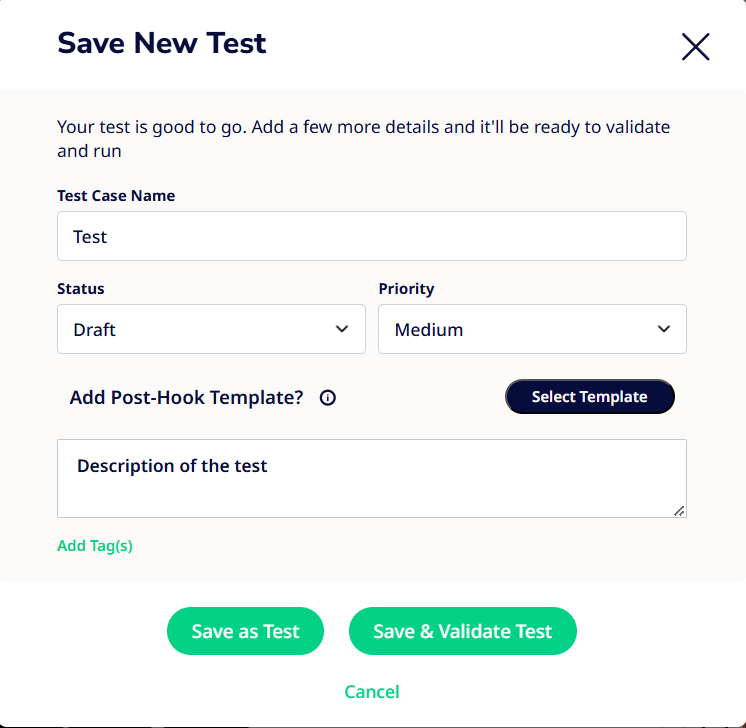
You can choose to Save as Test, Save as a Template, or Insert Steps (If you chose Continue From Here in Step 8). In this walkthrough, we are saving as a test.
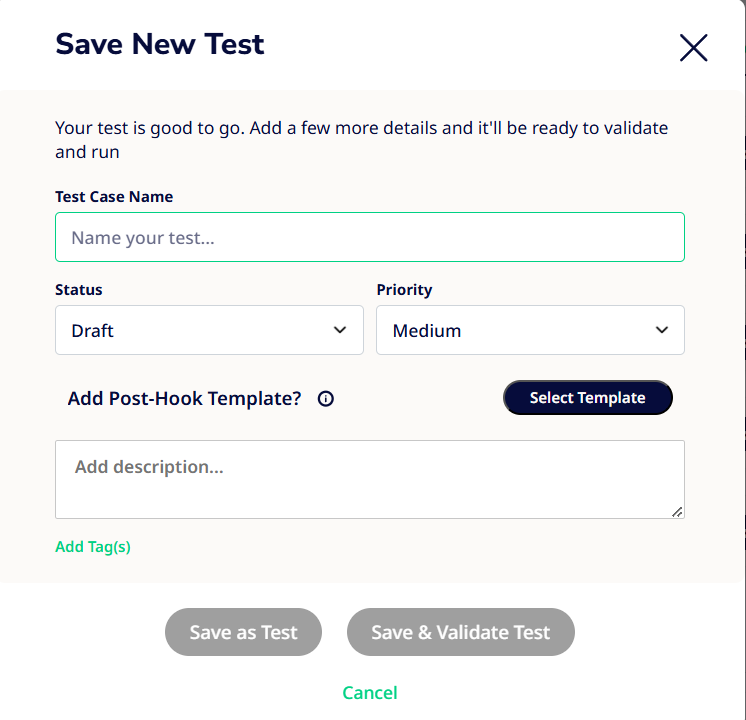
You can name the test, choose status (Draft/Ready), Priority(Low/Medium/High), add post-hook templates, and text description and tags for your ease of review and organization.
Choosing Draft status when you are saving a newly authored test helps you keep track of tests that you have validated to schedule vs those that still require further validation.
You can Save as Test or Save & Validate, the latter of which is a powerful feature that will immediately begin validating your recorded test.
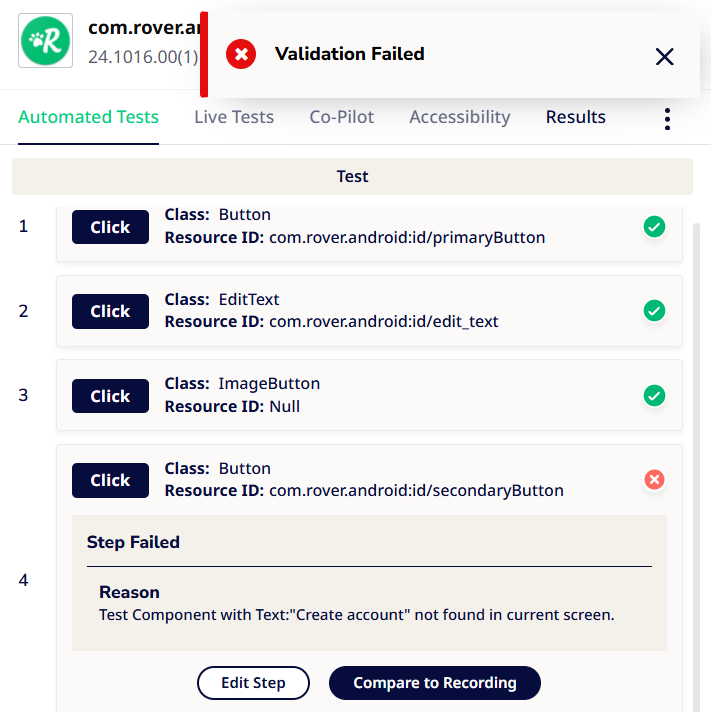
Upon clicking on Save & Validate, Sofy will start playing back your test to validate it. The recording will playback on the device’s screen to the left, while you see the step details on the right side.
If your test fails during validation, the execution will immediately halt and provide you with the reason for failure as well as the ability to tweak the test, using a combination of Compare to Recording and Edit Step before re-running it.
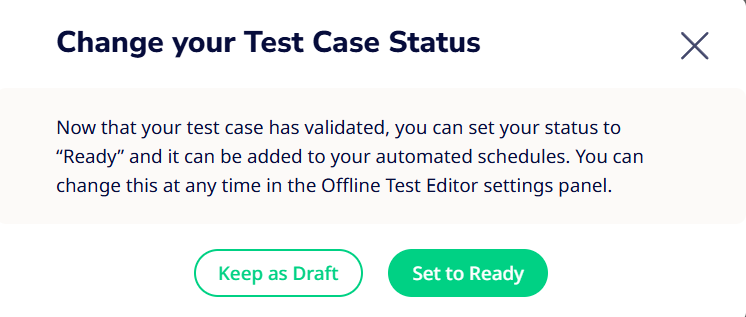
On a successful validation, you can choose to record a new test if you are not satisfied with your current recording, or you may exit validation at which point you can change your test case to Ready.
You can find your saved tests under the Automated Tests tab in the right panel.