Adding a Visual Match to a Test Step
Visual Match allows you to override and fine-tune your click target in automated test steps. When enabled, you can draw a new bounding box around the element you’d like Sofy to select during test playback.
Visual Match is best used in the following cases:
- When the XML path for the element is difficult to detect, such as
- when an element is hidden under a popup or
- when the elements on the screen are not uniquely defined based on best practices.
- For WebView components and visual components such as barcodes
1. Running the same automated test on devices that have largely different screen sizes. For example, the test was recorded on a mobile device and played on a tablet.
2. The custom bounds are drawn around an area that might contain noise. For example, if your app has a white background and the element you’ve selected has a lot of white space, the system might mark those white spaces as redundant, resulting in a false positive or incorrect match.
3. When there might be multiple elements on the screen which are visually identical, like many checkboxes on one screen or other similar-looking items such as similar-looking flags of countries
4. Element-matching which relies heavily on color, like a comparing two identical logos having slightly different color combinations
Adding a Visual Match to a Test Step
- Log in to your Sofy account.
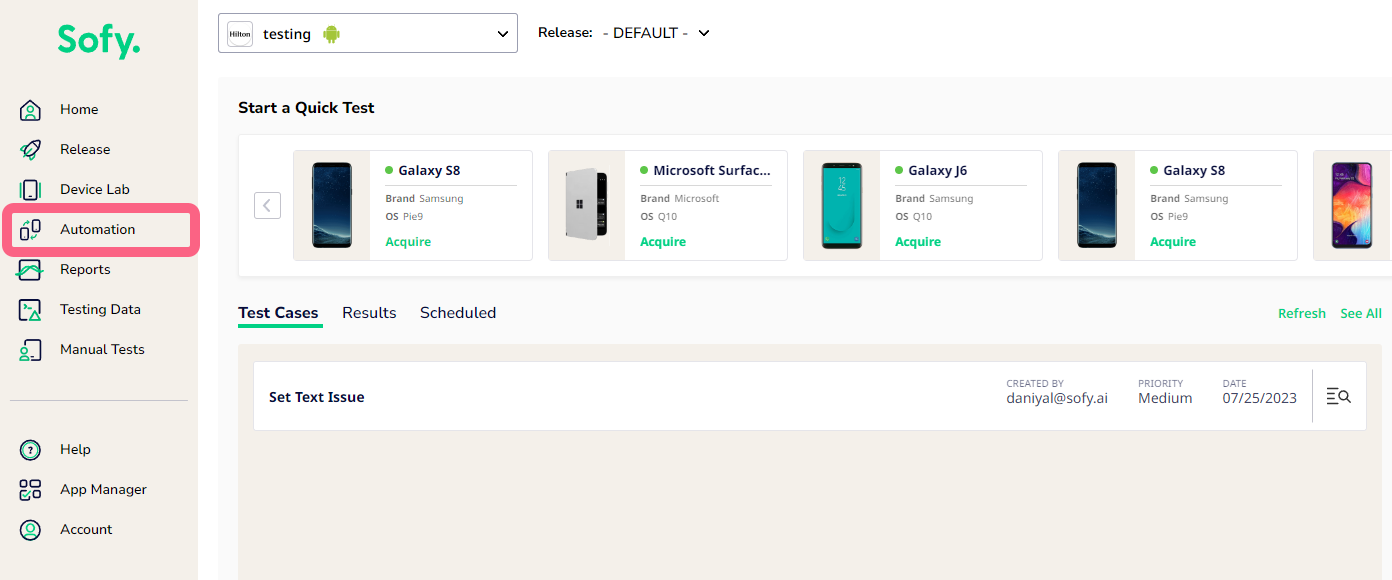
- Go to Automation from the left navigation bar.
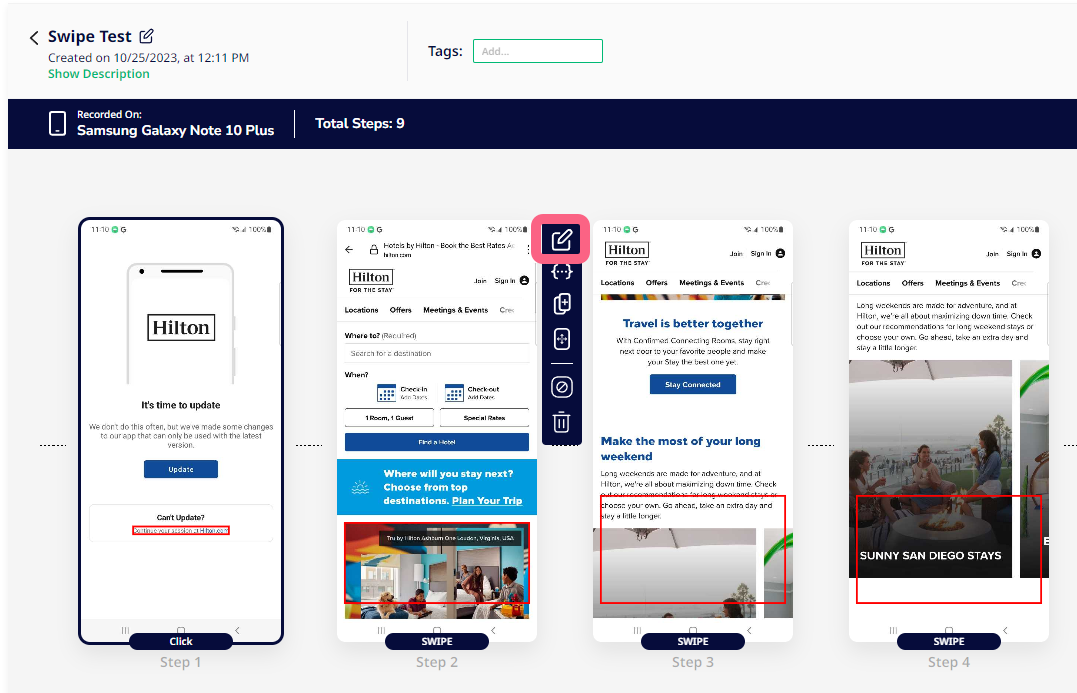
- Select a test case.
- Find and select the step you want to add a Visual Match override to, then select Edit from the popup.
- Select the Visual Match tab.
- Click the toggle to enable Visual Match.
- Check the Create Custom Bound box.
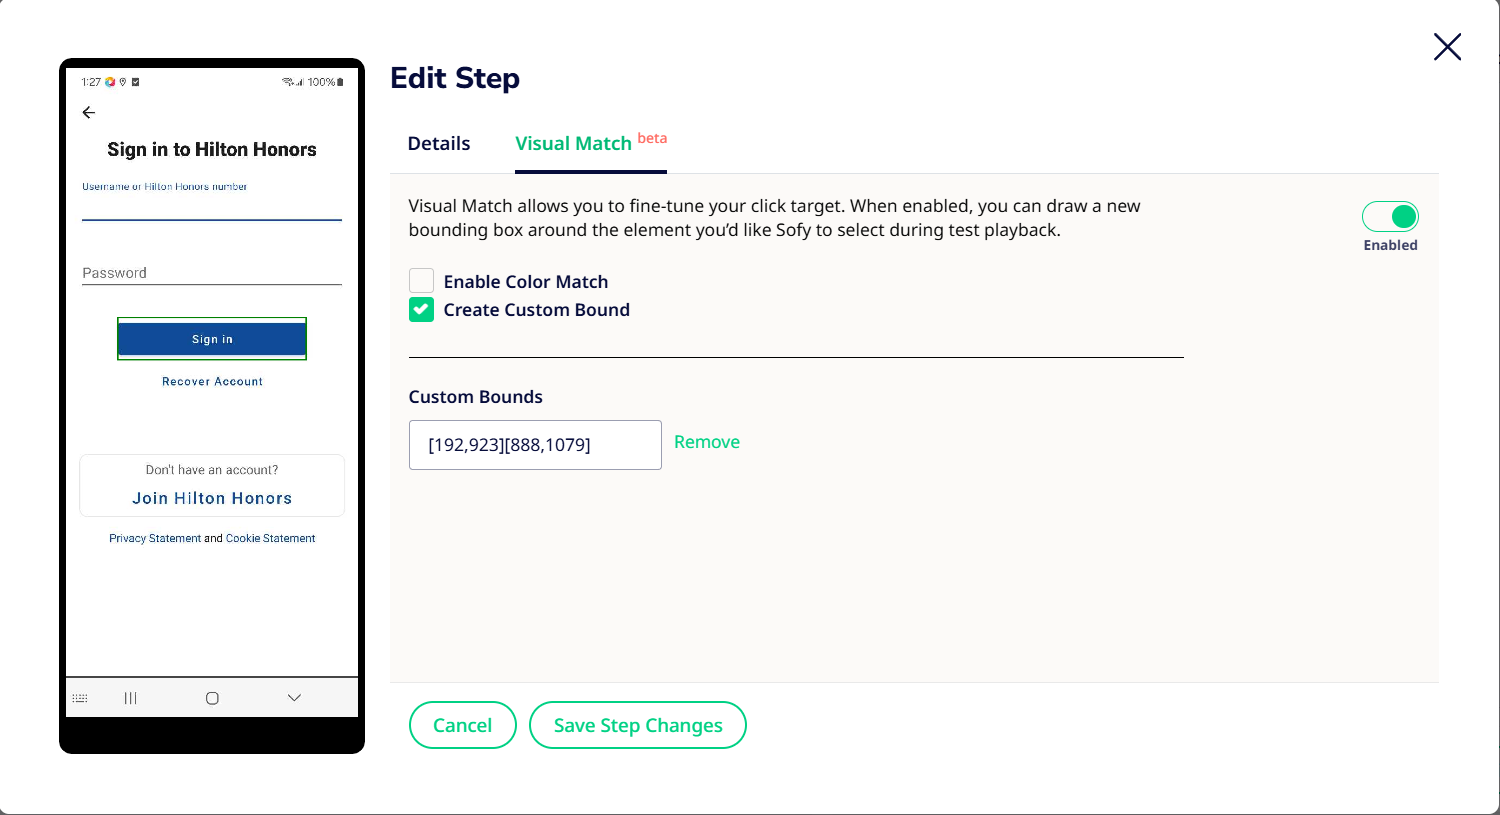
- In the image to the left, click and drag your mouse over the desired area to create a green custom-bound box. The box coordinates will appear in the Custom Bounds field.Note: Ensure that you’re as precise as possible when drawing the custom-bound box.
- If you need to redo the custom bound box:
- Click and drag your mouse again to remove the original box and create a new one.
OR - Click Remove next to the Custom Bounds field, then draw your box again in the image.
- Click and drag your mouse again to remove the original box and create a new one.
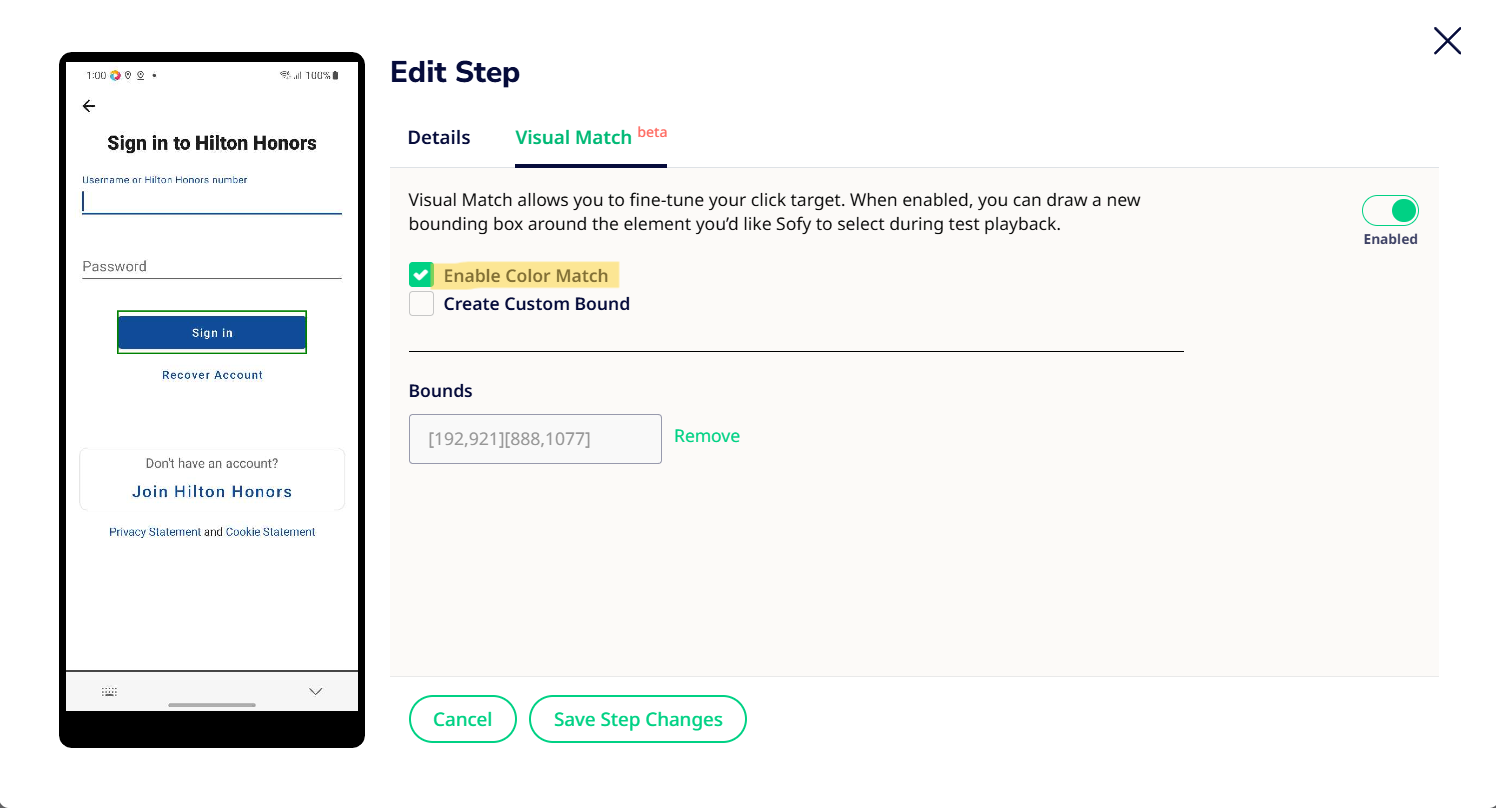
- You may also choose to enable Color-Match. Color-Matching allows you to verify color-specific differences (Scroll down for Best Practices on using Color-Match).
- Once you’re done, click Save Step Changes.
- Select Save Test in the top right-hand corner to finish saving your changes.
Note: You can’t use both a Manual Override and a Visual Match override in the same step.
Adding Visual Match During Validation
You no longer need to exit the lab to use Visual Match!
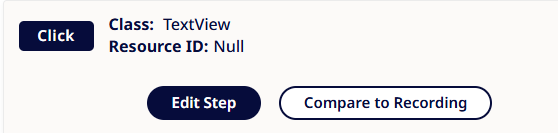
- You can do this during validation of a test case in lab. Simply click on Edit Step as shown below
- The Edit Modal will pop up with various options, including Visual Match, just as you see in offline mode.
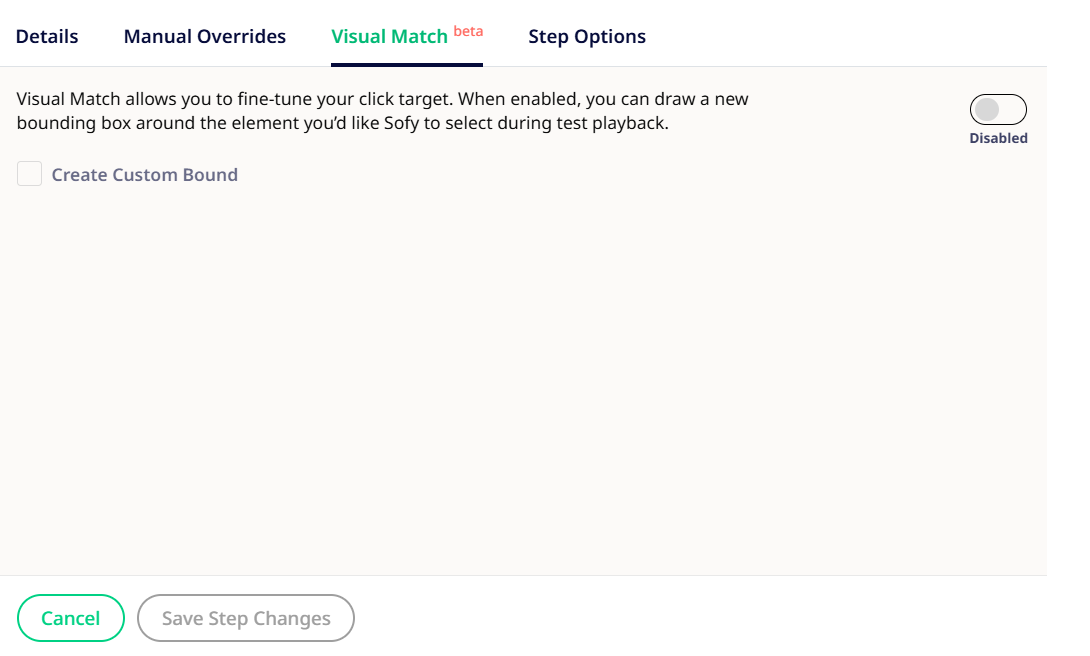
You can then enable Visual Match for your use case.
Best Practices for Color Match
To ensure accurate and reliable results when using Color Match or the Color Similarity Check, follow these best practices:
- Use Color Check Only Where It Matters
Enable Color Check only for scenarios that demand visual precision, such as brand color validation, UI consistency, or marketing screens.
Keep it disabled for functionality-focused tests where color variations don’t affect outcomes — for example, when testing dark mode, accessibility themes, or dynamic layouts.
- Define Tight and Relevant Bounds
When a component includes large white or transparent padding, the algorithm may misinterpret the true color area.
For example, buttons or icons surrounded by white padding can cause Sofy to incorrectly assess the color region.
Best Practice:
Draw custom bounds closely around the specific component or color area you want to validate.
Avoid including extra white or transparent regions — this ensures the algorithm focuses solely on the intended color area and improves detection accuracy.
- Validate Thresholds for Your Use Case
Default color similarity thresholds generally work well, but if your app uses gradients or subtle hue variations, fine-tune the threshold to strike the right balance between sensitivity and tolerance.
A lower threshold allows minor differences (ideal for natural rendering variations).
A higher threshold enforces stricter matching (ideal for brand or design-critical tests).
- Avoid Testing Dynamic or Contextual Colors
Exclude elements whose colors change dynamically — such as hover states, animations, or mode-dependent styles (e.g., dark/light themes). These variations can produce false mismatches and reduce test reliability.