Adding a Swipe Until Action to a Test Case
When testing an app, the number of swipes needed to find an element can vary by device and screen size—often causing tests to fail.
The Swipe Until condition solves this by letting you specify that the system should swipe up or down until the target element is found.
You set a maximum number of swipes to avoid endless scrolling.
The test will pass if the element is found, or fail if the swipe limit is reached.
This makes your tests more reliable across different devices without extra manual adjustments.
Adding a Swipe Until Action to a Test Case Step
- Log in to your Sofy account.
- Select Automation from the left navigation bar.
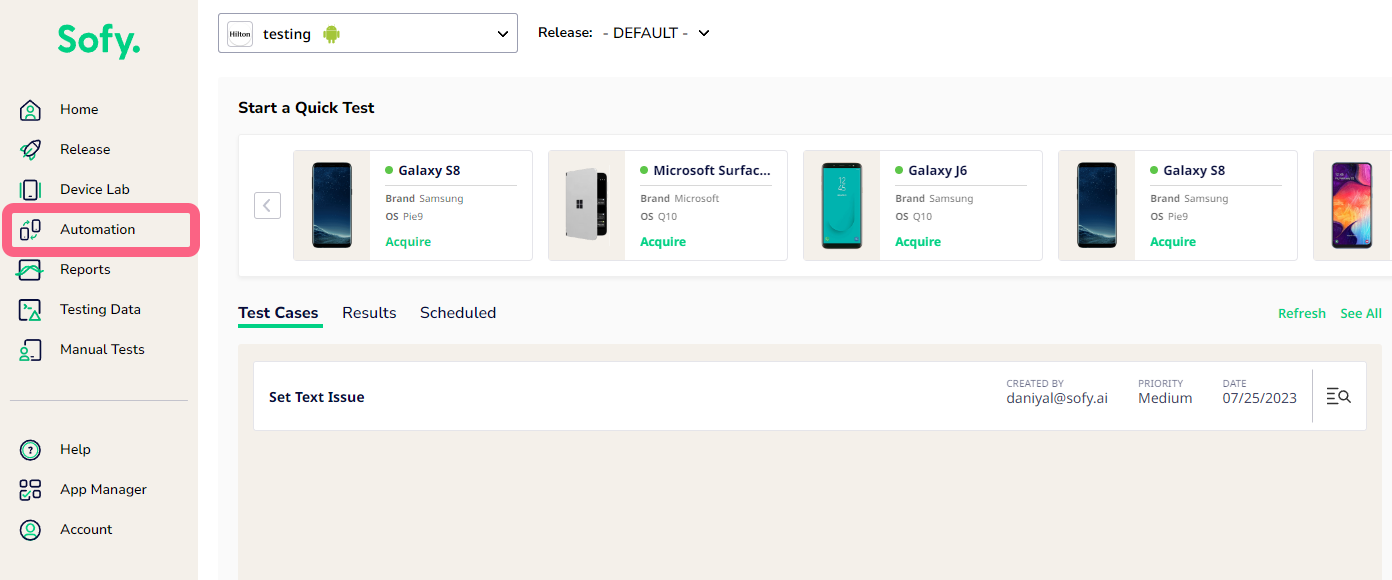
- Search for and select a test containing Swipe actions.
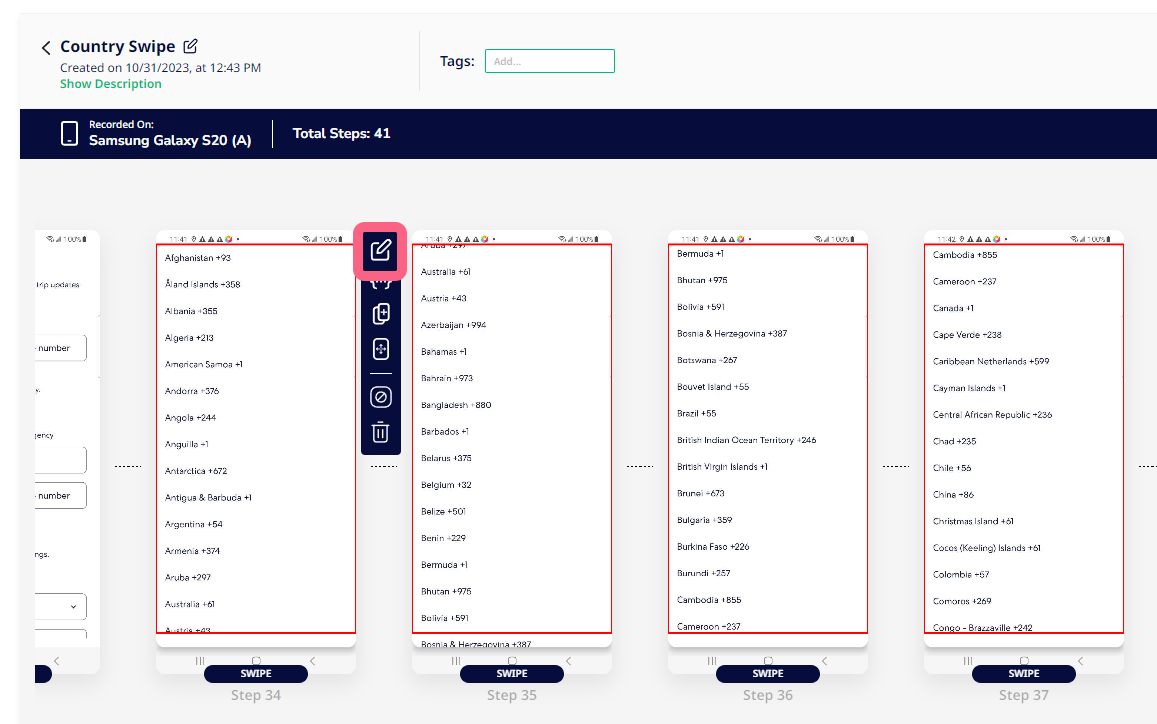
- If you have multiple steps that contain a Swipe action, click on the first step and select Edit from the toolbar that pops up.
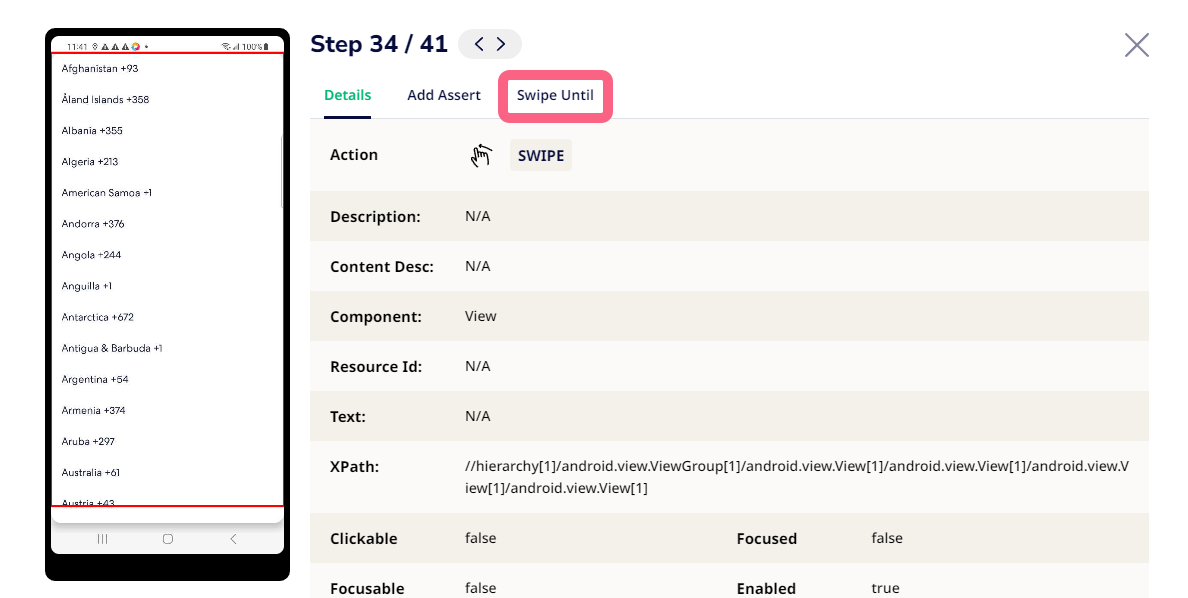
- Navigate to the Swipe Until tab.
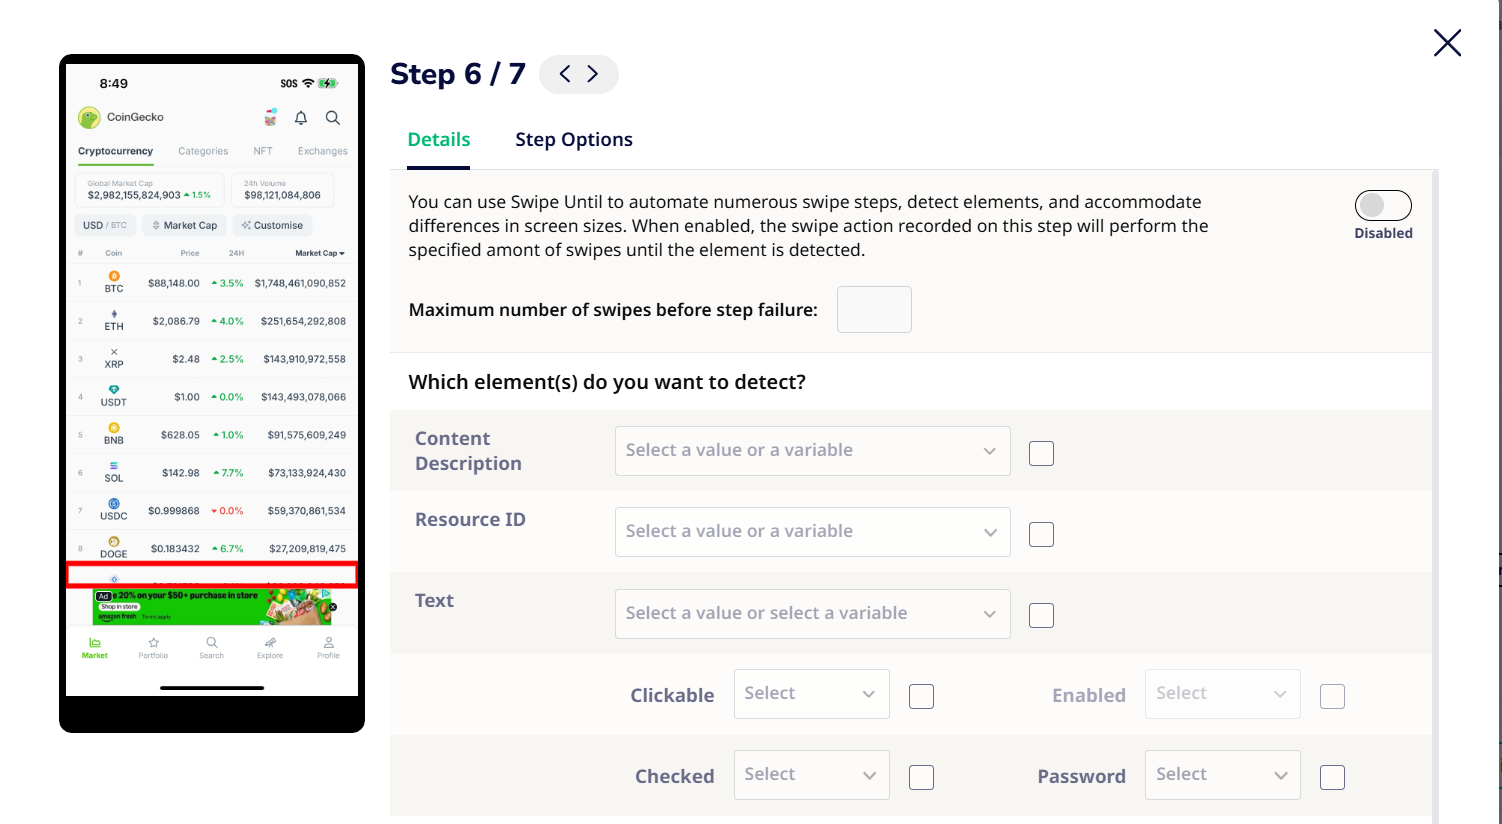
- Toggle on the Swipe Until setting to enable it.
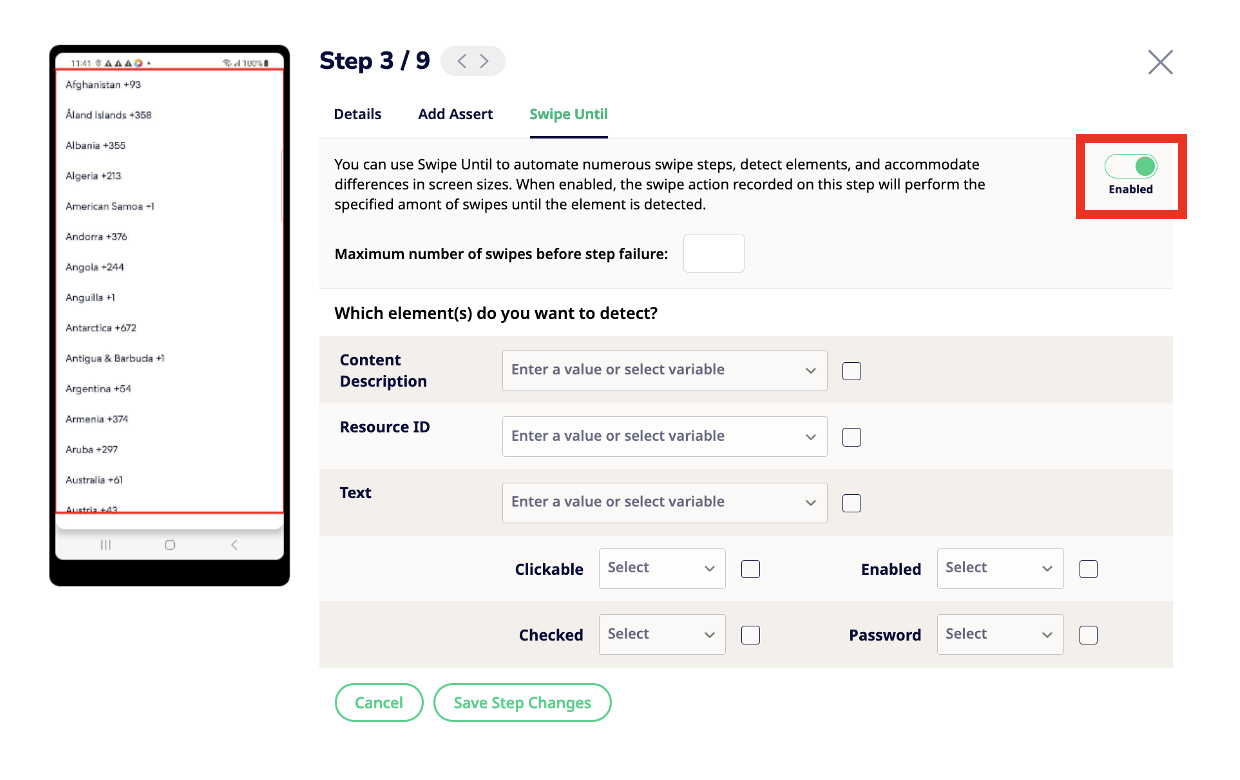
- Under Which element(s) do you want to detect?, check the box next to each of the following settings to configure them:
- Maximum number of swipes before step failure: Enter the maximum number of times you’d like the system to swipe through the app to find the specified element. If the system reaches the max number of swipes before finding the specified element, the test will fail.
- Content Description: Check the box and provide a textual description of a user interface (UI) element you’d like the system to find and select. For example: ImageView or ImageButton.
- Resource ID: Check the box and provide a resource ID of the element you’d like the system to find and select.
- Text: Check the box and provide the text you’d the system to find and select. If Text is the only indicator you are specifying for the step, you may leverage Sofy's OCR to improve the Swipe execution while ensuring screen-readiness check. Alternatively, you may continue using only XML capabilities if you do not enable OCR.
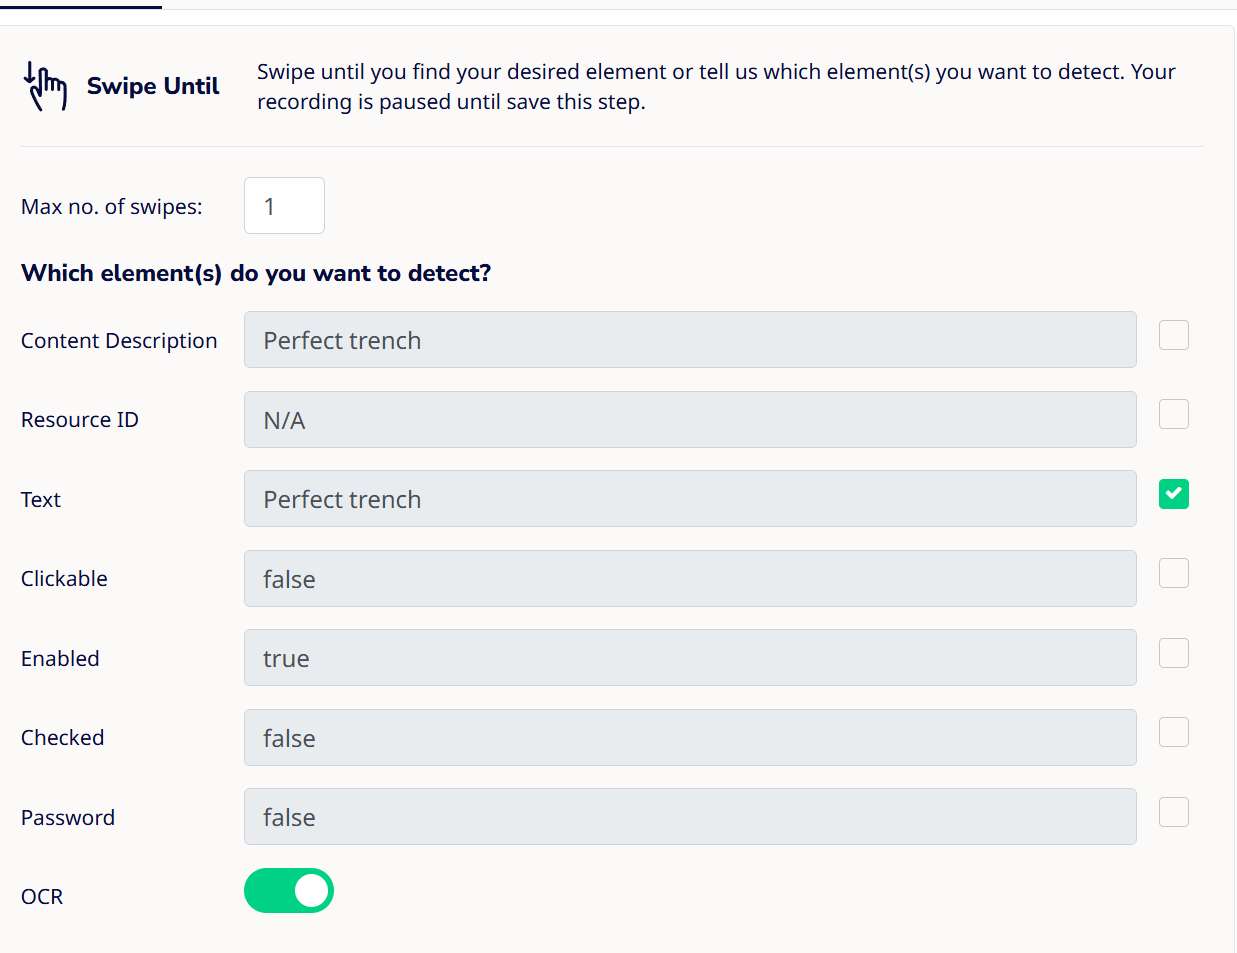
- While OCR is powerful, it does have some constraints:
- Multi-line text: OCR may not always recognize phrases that span across multiple lines.
- Dynamic layouts: If an element appears in varying positions (e.g., the Order Anything tile that may show up in the first or second row), OCR may not consistently read it as a single phrase.
- Visual complexity: Highly stylized fonts, overlapping text, or low-contrast text may reduce recognition accuracy.
- Best Practice: For more reliable results, choose shorter, single-line text labels (e.g., Pharmacy, Order, or Anything).
- Clickable: Check the box and indicate if the element is clickable.
- Checked: Check the box and indicate if the element is a checkbox.
- Enabled: Check the box and indicate if the element is an enable or disable setting.
- Password: Check the box and indicate if the element is a password setting.
- Select Save Step Changes. The Swipe step will change to a Swipe Until step.
- If you have multiple Swipe steps, disable or delete the remaining Swipe steps in the test case.
- Once you’re done making changes to the test case, select Save Test in the top right-hand corner.
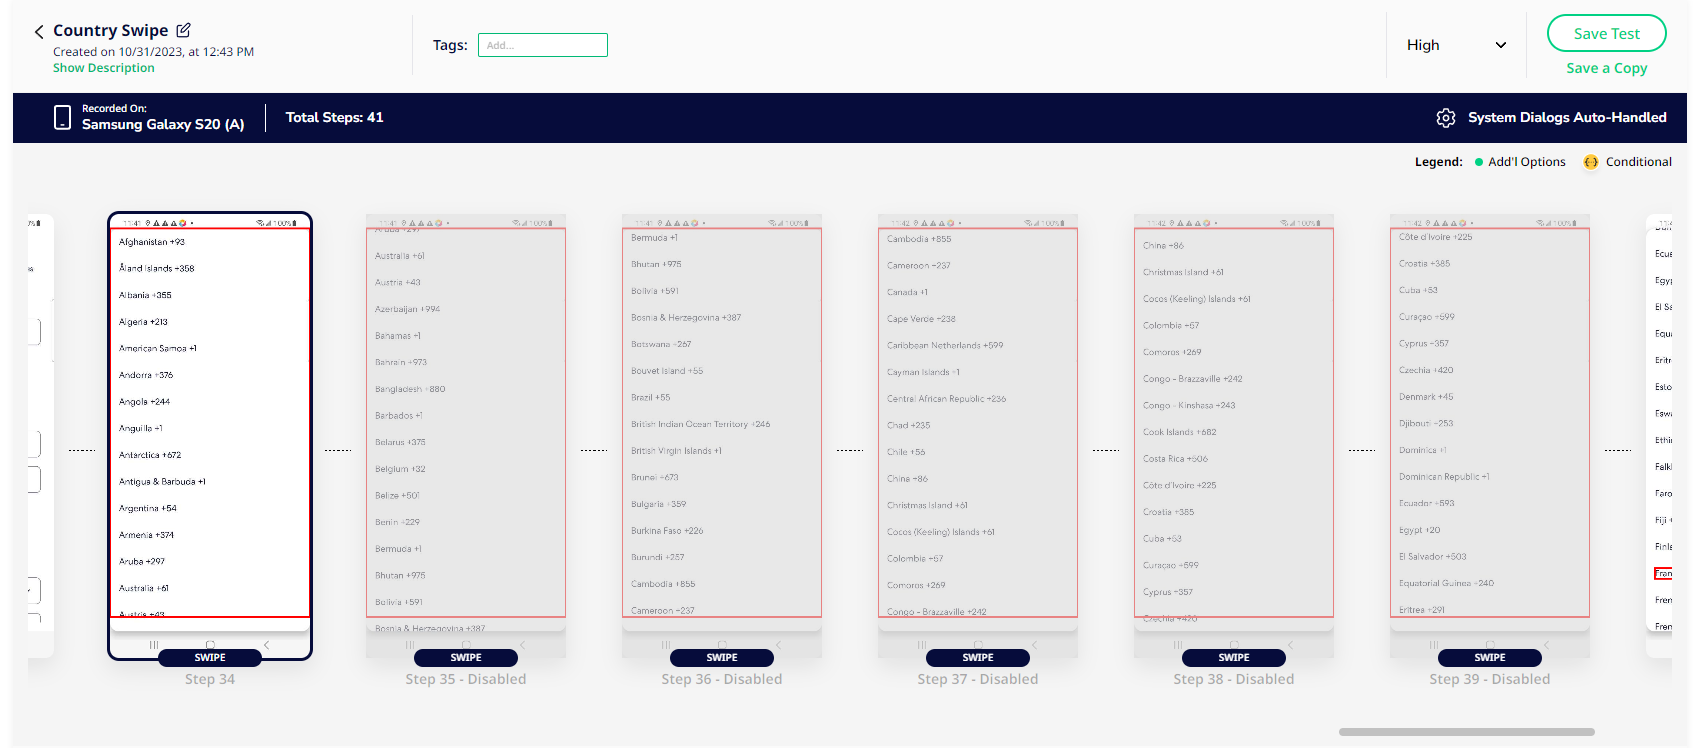
Example: Swipe Until Country Name is Found
Let’s say you’re testing the signup function of your app, and you have a step that requires the user to scroll through and select a country from a list. On one device, it may take five swipes to select the desired country, while on another device with a larger screen it may take only three swipes.
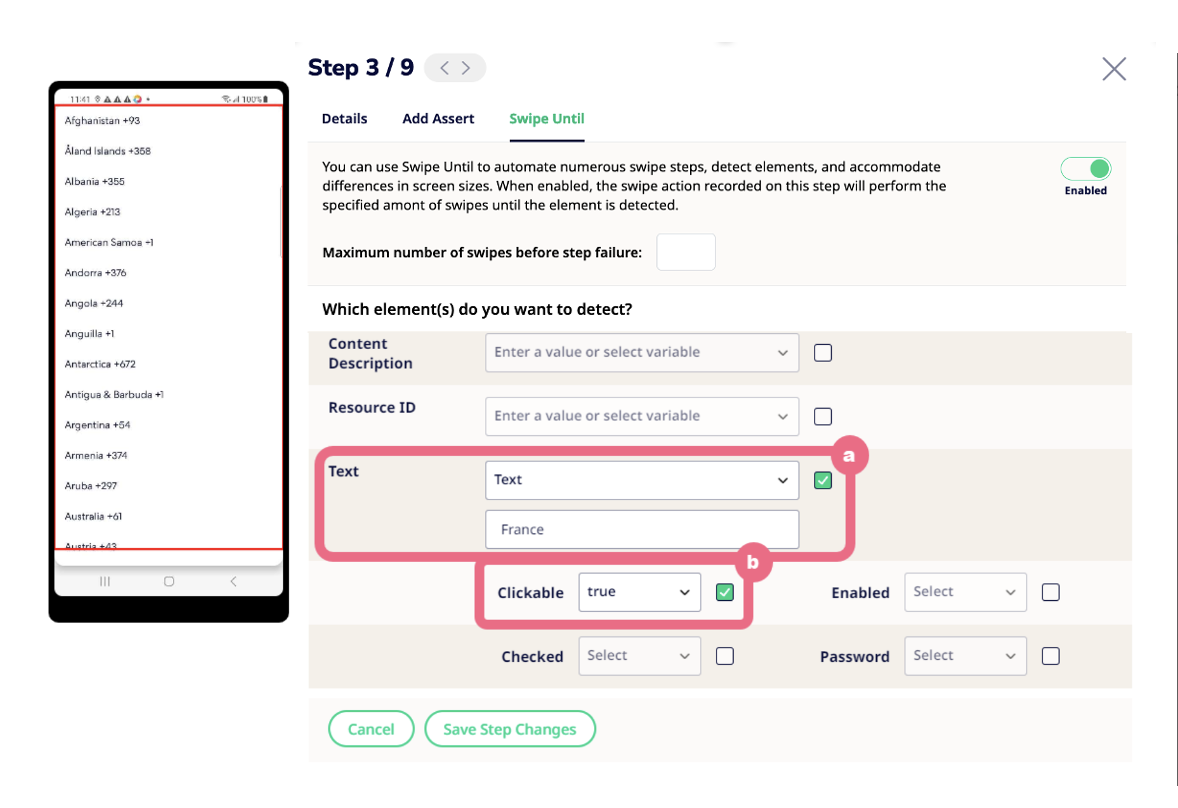
Instead of creating a separate test case for each device and screen size, you can enable the Swipe Until action to the first Swipe step and configure the following settings:
- Text: Check this box, select Text from the dropdown, and enter the name of the country you want the system to find and select.
- Clickable: Check this option to indicate that the element you want to find is clickable. Then select True from the dropdown.
Don’t forget to disable the remaining Swipe steps in the test case!
Adding Swipe Until to your Test in Sofy Lab
You no longer need to navigate to Offline Edit Mode for a test case to use Swipe Until - You can add Swipe Until while recording and validating now!
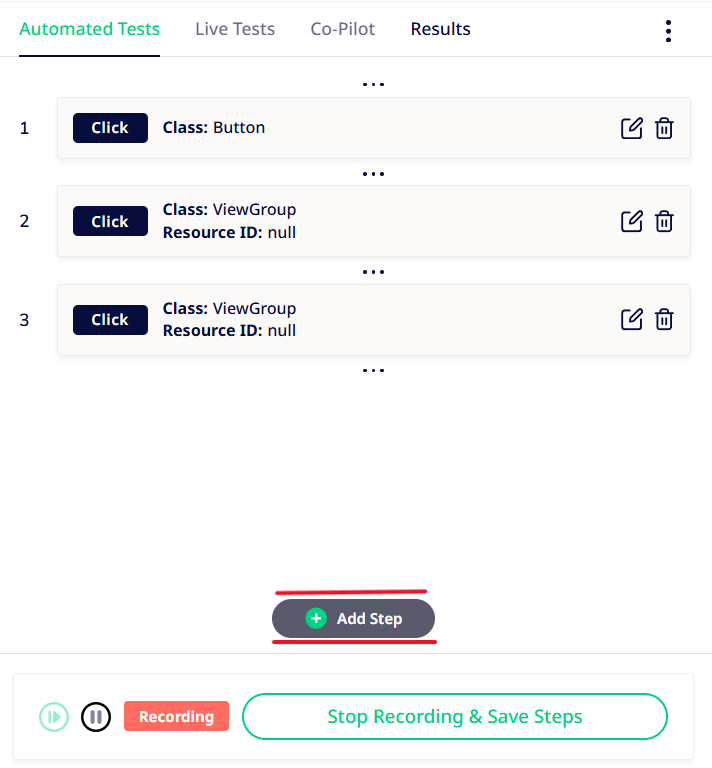
- During Recording, you can add Swipe Until by first clicking on Add Steps as highlighted below at the bottom of the screenshot:
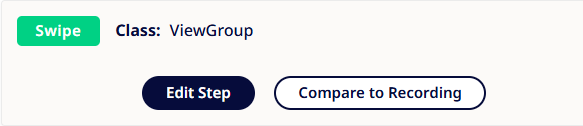
- You could also add a Swipe Until enhancement during validation.
- Click on the Edit Step for the Swipe action
- Click on the Edit icon highlighted in red

- You will then be able to enable Swipe Until and use it as needed.