Automate API Testing
In the world of DevOps, we’ve got tools for API testing and integration, different tools for automation and we’re not going to lie it gets overwhelming. Considering this, we at Sofy brainstormed over how we can be the one-stop solution for all your testing needs. On a mission to replace coded automation, we’ve decided to take it one step further. We’ve added API support in our one of a kind automation feature.
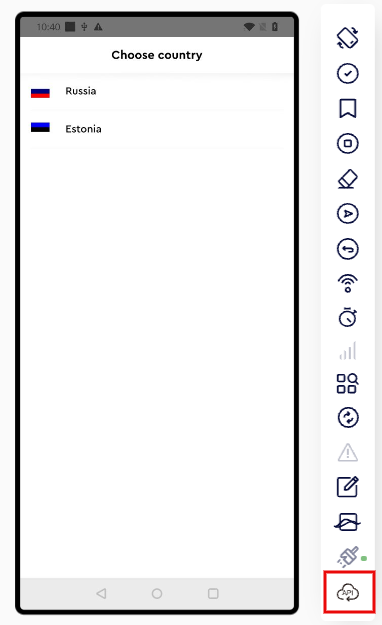
Once you’ve initiated the recording sequence, look at the bottom of the device pane to look for this icon,
This icon fires up the latest API integration feature. This is going to trigger a modal that’s going to look something like this.
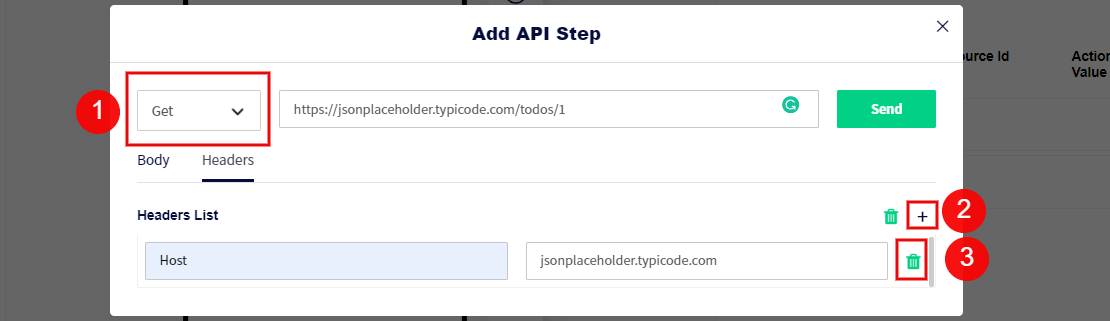
- 1. This is where you can select from a variety of API calls such as GET, POST, PUT and DELETE.
Once you’re done selecting your desired method you can proceed to add a URL in the text field next to it. Before we hit that ‘Send; button, however, we have to add the necessary headers to ensure our call works seamlessly.
- 2. You can click on the ‘+’ icon to add your header, fill in the ‘Header Name’ field on the left and the ‘Header Content’ Field on the right. You’re all set now!
- 3. However, if you wanted to delete a header and don’t have time to press that backspace key for long you can always click on the trash can icon and get rid of it altogether.
For calling methods such as POST you can also add a request body in JSON format and then press that shiny ‘Send’ button. Once you do here’s what you’ll be seeing.
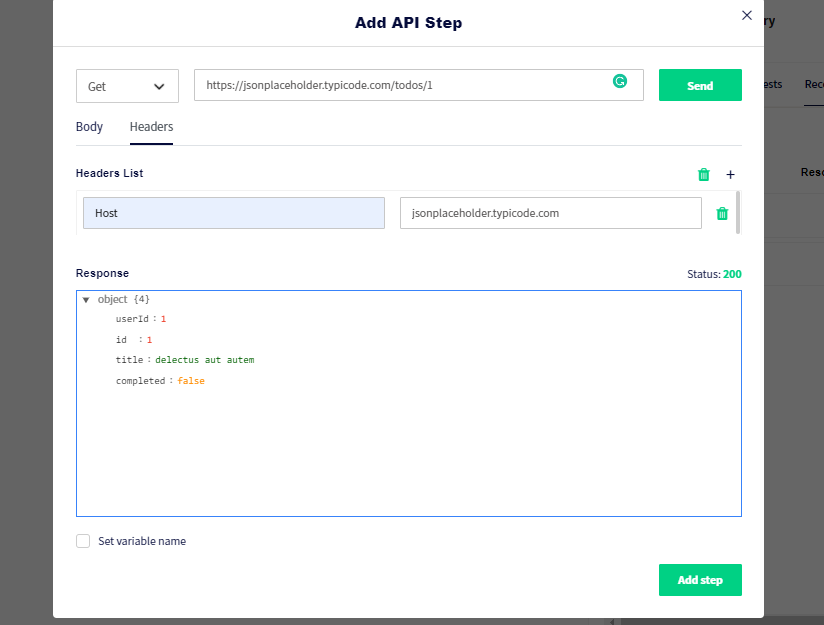
You can also view the status of your request in the top right corner of the ‘Response’ field along with the response itself.
Add Return API call step to your test cases
Let’s say you’re automating your application, and one of your test cases requires you to hit an API in order to complete an action, mimic a user interaction and move on, or even a case in which the API call in return generates a unique key that you need to use in order to move forward with your test case. Here’s where Sofy comes in. For normal API calls you can click ‘Send’ and be done with your day’s work and if you intend on using a value from the response, you can proceed to check the ‘Set Variable Name’ check box at the bottom left of your screen.

1. You can add in a custom variable need you can identity later on and a variable you can store your API response in.
2. You can enter the JSON path yourself or let Sofy take care of it for you by simply clicking on any one of the key pairs or the object itself.
3. Once you enter your response or click on any one of the pairs in the response the value will be fetched for you to preview before you utilize it within one of your scenarios.
4. Once you’re done you can proceed to click on the ‘Add Step’ button. Upon clicking this button Sofy is going to store the value associated with the path into the variable named ‘Demo Variable’ which can then be utilized anywhere in your test case recording.
Upon playback, Sofy will dynamically hit this API again and store the updated value (If any) and utilize that during the recording process.