Editing automated tests, rename, save as

Open an Automated Test you would like to edit by selecting Automation in the right-hand sidebar.

Select the Edit Icon to edit any of your recorded Test Cases.

You'll see your Automated Test Case in Edit view. Here you can add tags, edit the name of your test, and save your test as a new name.
Editing Your Test
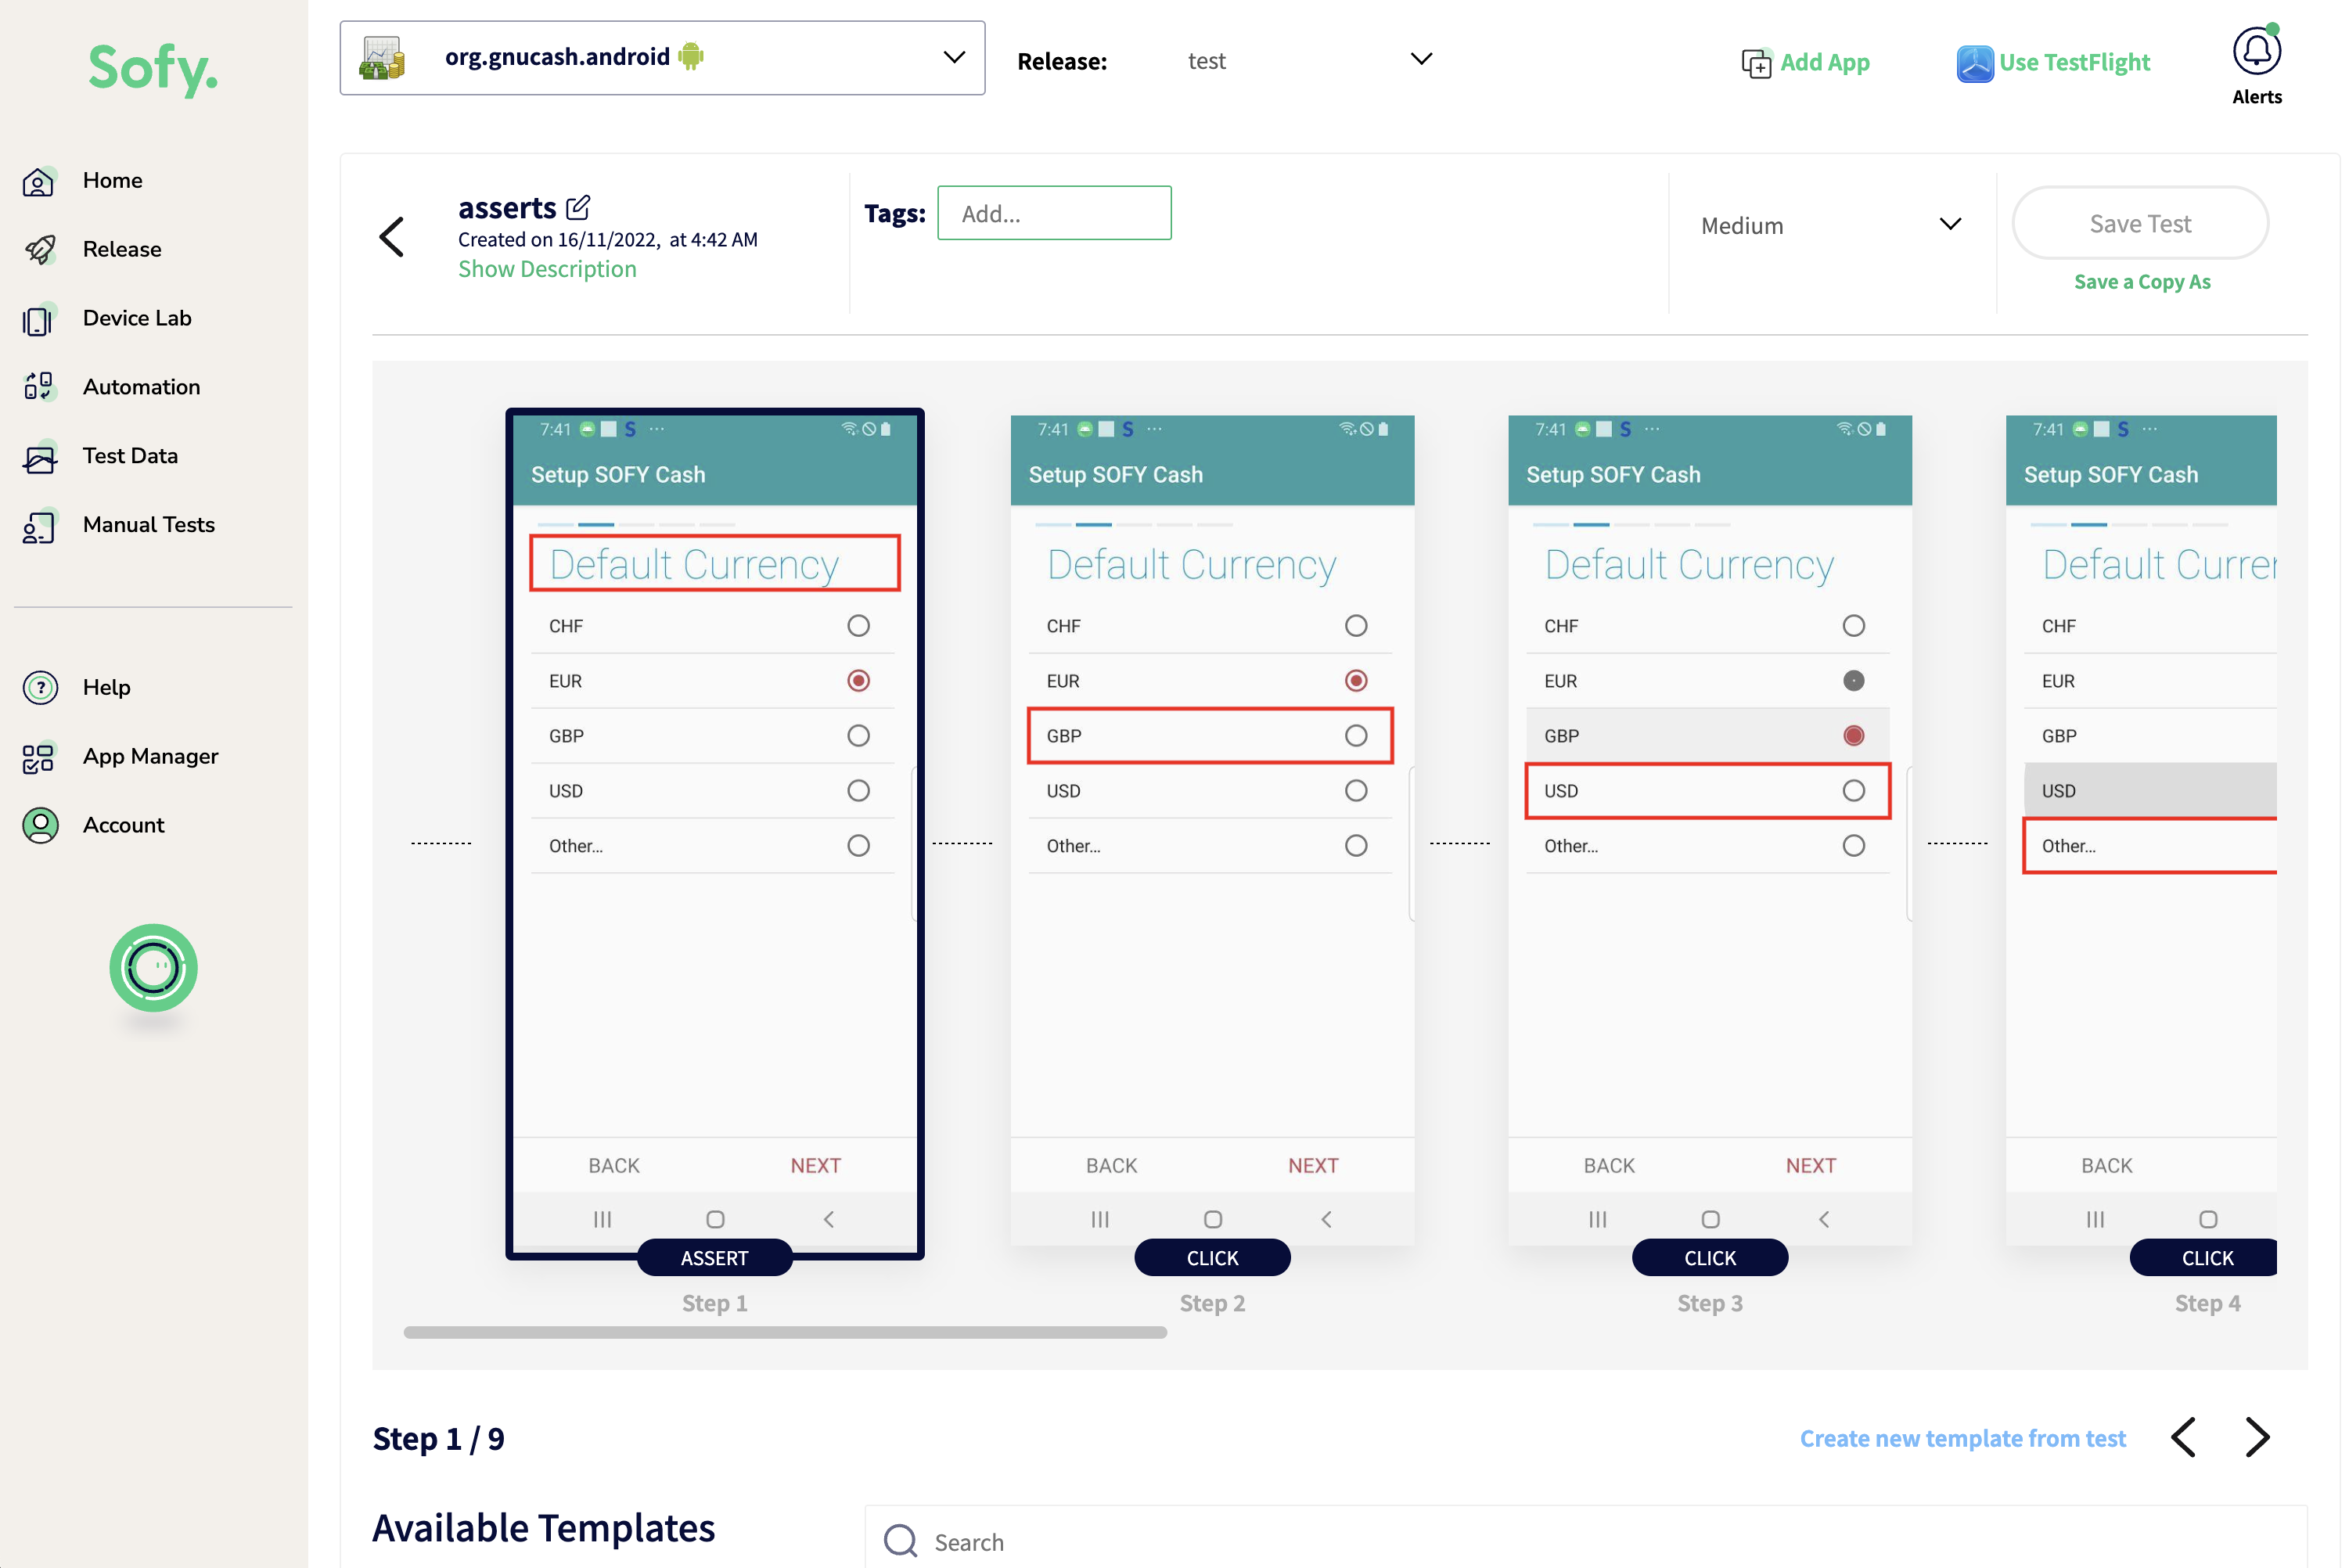
- You can edit your step or add asserts by clicking on any step in your test and selecting the Edit Icon from the menu.
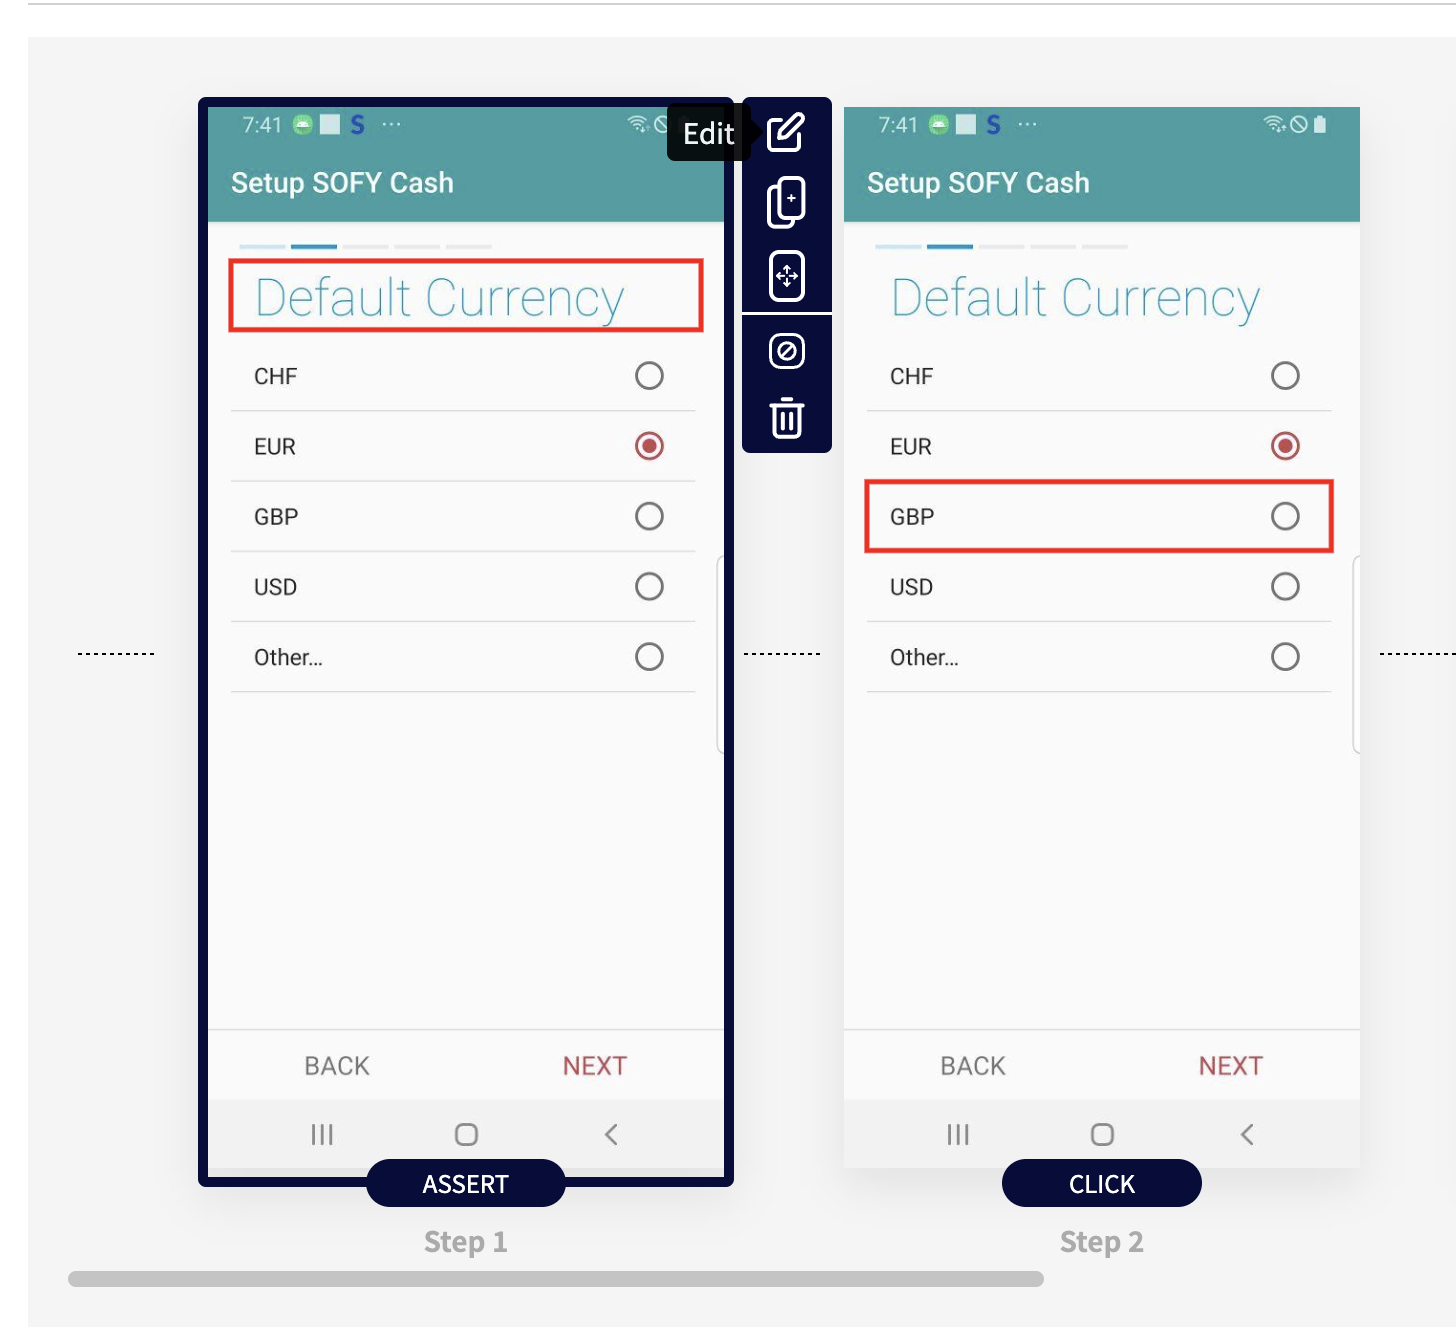
- This will launch the step in Edit Mode, where you can get details about the step, give it a description / notes, as well as add asserts on any element.
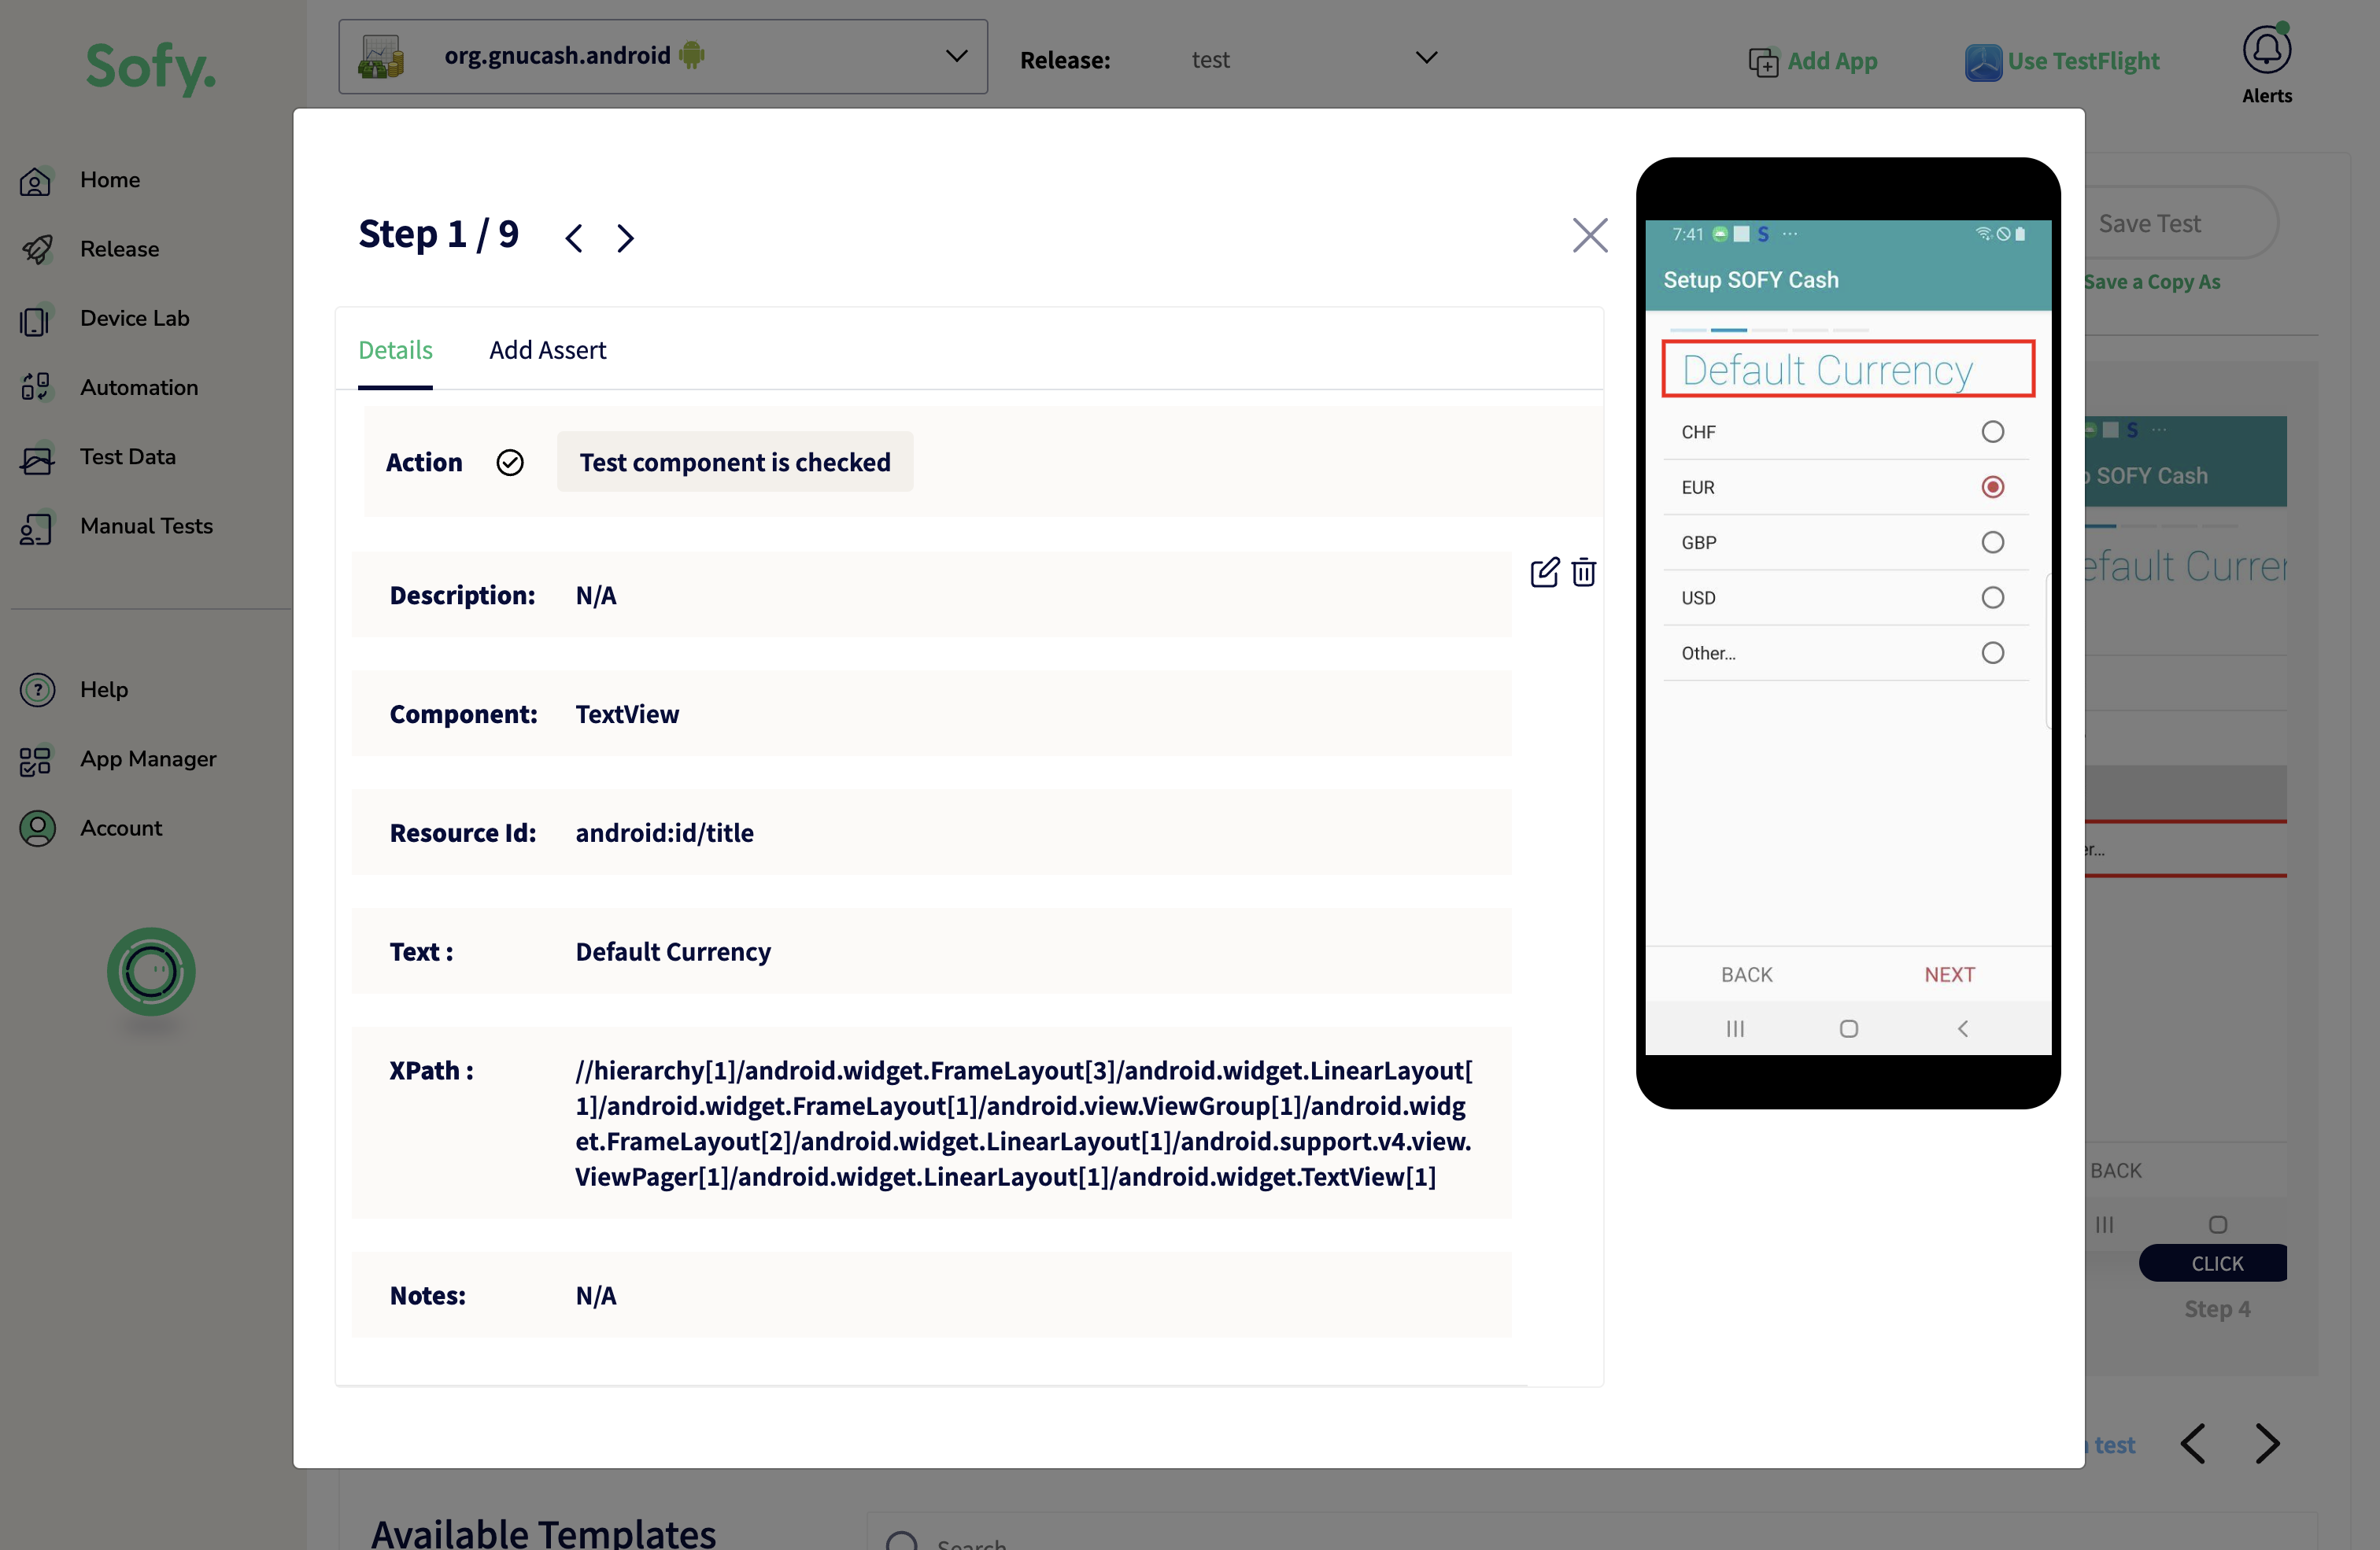
- Choose the element you'd like to add an assert to.
Introduction to Asserts (see more details here)
Asserts allow you to set conditions on any test step that you can use to know if your step is passing, failing, and other conditions.
- Choose the type of assert you would like to apply to this element (e.g. for text, use Test component has content, or for an image, use Test component is present). If your assert needs additional information, you'll be able to enter it after selecting the type of assert.
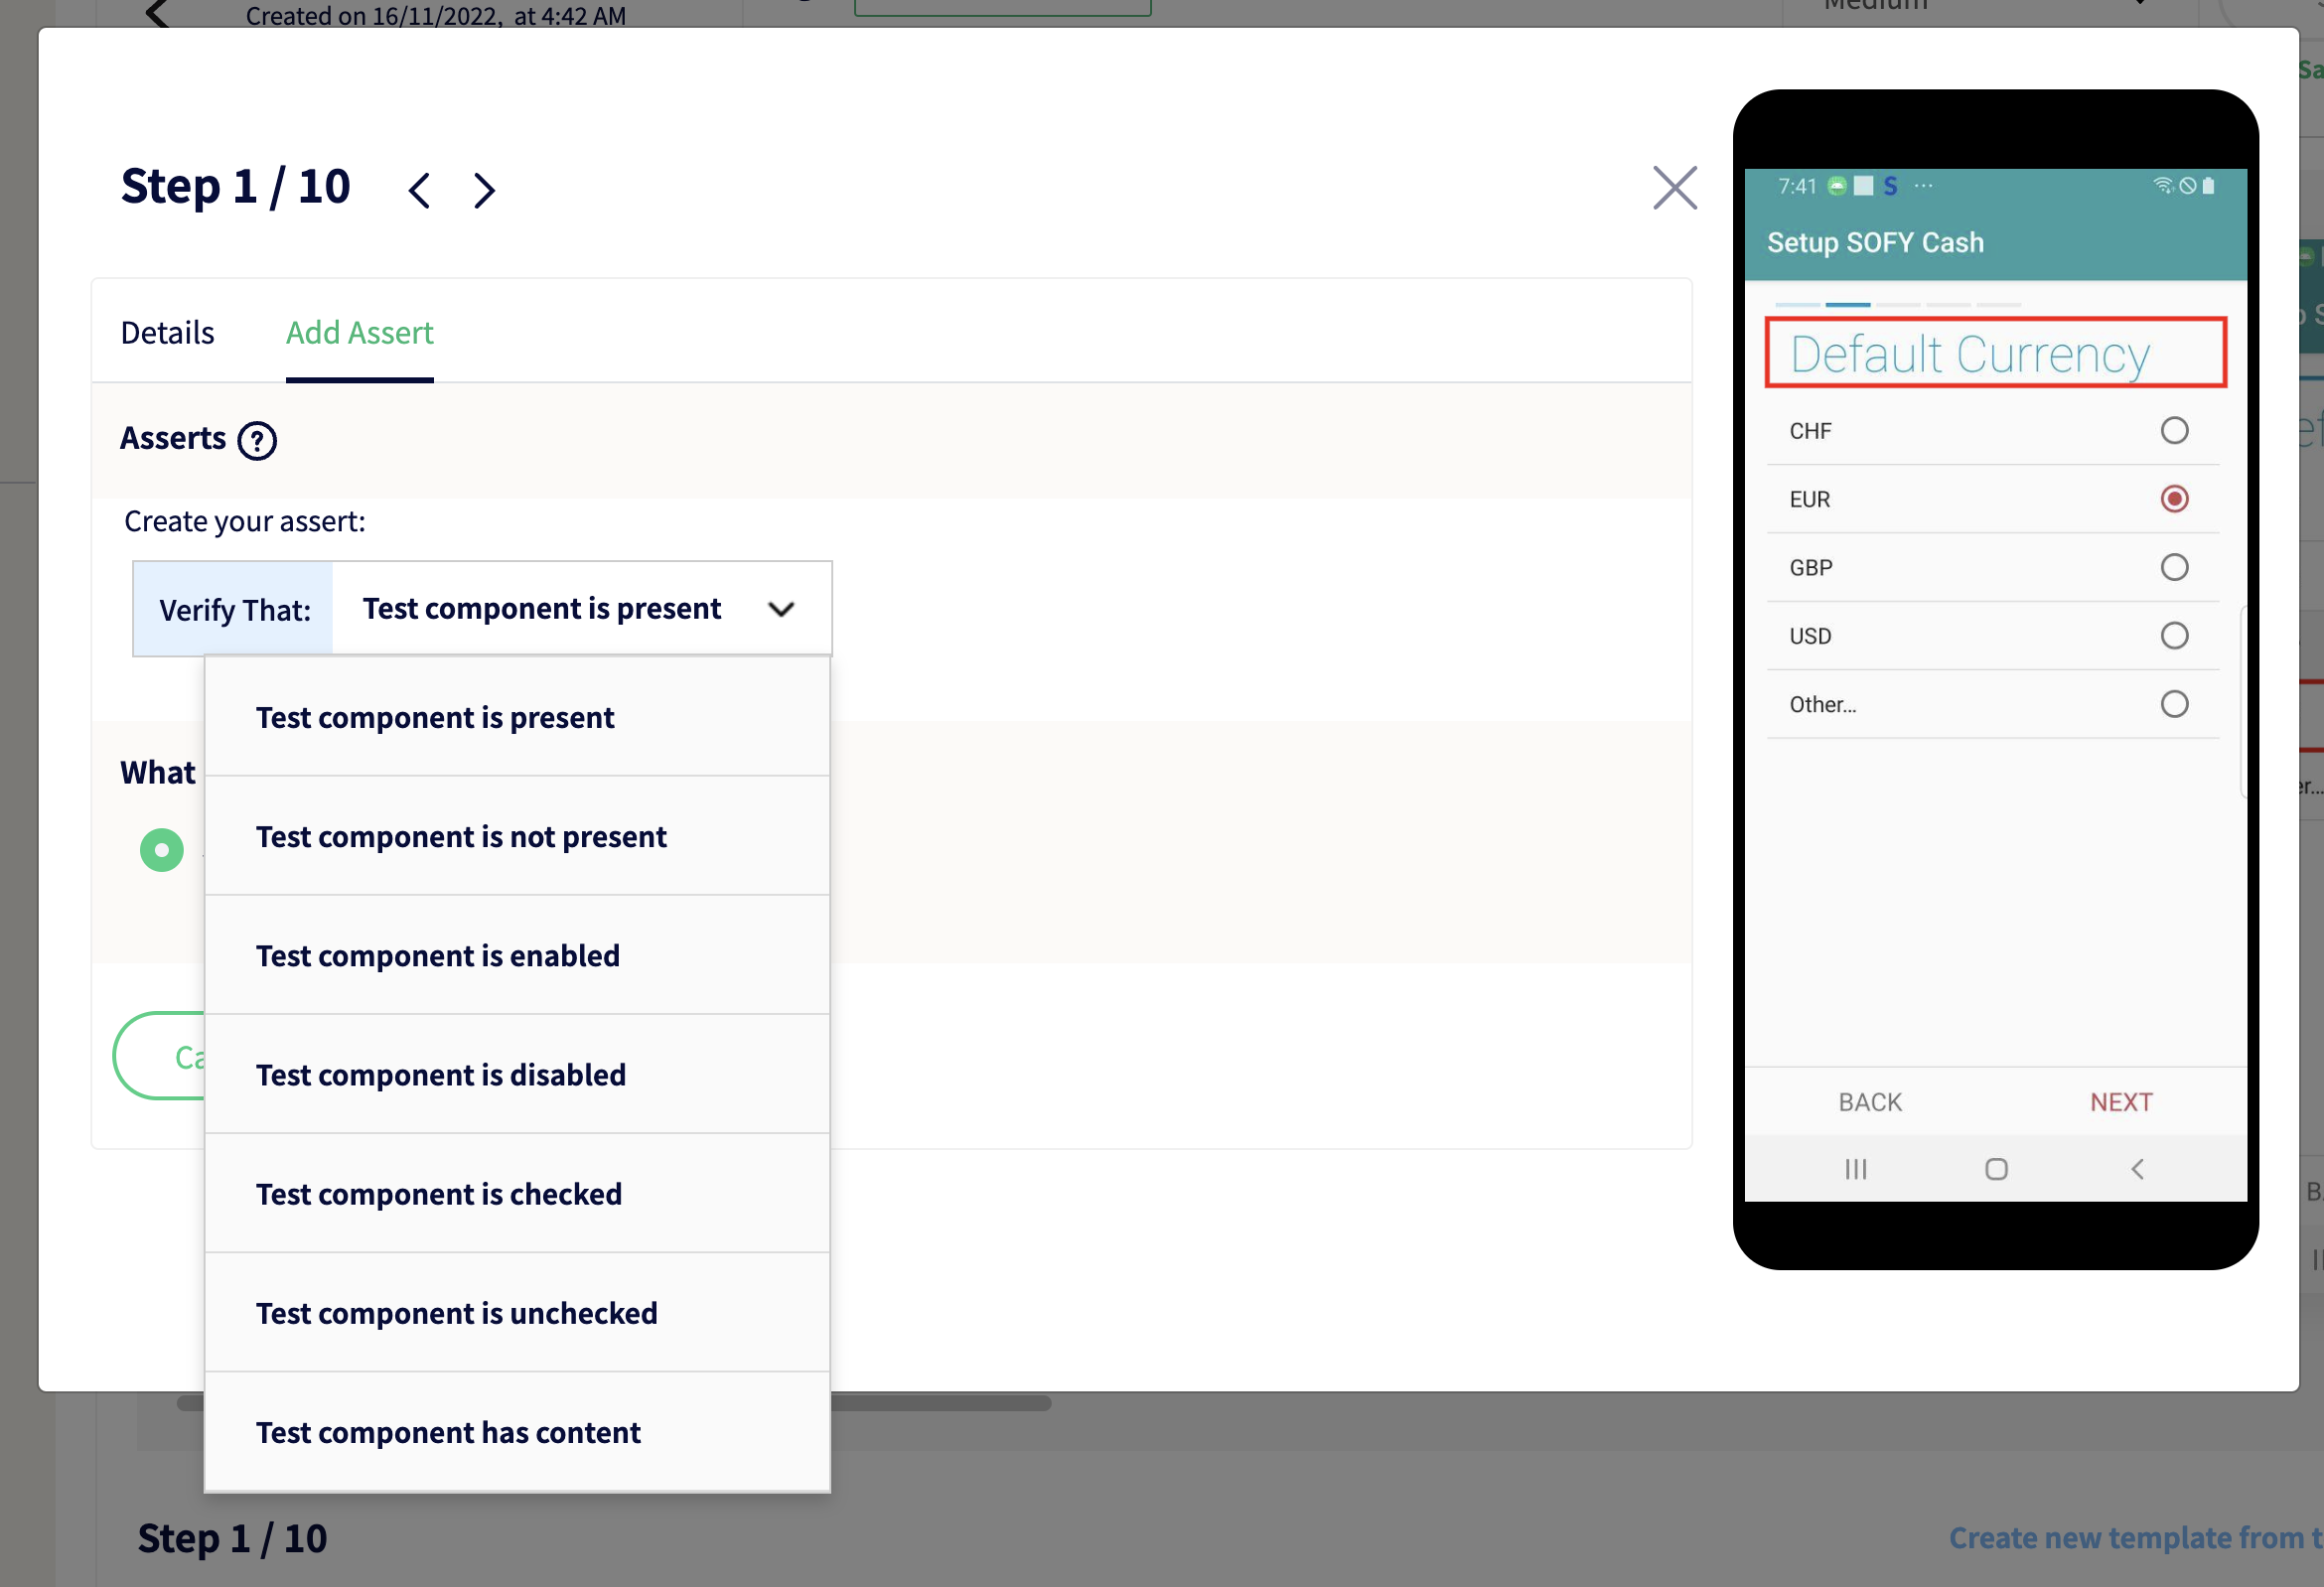
- For text asserts, enter the the text you wish to check against.
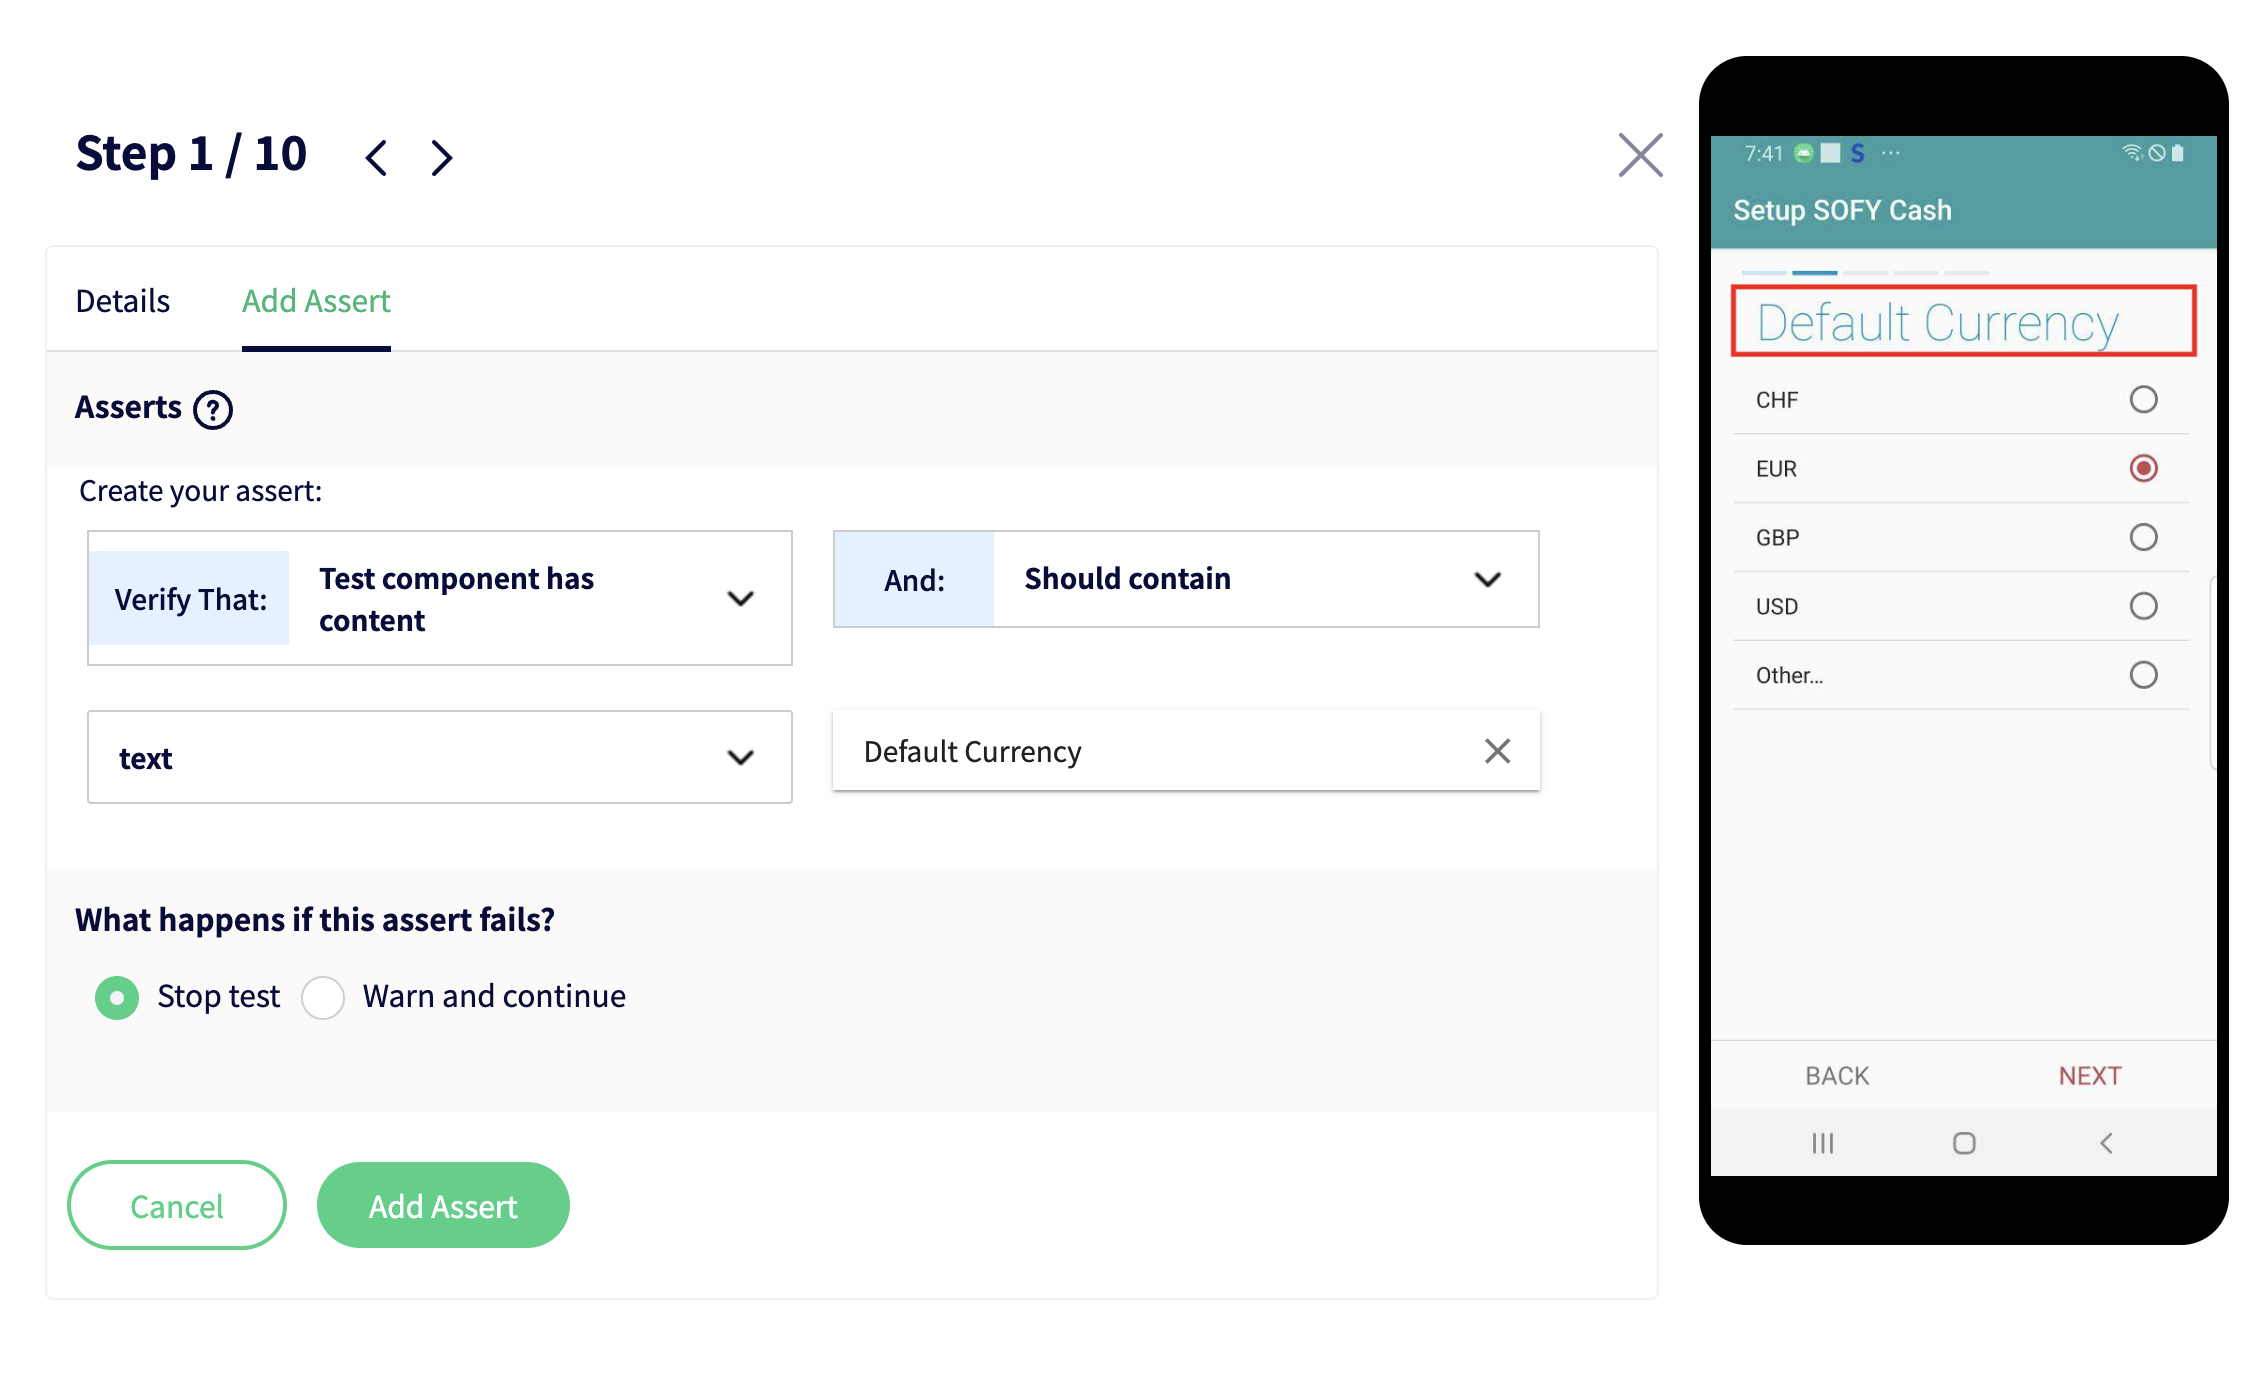
- Click Add Assert, and your assert will be set and saved.