Adding Asserts During & After Automation
An Assert is a Boolean expression that is added at a specific point in a test script to validate a condition which will be true unless there is a bug in the program. A test assertion is defined as an expression, which encapsulates some testable logic specified about a target under test.
With Sofy, you can either choose to stop your test execution when the assert rule fails or create a warning but continue to execute your test. This selection is made when you are specifying the assert rules.
Here is a quick video to let you know how you can add Asserts to your test:
Adding Asserts while Creating Tests (online mode)
Asserts are created when you create an automated test. To validate an Assert function, you should enable Assert Mode. To do that, complete the following steps:
- Click the Assert icon in the Action Bar.

- When you enter Assert Mode, you will see a red icon at the top right of the user interface. At this point you will be able to select any of the individual controls and create assertions to validate the existence (or non-existence) of that control or Text.

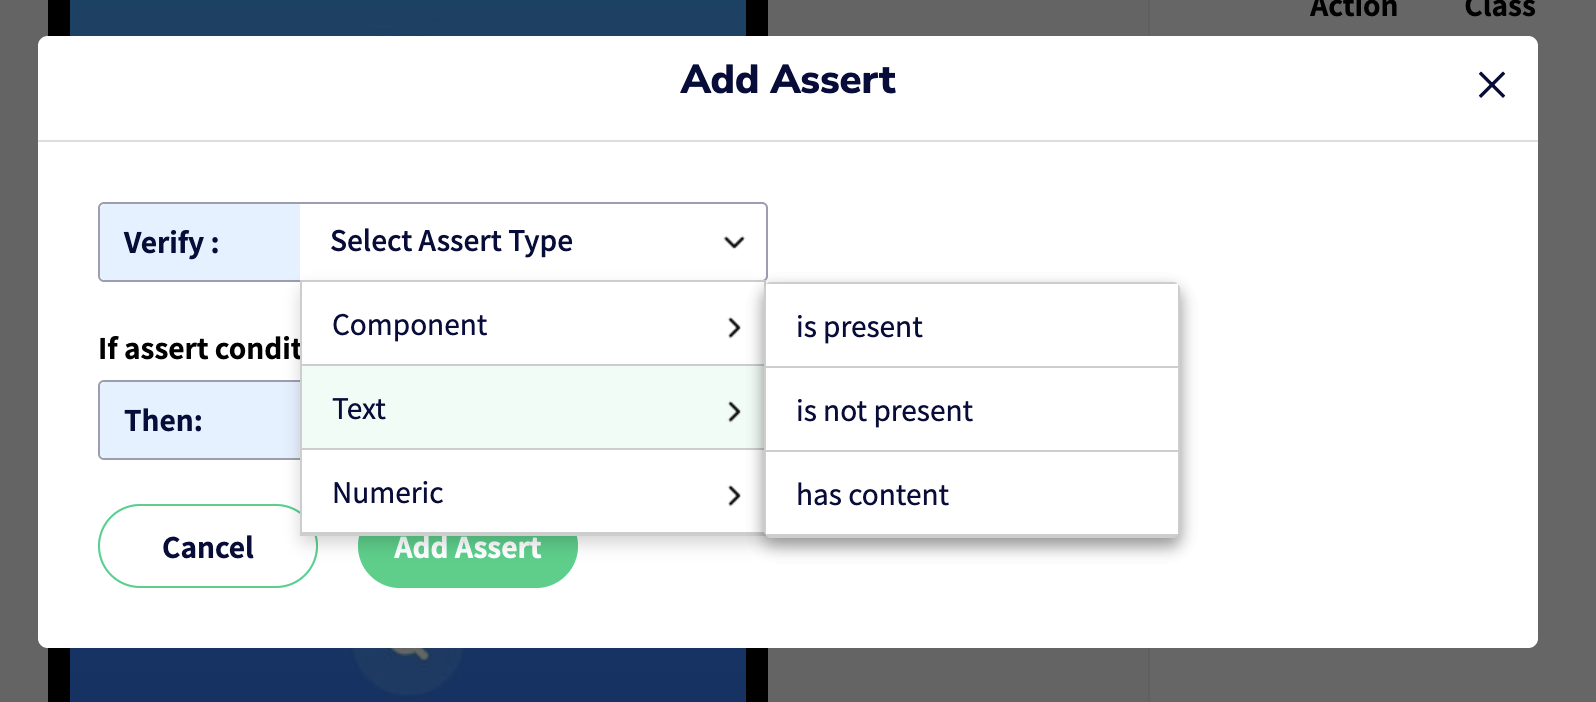
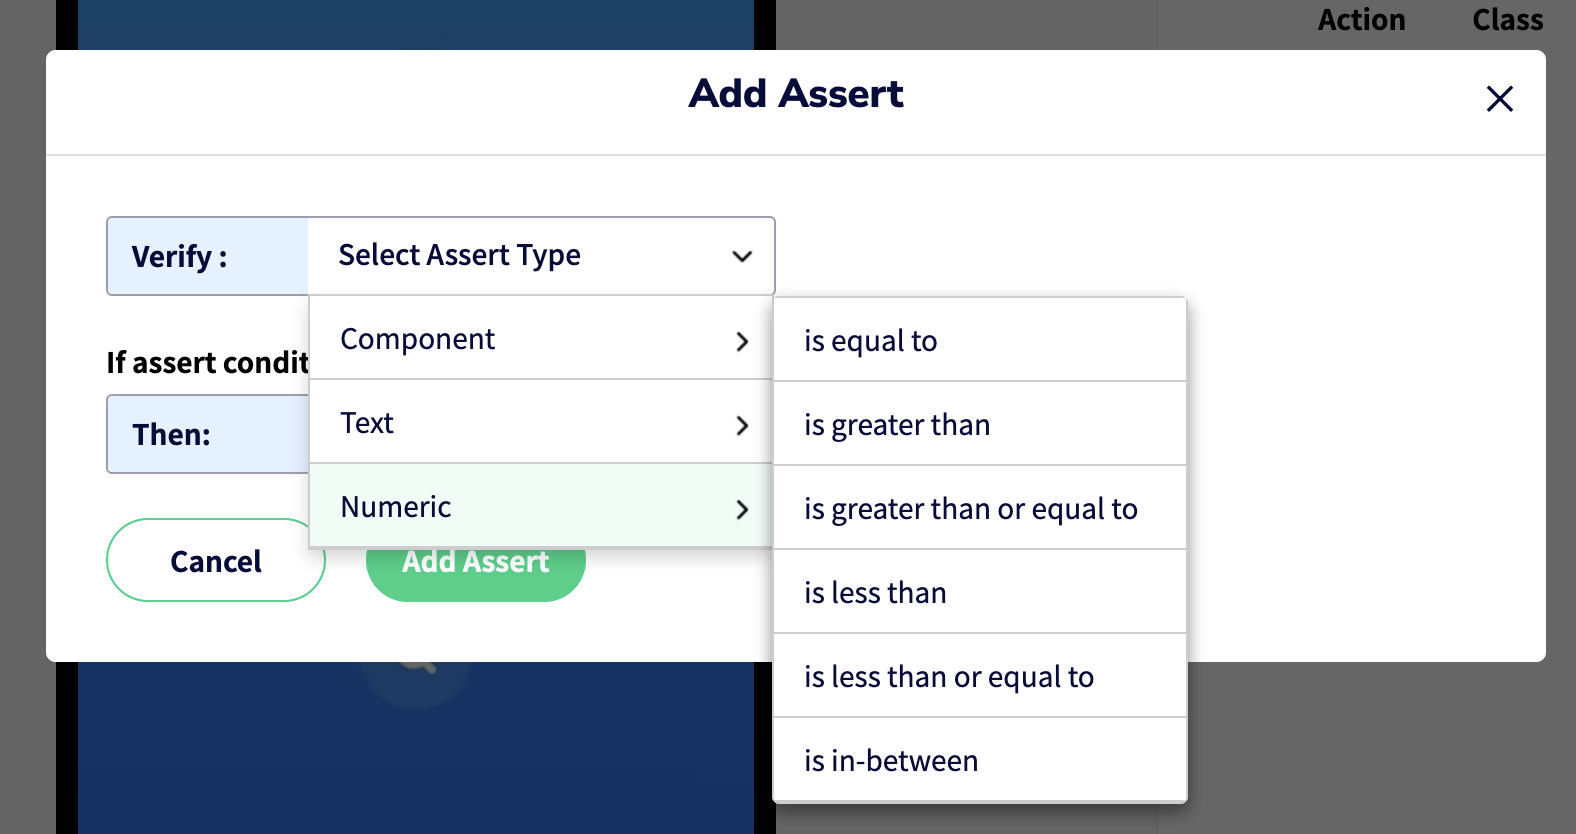
- What follows are explanations of various Assert Rules. You might choose what kind of an assert you wish to define over a particular element, based on what kind of property you wish to check with respect to that given element
- Component asserts are useful in checking if a certain component is present or absent, enabled or disabled, checked or unchecked and so on.
- Text asserts help to define asserts on textual elements depending on if it may be present or absent or has content.
- Numeric asserts are useful in situations where you wish to check a numeric value inside a certain test case and make a decision based on comparative analysis depending on the arithmetic value of that number.
- Component asserts are useful in checking if a certain component is present or absent, enabled or disabled, checked or unchecked and so on.
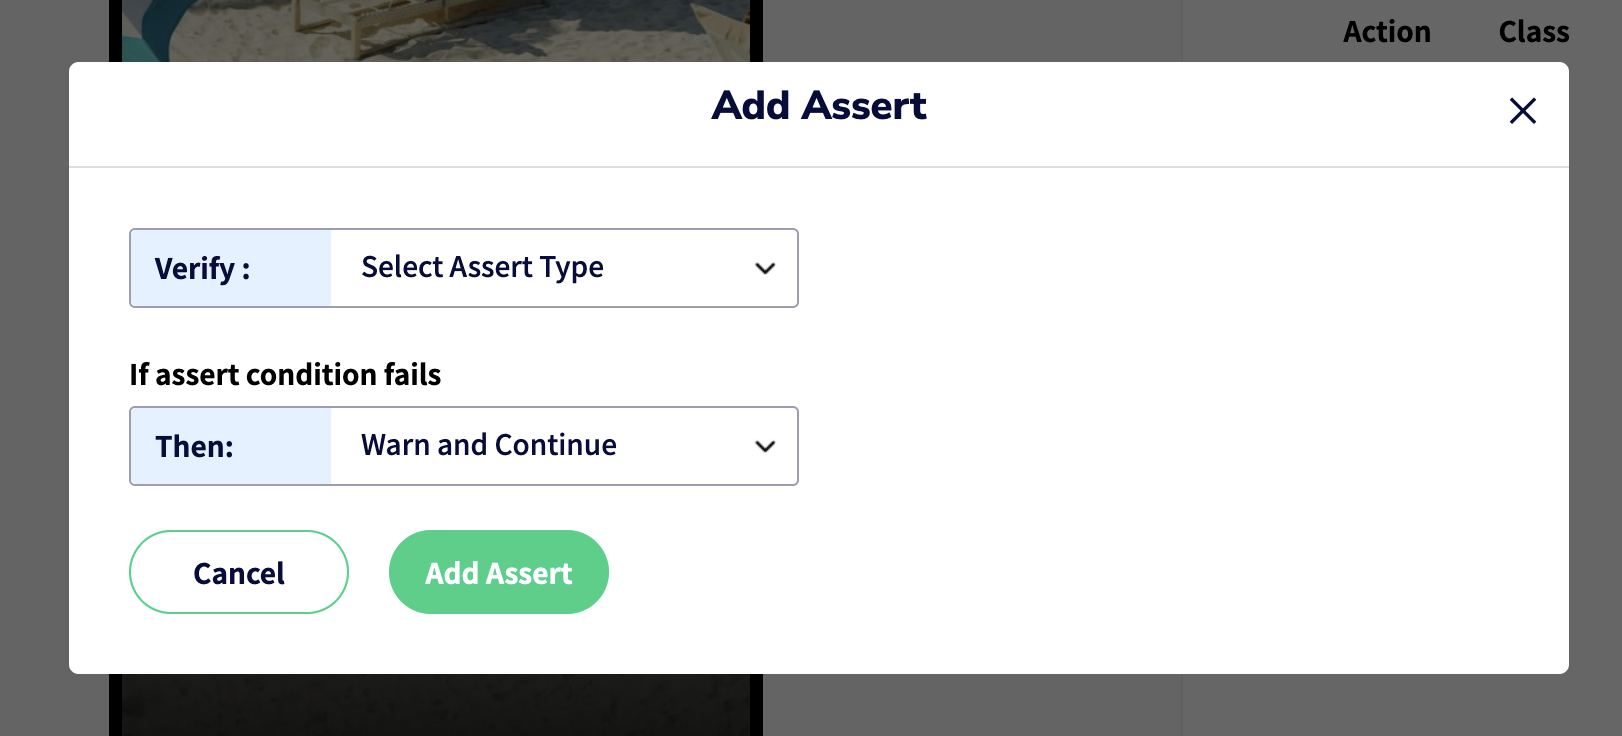
- Finally you can select what should Sofy do when this assert fails: you can choose to either decalre the test as Failed or just give a Warning & continue:
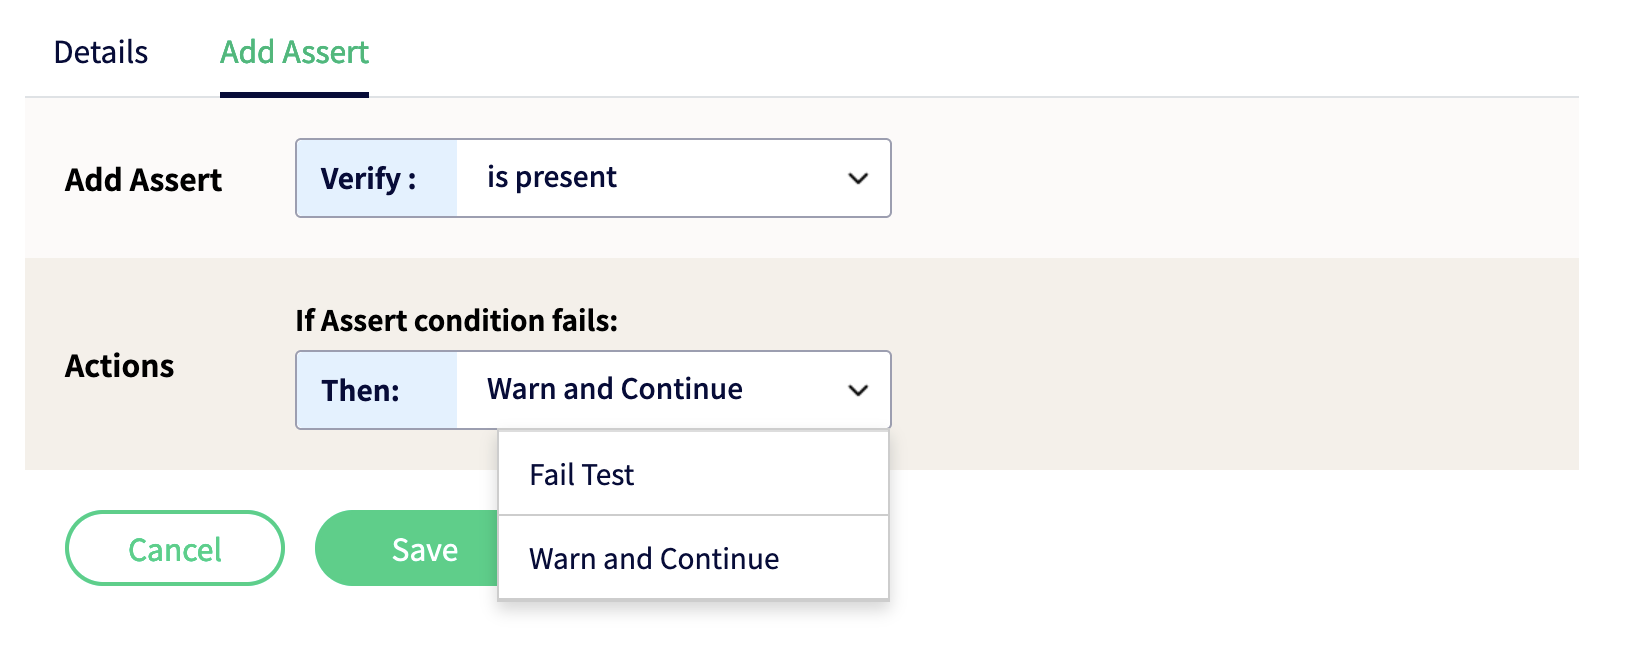
Table of Assert Functions
The following table describes how various Assert functions are used in Sofy:
Assert function | Component | Description |
Test Component's Content should be Equal | Button, Labels, TextBox | Text of the component matches with string that is compared |
Test Component's Content should not be Equal | Button, Labels, TextBox | Text of the component does not matches with string that is compared |
Test Component's Content should contain | Button, Labels, TextBox | Text of the component contains within string that is compared |
Test Component's Content should not contain | Button, Labels, TextBox | Text of the component does not contains within string that is compared |
Test Component is present | Any Element | The component is present in current view |
Test Component is not present | Any Element | The component is present is not in current view |
Test Component is checked | Checkbox | The component is checked |
Test Component is Unchecked | Checkbox | The component is unchecked |
Test Component is Enabled | Button, TextBox | The component is enabled for data entry or selection |
Test Component is Disabled | Button, TextBox | The component is enabled for data entry or selection |
Test Component's numeric value is greater than (and/or equal to) a defined number | Number | The component has a numeric value greater than (and/or equal to) the defined number |
Test Component's numeric value is lesser than (and/or equal to) a defined number | Number | The component has a numeric value lesser than (and/or equal to) the defined number |
Test Component's numeric value lies between two defined numbers | Number | The component has a numeric value lying between two defined numbers |
Adding Asserts after Automating Tests (offline mode)
Additionally, you could also add Asserts inside tests which you have already authored or created earlier i.e. in offline mode. To do this:
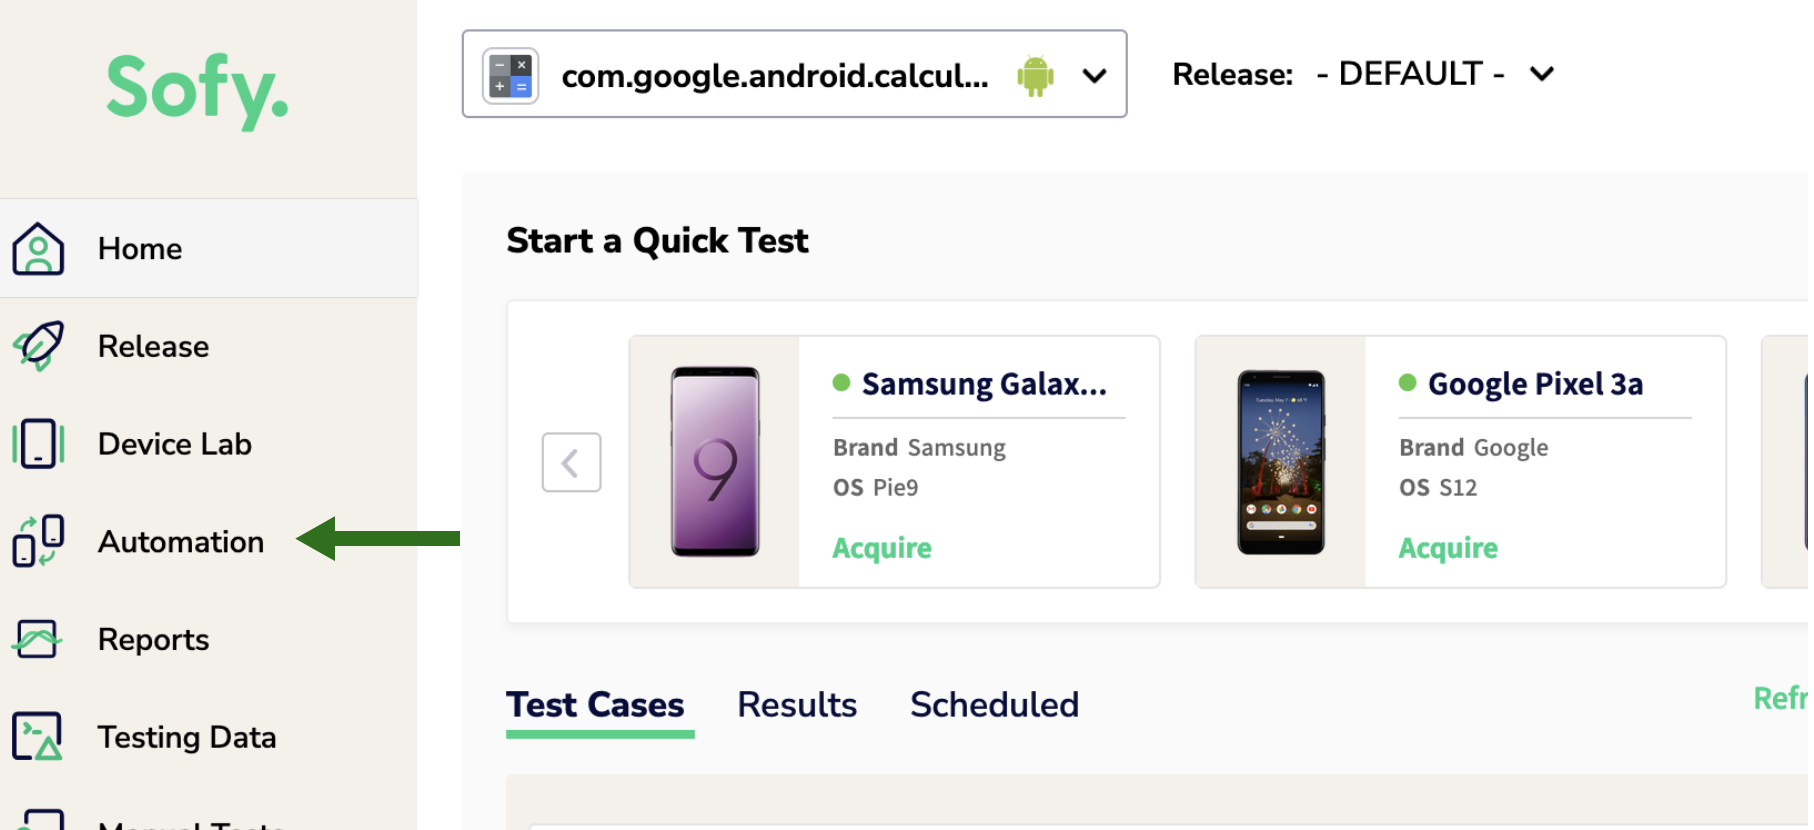
- Navigate to the Automation section from the main Sofy dashboard:
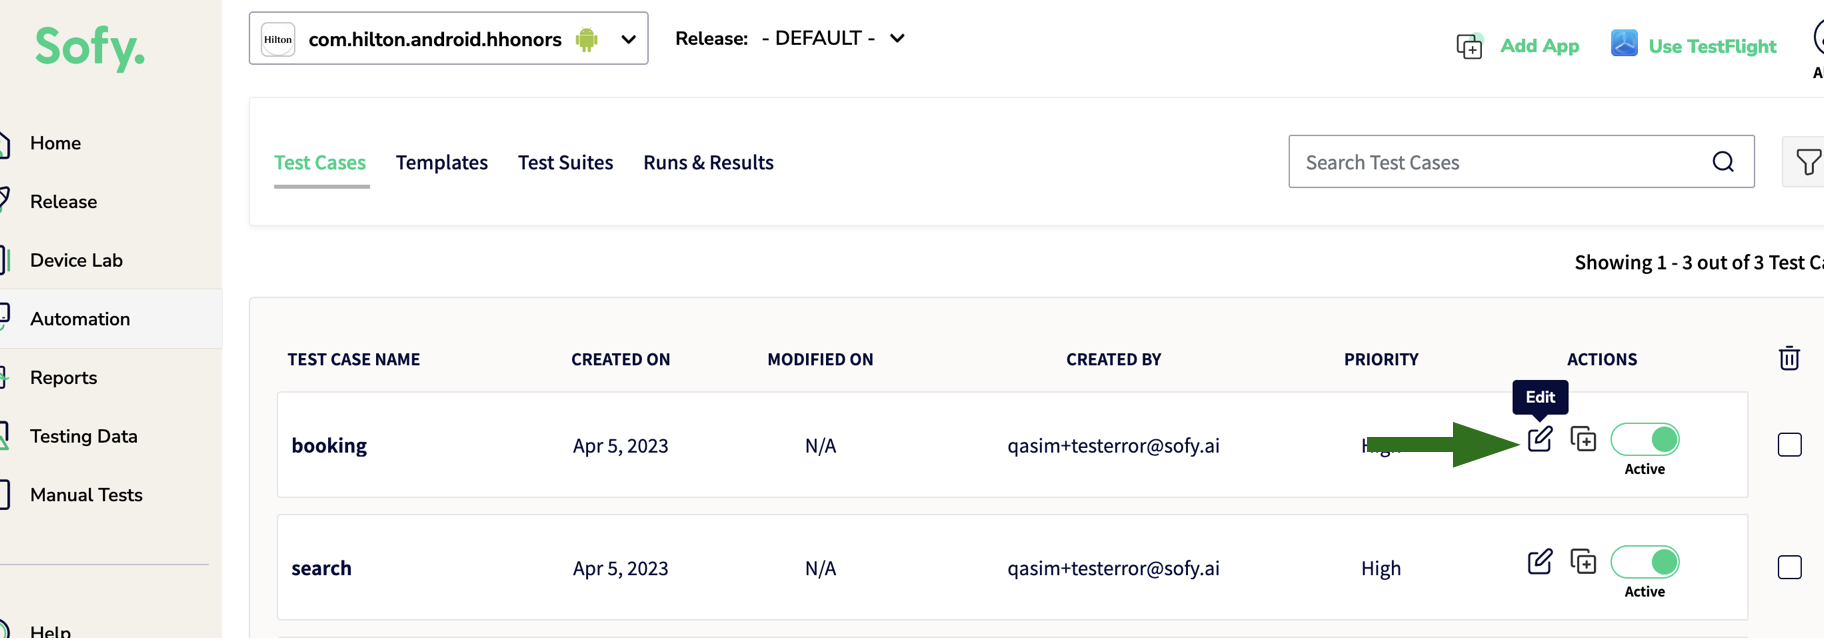
- Click on the Edit (pen) icon next to any test case which you wish to edit and define an assert over:
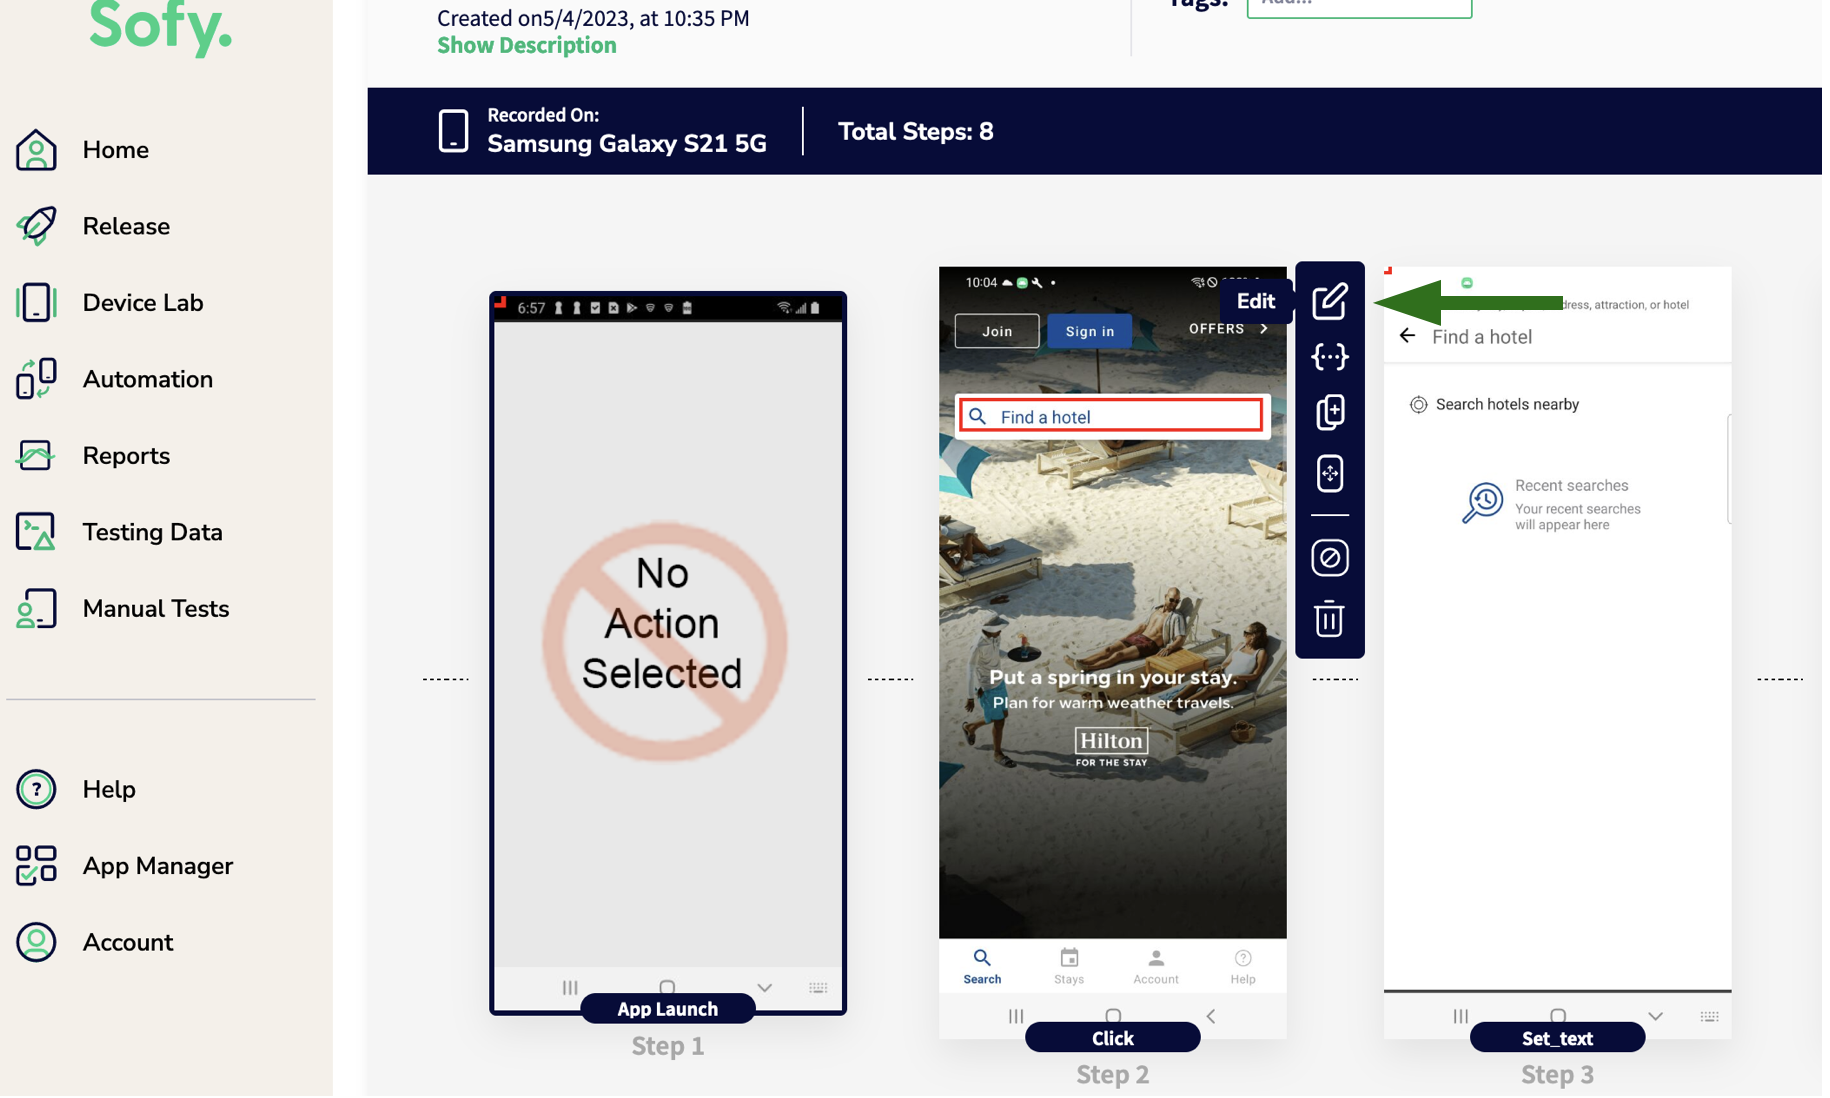
- The test case will then open in Edit mode and you can click on the Edit icon on the top-right of any test step to start editing that test case.
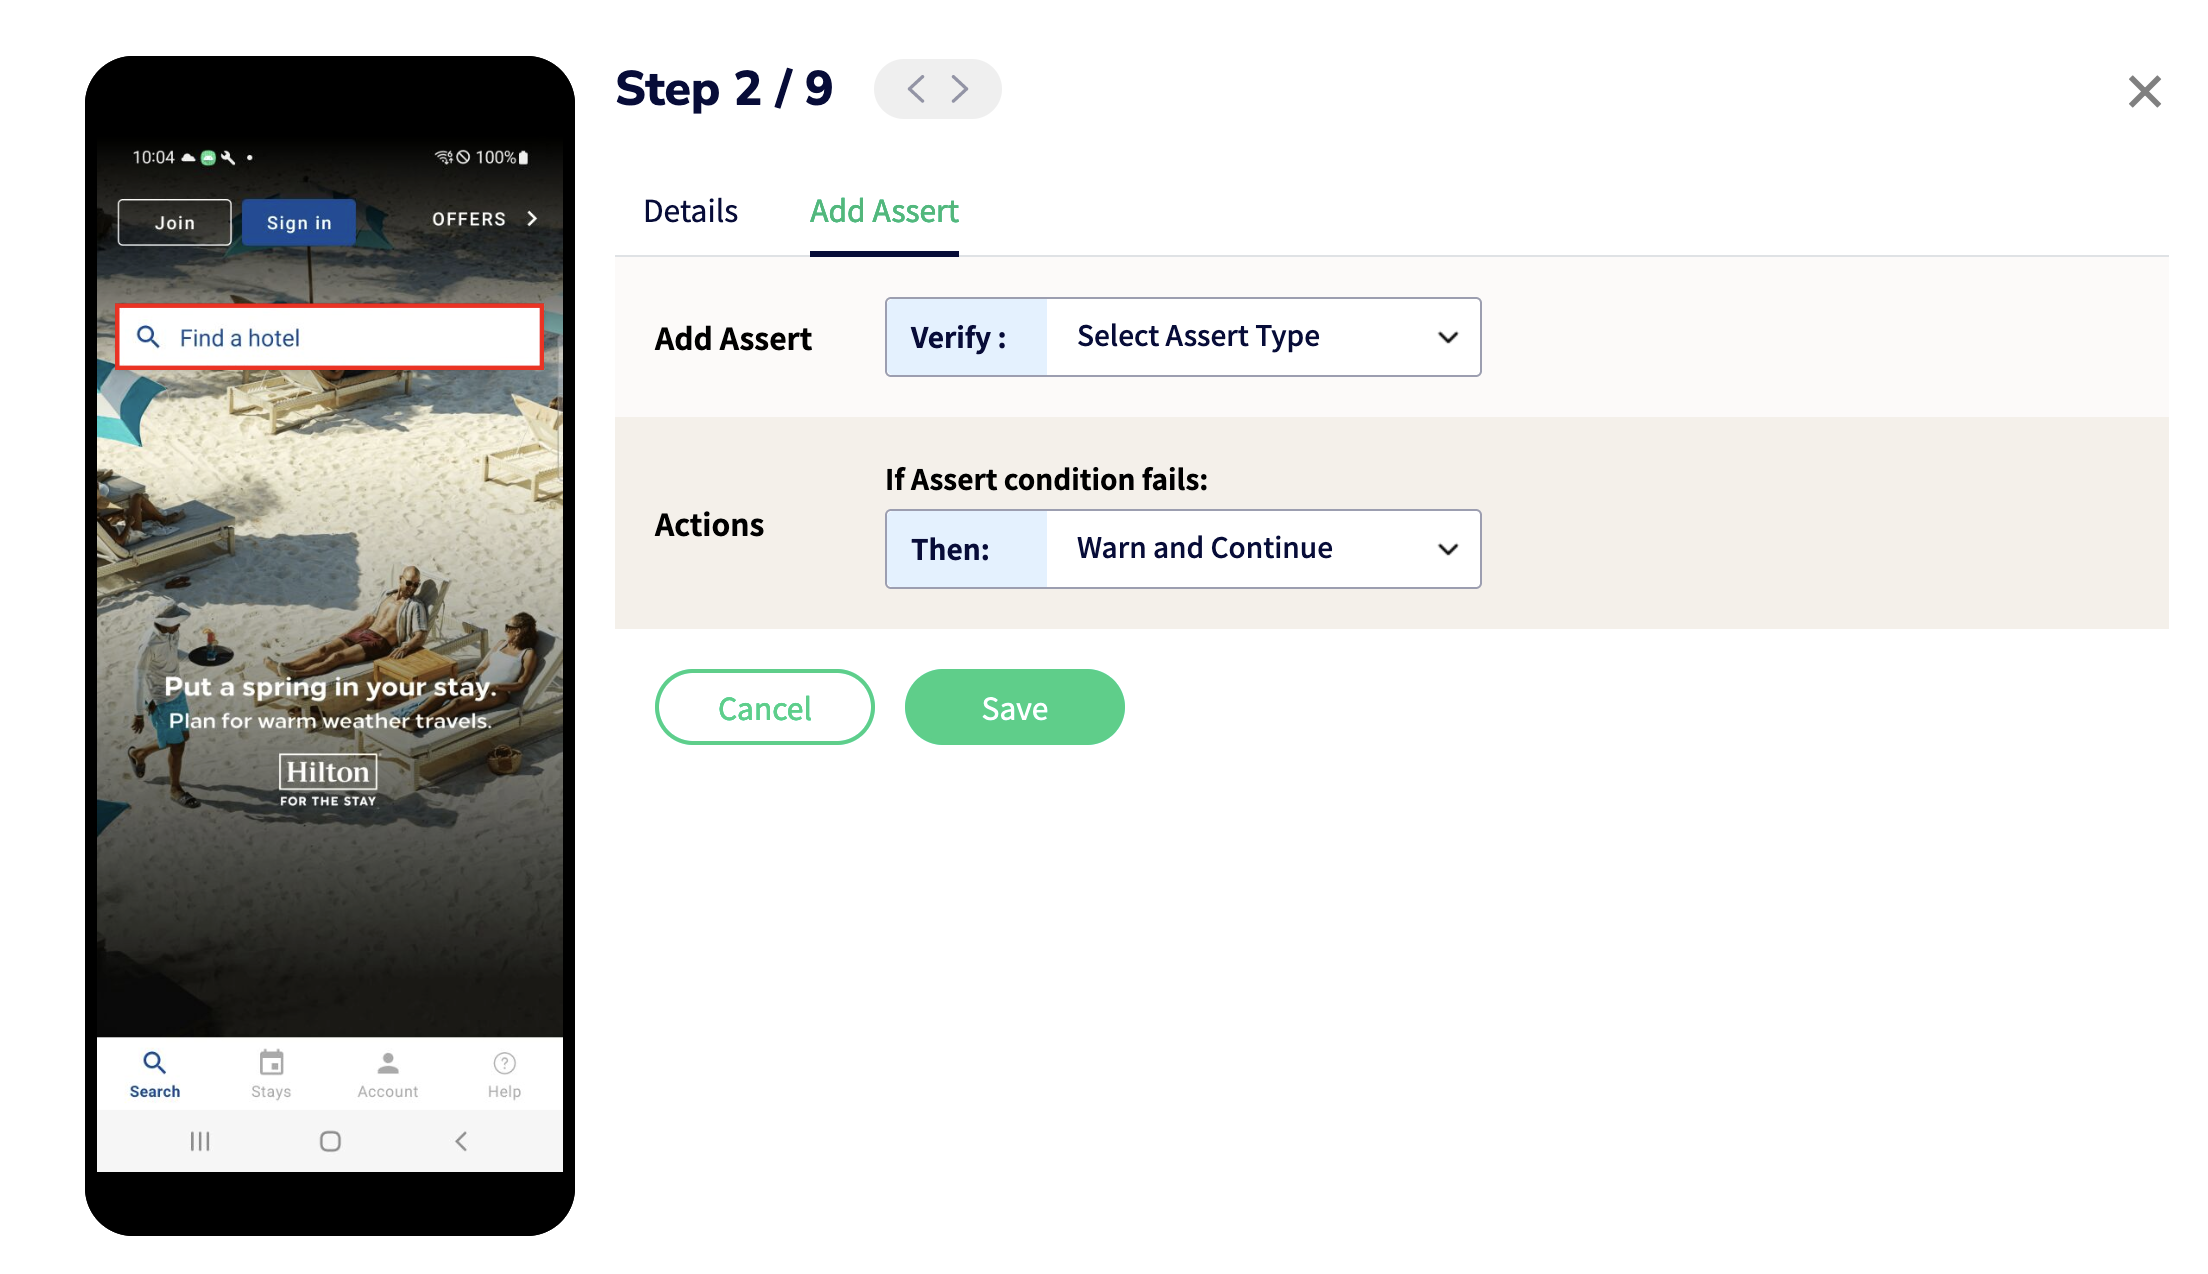
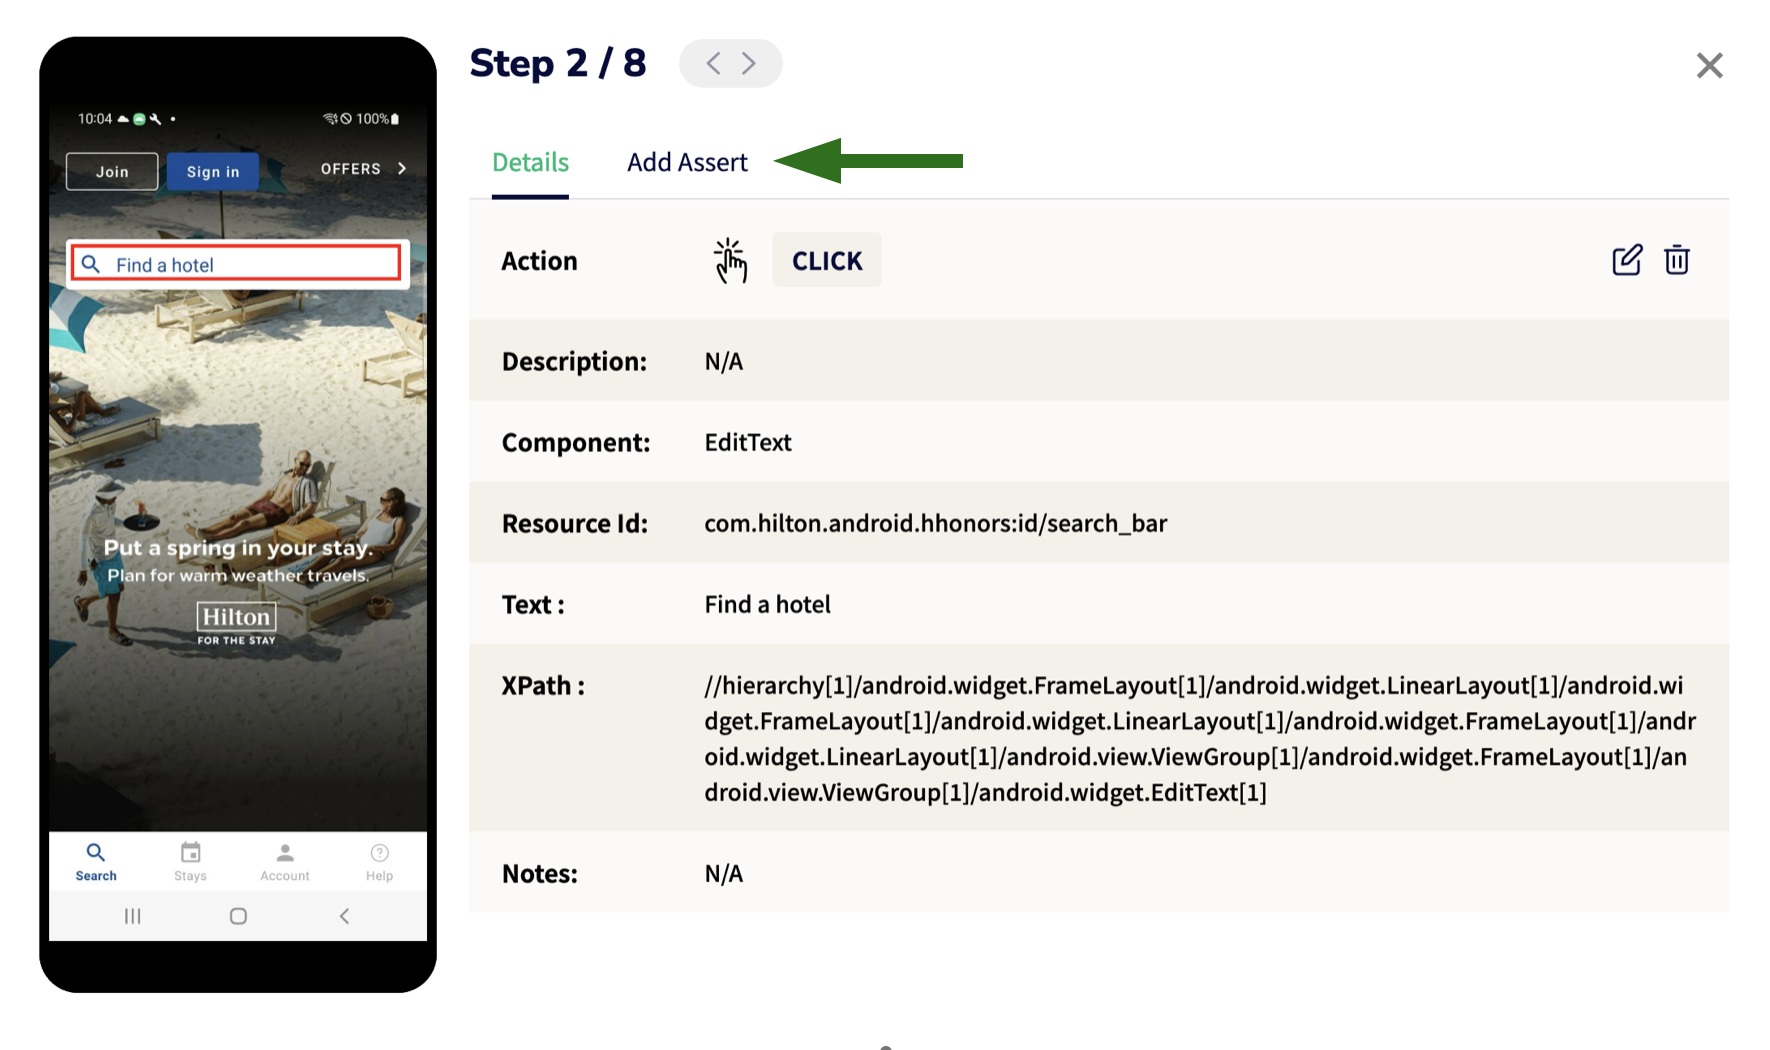
As an example, let us try to Edit and add an Assert over Step 2 of this test case:
- Once inside Editing mode, click on the Add Assert tab & select an element in the app over which you wish to define an assert:

- Once you have selected an element from the screen, you will see the Assert modal like shown below. You can then define an assert over the selected element just how you would do during automation (see top of this article for details on adding asserts during testing/automation):